

Last Updated: November 9, 2026
Quick Summary
To add custom panel lines to Gunpla, scribe shallow grooves into the bare plastic with a panel-line chisel guided by scribing tape, making three to five light passes until the groove is roughly one-third to one-half the chisel's width deep. Plan and sketch the layout before assembly, then fill the new lines with Tamiya Panel Line Accent Color.
- Panel lining traces existing grooves, while scribing creates new ones as a construction step before paint.
- Keep parallel grooves at least two to three chisel-widths apart and at least 1 mm in from any edge.
- Use fewer, bolder 0.2-0.3 mm lines on High Grade parts and finer 0.15 mm lines on Master Grade and Real Grade.
- Clear plastic dust from the groove with a soft brush before applying accent color and wipe excess with a thinner-dampened swab.
- Fill a slipped chisel gouge with thin CA glue, sand it flush, and recut the line.
Table of Contents
- When to Panel Line Gunpla and What Custom Lines Add
- Gunpla Panel Line Design Ideas That Follow the Kit's Shape
- Gunpla Scribing Tools and Materials You Actually Need
- How to Scribe Custom Panel Lines Step by Step
- How to Use Tamiya Panel Line Accent Color on New Lines
- Fixing Scribing Mistakes Without Ruining the Part
- Safety and Material Compatibility for Custom Panel Lines
- Picking Up Scribing Supplies at Utopia Toys and Models
- Frequently Asked Questions
When to Panel Line Gunpla and What Custom Lines Add
That distinction matters. A panel-line marker on an existing groove is a finish step. Cutting a groove is a construction step, done before paint, topcoat, and decals.
So when should you add custom panel lines? Three moments make sense:
- The kit's armor looks flat and toy-like next to the box art
- You want a specific mobile suit's design language on a kit that lacks it
- You are entering a build competition or photo shoot and need the model to read at a distance
Custom lines are structure, not decoration added at the end, and they change how every later step behaves.
Watch out: scribing a kit you have already painted means reworking the finish around every new line. Plan your layout before assembly, not after.
Gunpla Panel Line Design Ideas That Follow the Kit's Shape
Look for these natural anchors on any Gunpla part:
- Edges and corners. A line parallel to an edge, set back a few millimeters, reads as a separate armor plate.
- Curves and vents. Follow the sweep of a shoulder or calf. A line that echoes the curve looks intentional; one that fights it looks like a mistake.
- Existing panel line endpoints. Extend a molded line past where it stops, the easiest way to make a kit look custom-detailed without redrawing the whole design.
Beyond the visual cues, a few working rules help you apply the layout to any part.
Spacing. Set parallel lines roughly one chisel-width apart at minimum, and two to three chisel-widths apart for lines that should read as separate plates. On a 0.2 mm chisel, that means no two parallel grooves closer than about 0.4 mm, and 0.5-0.6 mm for a clear plate break. Closer than that and the plastic between grooves gets thin and the lines blur.
Scale by grade. High Grade parts have less surface area, so use fewer, bolder lines: one or two per major armor face, in the 0.2-0.3 mm range. Master Grade and Real Grade parts can carry finer detail, so 0.15 mm lines and denser layouts work. Match line density to the kit's size, not to someone else's photo.
Symmetry with a tolerance. Mirror the layout, but do not obsess over sub-millimeter alignment.
Reading distance. Sketch first with a mechanical pencil on bare plastic. It wipes away cleanly and costs nothing to test.
Watch out: sketching a layout that only works from directly in front.
Gunpla Scribing Tools and Materials You Actually Need
The Gunpla scribing tools list is shorter than most tutorials suggest. You need a chisel, a way to guide it, and a way to clean up.
Here is the core kit:
- A panel-line chisel. These come in fixed widths, commonly around 0.15 mm, 0.2 mm, 0.3 mm, and wider. Start with one mid-width chisel rather than a full set.
- Scribing tape or guide tape. Thin, flexible tape that gives the chisel a wall to ride against.
- A steel ruler. For long straight runs on flat armor.
If you are assembling a starter toolkit and want to compare against a broader list, our beginner Gunpla tool list covers the essentials beyond scribing. Builders on a tight budget should also look at our affordable tools under $20 guide before committing to scribing-specific purchases.
One honest limitation: cheap chisels dull fast and start tearing plastic instead of cutting it. A dull chisel is worse than no chisel, because it leaves ragged grooves that are hard to fix.
How to Scribe Custom Panel Lines Step by Step
The full workflow runs in six stages: plan, tape, score, deepen, clean, and check. Each stage is short, and rushing any of them ruins parts. What most guides leave out is which tool to reach for at each stage and how to measure whether a groove is actually done. Precision in these initial stages often hinges on identifying quality nippers, as a clean gate removal prevents the structural stress that makes subsequent scribing prone to error.
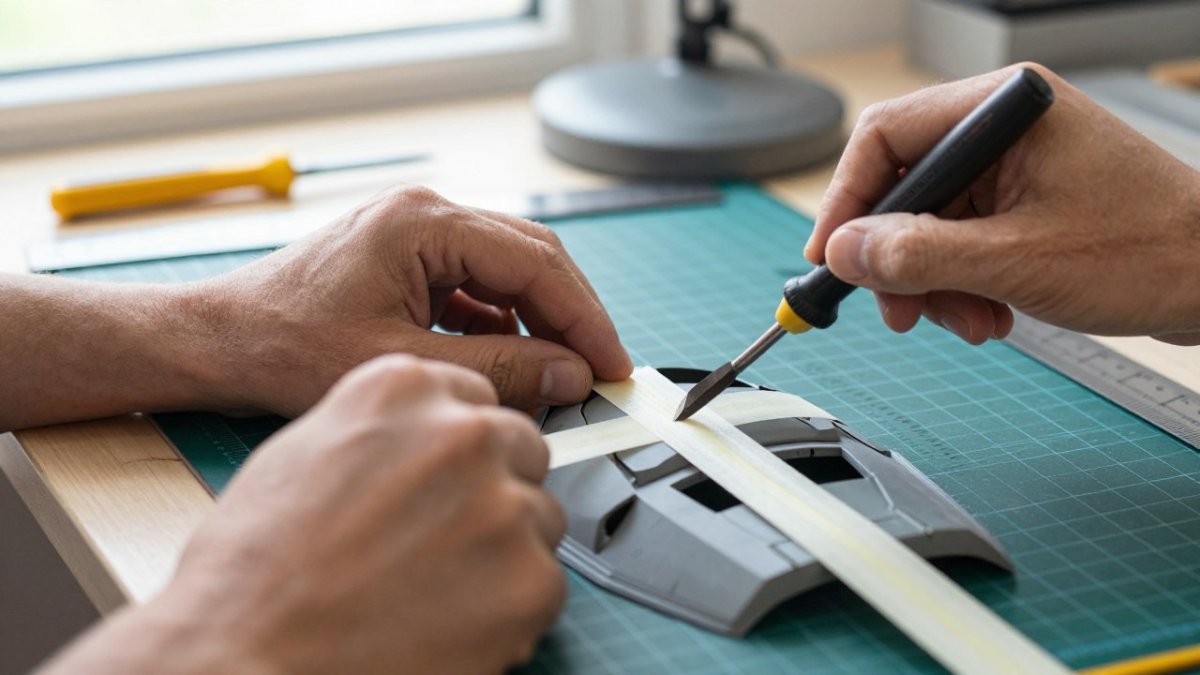
- Plan the line. Sketch it in pencil on the bare part. Confirm it reads at arm's length.
- Tape the guide. Lay scribing tape along the pencil line so the chisel has a straight wall to follow.
- Make a light scoring pass. Draw the chisel along the tape with almost no pressure. You want a visible scratch, not a groove.
- Repeat with light pressure. Three to five passes build a clean groove. Let the chisel do the work.
- Clear the dust. Brush out plastic shavings after every few passes so you can see your depth.
- Check the depth. Tilt the part toward a light. The groove should catch a shadow without looking like a canyon.
Tool selection by use case. The right scriber depends on the line you want, not on buying the biggest set.
- Straight runs on flat armor: a fixed-width chisel in the 0.2-0.3 mm range plus a steel ruler taped down as a hard wall.
- Curves and tight areas: a 0.15 mm chisel or a hook-blade scriber that follows a taped curve without the handle fouling surrounding detail.
- Wide plate breaks: a 0.5 mm or wider chisel, or two parallel 0.3 mm passes with the plastic between them cleaned out.
Measurable depth targets. Depth decides whether the line survives paint and accent color.
Reading your passes against those targets.
- First pass: a faint scratch. Barely visible. This is correct.
- Second and third passes: the scratch becomes a shallow groove with clean edges, roughly half target depth.
- Fourth and fifth passes: the groove reaches working depth and holds accent color.
- Beyond that: stop and check with the fingernail test. More passes risk thinning the plastic.
Light pressure keeps the chisel inside the tape wall.
Watch out: cutting a groove across a thin section or near a part's edge weakens it.
For a deeper walkthrough of the cutting motion itself, our step-by-step scribing guide goes further than this section can.
How to Use Tamiya Panel Line Accent Color on New Lines
Tamiya Panel Line Accent Color is a thin, pre-mixed wash designed to flow into grooves by capillary action.
The process:
- Clear all plastic dust from the groove with a soft brush.
- Shake the bottle well, then touch the applicator brush to one end of the line.
- Let the color flow along the groove. Do not paint it in. Capillary action does the work.
- Wait for it to dry fully.
- Wipe away excess with a cotton swab lightly dampened with the matching thinner.
Two things trip up first-timers. First, accent color needs a groove with some depth. Second, too much solvent on the swab lifts color out of the line you just filled.
For the complete accent color process, including cleanup and sealing, our full panel lining guide covers it in detail.
Fixing Scribing Mistakes Without Ruining the Part
Most scribing mistakes are fixable. The part is only ruined if you keep cutting after something goes wrong.
Common problems and their fixes:
| Problem | What It Looks Like | The Fix |
|---|---|---|
| Chisel slipped off the tape | A stray gouge across the armor | Fill with thin CA glue, sand flush, recut |
| Groove too shallow | Accent color wipes out completely | Add two more light passes |
| Groove too deep | Shadow looks like a trench | Sand the edges gently to soften it |
| Ragged, torn edges | Fuzzy plastic along the line | Fresh chisel, lighter pressure, sand the edge |
| Line wandered off course | A curve that drifts | Stop, retape, restart from the last clean point |
The CA glue fill is the workhorse fix. A tiny drop of thin cyanoacrylate in a stray gouge, left to cure and sanded flush, restores a flat surface you can scribe again.
A common mistake is trying to sand out a deep groove entirely. You will flatten the surrounding detail before the groove disappears. Fill it instead.
Safety and Material Compatibility for Custom Panel Lines
Plastic dust is the main hazard in scribing, and it is easy to ignore. Fine shavings from cutting polystyrene get into the air and onto your work surface.
A few material notes that save builds:
- Polystyrene, the standard Gunpla plastic, scribes cleanly. Most Bandai kits use it, and it takes a groove well.
- ABS parts behave differently. They are harder and can chip rather than cut. Use lighter pressure and expect a different feel.
- Clear parts should not be scribed. They crack, and the damage shows immediately.
- Polycaps and joint parts are off limits. They flex, and a groove in a flexing part becomes a tear.
Solvents deserve their own warning. Panel line accent thinners and similar products attack bare polystyrene if left pooling on the surface. Apply accent color into grooves, wipe promptly, and keep solvent off large flat areas.
Picking Up Scribing Supplies at Utopia Toys and Models
The right order of operations is simple: practice on a cheap kit before you scribe a kit you care about. Buy one chisel, one roll of scribing tape, and one bottle of accent color.
At Utopia Toys and Models, we stock Bandai Gundam model kits and the supplies that go with them, with most in-stock items ready to ship. If you are ready to buy a kit specifically to practice on, the Gunpla Kun Deluxe Set gives you a full build to work your new scribing skills into.
Scribing custom panel lines is a skill built on light passes and patience, not on expensive tools. Start with one chisel and one practice kit, and let your depth control improve before your line count does.
Frequently Asked Questions
What tools do I need to scribe custom panel lines on Gunpla?
At minimum you need a panel-line chisel in a narrow width, scribing tape or guide tape, a steel ruler, and a hobby knife. Add a fine-point mechanical pencil for sketching the layout, a soft brush for clearing plastic dust, and a panel-line marker or accent color for filling the grooves. Chisel width matters: a 0.15 mm chisel suits small detail work on 1/144 scale parts, while 0.2 mm to 0.3 mm widths read better on larger 1/100 surfaces. Buy one quality chisel before collecting several cheap ones.
How deep should I scribe panel lines on a Gunpla kit?
Aim for a shallow groove, roughly the depth of the chisel tip itself, built up over several light passes. Start with almost no pressure and let the blade do the cutting. If you press hard on the first pass, the chisel can jump the tape and scar the plastic surface. Stop when the line holds color cleanly and looks consistent along its length. Deeper is not better: overly deep grooves weaken thin parts and look unnatural at scale.
When should I panel line Gunpla, before or after assembly?
Most builders get cleaner results working on sub-assemblies or individual parts before final assembly. Loose parts are easier to hold, tape, and rotate, and you avoid stressing joints while scribing. Panel line accent color also flows better on a part you can tilt. Save full assembly for after the lines are cut, cleaned up, and top coated. If a line crosses a seam between two parts, mark it on both pieces and align them during test fitting.
Is it necessary to panel line Gunpla, or is it optional?
It is optional. Out-of-box kits build fine without any custom work. Panel lining and scribing add surface detail that makes the plastic read as mechanical rather than flat, which is why many builders treat it as the highest-value step after a straight build. If you are new, try accent color on the existing molded lines first. Once you are comfortable with cleanup, move to cutting your own custom panel lines with a chisel.

