

Table of Contents
- What You'll Need Before You Start
- Best Nippers for Gunpla: Choosing Your Primary Cutting Tool
- Hobby Knives and Precision Blades for Detail Work
- How to Clean Up Nub Marks and Gate Damage
- Gundam Model Kit Grades Explained: Choosing Your First Build
- Workspace Setup, Safety, and Tool Organization
- Essential Finishing Supplies: Paint, Cement, and Panel Lining
- Common Mistakes to Avoid When Starting Out
- Frequently Asked Questions
Last Updated: September 2, 2026
What You'll Need Before You Start
Building your first Gundam model kit requires specific tools, not an expensive collection, just the right five to seven items that solve real problems during assembly. Most beginners make one critical mistake: they try to build with whatever they have lying around, then wonder why their models look unfinished or damaged.
This guide walks you through exactly what you need, why each tool matters, and how to set yourself up for success before you even open your first kit.
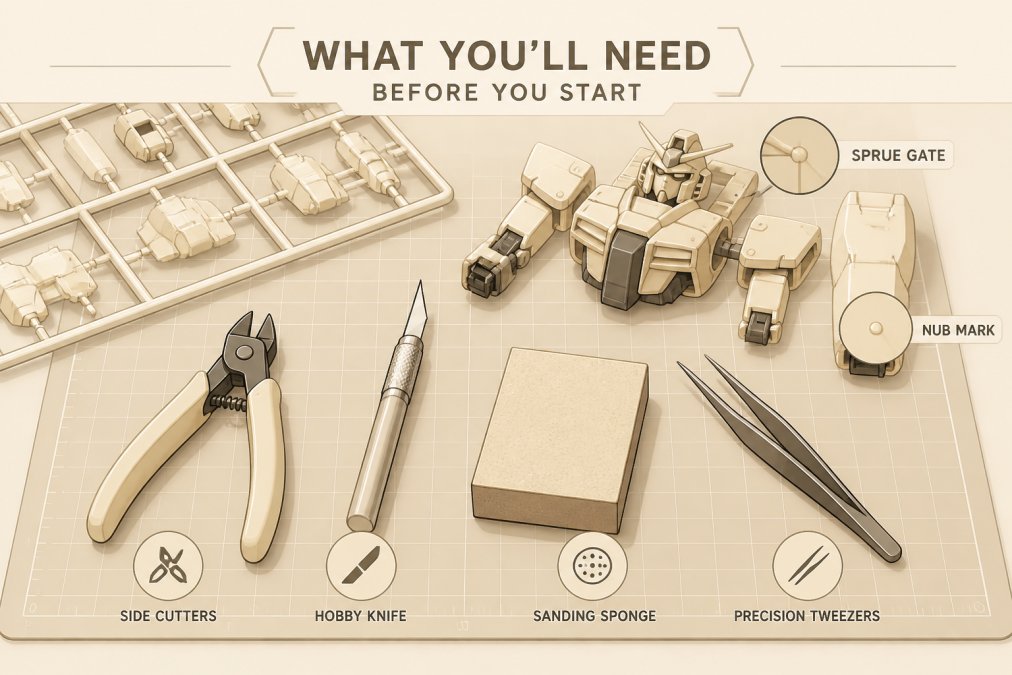
The essential tools break into four categories: cutting tools, finishing tools, assembly tools, and workspace setup. Each solves a specific problem that comes up during the build. Start with cutting tools because every kit arrives with plastic parts attached to sprues, the frames that hold pieces during manufacturing. You cannot build without separating those parts cleanly. Next comes finishing tools to clean up nub marks and gate damage. Then assembly tools to hold and position parts precisely. Finally, workspace setup to protect both your model and yourself.
Best Nippers for Gunpla: Choosing Your Primary Cutting Tool
Your nipper is the first tool you'll use on every model kit and the most critical purchase. The Tamiya Modeler's Side Cutter stands out as the best option for beginners because it delivers clean, flush cuts that minimize nub marks, the small plastic remnants left where parts attached to the sprue.
The Tamiya cutter uses hardened carbon steel blades specifically designed for plastic model parts. Standard utility scissors crush plastic instead of cutting cleanly, leaving white stress marks and rough edges that require extensive cleanup. A quality nipper cuts so cleanly that you often need only light sanding, not heavy filing.
What separates this tool from cheaper alternatives is blade geometry. The blades are angled to cut flush against the model part, allowing you to position the cutter so the blade sits flat against your model's surface, then cut away the sprue gate with minimal plastic remaining. The ergonomic grip also matters, you'll spend hours squeezing your cutting tool, and a poorly designed handle causes hand fatigue and cramping. The Tamiya cutter's elastomer grip distributes pressure across your palm instead of concentrating it on your fingers.
Hobby Knives and Precision Blades for Detail Work
After cutting parts from the sprue, your hobby knife handles cleanup work that nippers cannot reach. The X-Acto Knife with a #11 fine-point blade is the industry standard because the blade is thin and sharp enough to trim plastic without crushing it (xacto.com).
The hobby knife excels at removing nub marks, scraping away flashing (thin plastic seams between molded halves), and performing precision cuts on small parts. It's also essential for opening panel lines, the engraved details that define the mechanical appearance.
The #11 blade is razor-sharp, which requires respect. Always cut away from your body and keep your non-knife hand behind the blade, never in front of it. Replace the blade every few hours of cutting work, a dull blade is actually more dangerous because you'll apply more pressure to compensate, increasing the chance of slipping.
How to Clean Up Nub Marks and Gate Damage
Nub marks catch light and draw the eye immediately, making a model look unfinished even if assembly is perfect. Removing them requires a three-step workflow: cut as close as possible with nippers, trim the remaining plastic flush with your hobby knife, then sand smooth.
Position your nipper so the blade sits flush against the model surface, perpendicular to the sprue gate. Cut straight through to leave the smallest possible nub. Then take your hobby knife and carefully shave away the remaining plastic with light scraping strokes. Finally, sand the area smooth using a sanding sponge, which is flexible and conforms to curves. Start with 400-grit to remove the rough surface, then finish with 1000-grit for a smooth appearance. Sand in circular motions to avoid creating scratches.
The key insight: your nippers determine how much work cleanup requires. Quality nippers like the Tamiya cutter leave minimal remnants that need only light finishing, while poor nippers leave thick nubs that demand aggressive sanding.
Gundam Model Kit Grades Explained: Choosing Your First Build
Bandai uses a grading system that tells you exactly how complex a kit is. Understanding these grades determines whether your first build is enjoyable or frustrating.
High Grade (HG) kits are the beginner standard at approximately 1:144 scale, with models standing about 4-5 inches tall. HG kits contain 100-150 plastic parts and assemble in 4-8 hours. Parts fit together precisely with minimal glue required.
Real Grade (RG) kits are more complex despite being the same scale, containing 150-200 parts with internal frame structures that make them more articulated. These suit builders with one or two completed models, not absolute beginners.
Master Grade (MG) kits are substantially larger at 1:100 scale, standing 8-10 inches tall with 300-400 parts. Assembly takes 20-40 hours and suits intermediate builders.
Perfect Grade (PG) kits are the pinnacle at 1:60 scale with 1000+ parts, requiring 60+ hours. Only experienced builders should attempt these.
Start with HG. Every builder in the hobby started here because it teaches fundamentals, cutting cleanly, assembling joints, applying cement, and finishing, without overwhelming complexity. After completing 2-3 HG kits, you'll have the skills to move to RG or MG. The best HG kits for beginners are recent releases because Bandai continuously improves engineering. Utopia Toys and Models carries current-generation HG kits from top series like Mobile Suit Gundam, Gundam Wing, and Gundam 00, all in stock and ready to ship.
Workspace Setup, Safety, and Tool Organization
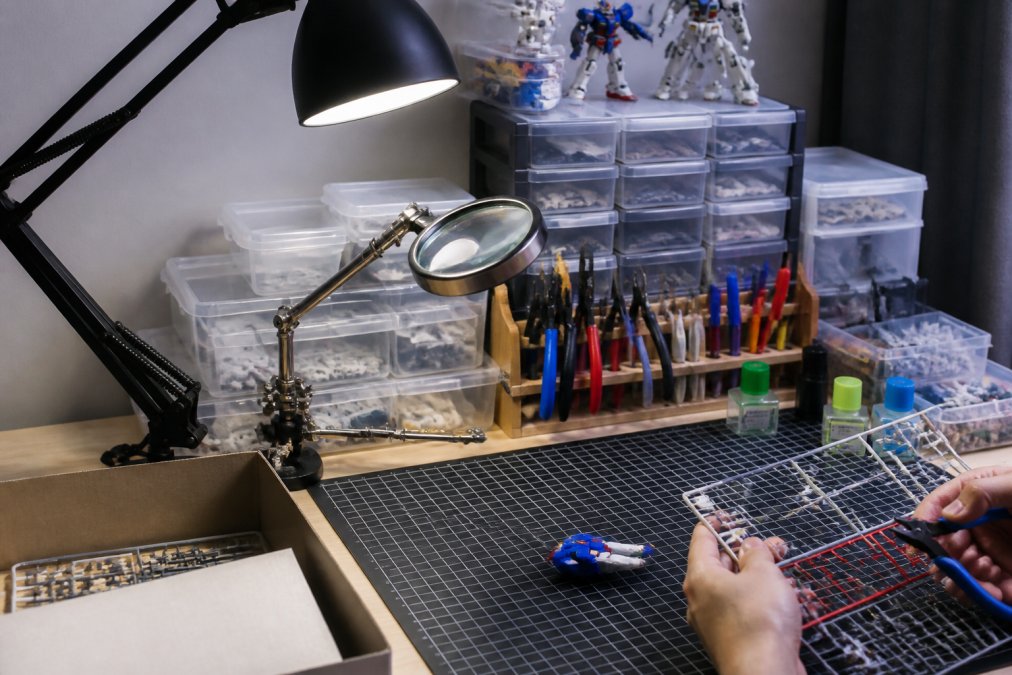
Your workspace determines whether building is enjoyable or frustrating. Start with a self-healing cutting mat, this is non-negotiable. It protects your table surface and provides a stable base for cutting. Never cut anywhere else.
Lighting is more critical than most beginners realize. You're working with small plastic parts and performing precision cuts. An adjustable desk lamp with at least 40 watts of brightness is minimum (osha.gov). Position the light to the side so it illuminates without creating glare. Many experienced builders use magnifying lamps because the combination of bright light and magnification catches details you'd otherwise miss.
A 2x or 3x magnifying glass costs under $20 and transforms your ability to see what you're doing. Panel lines become visible, nub marks become obvious, and gaps in cement joints become apparent.
Organization keeps tools accessible and prevents damage. A small toolbox or drawer organizer holds your nippers, hobby knife, tweezers, and files in one place. Safety gear matters, especially for younger builders. Cut-resistant gloves designed for crafting protect your non-knife hand without restricting movement. Eye protection is important when using cement or paint because fumes can irritate eyes. A basic dust mask prevents inhalation of plastic dust from sanding.
Essential Finishing Supplies: Paint, Cement, and Panel Lining
Beyond tools, three finishing supplies elevate your models from assembled to finished: plastic cement, panel lining markers, and paint.
Plastic Cement bonds plastic parts permanently. Mr. Hobby Mr. Cement S (Extra Thin) is the standard choice because the low viscosity allows cement to flow into joints via capillary action. Apply a thin line along the seam, press parts together, and hold for 30 seconds. The cement dissolves the plastic slightly, fusing parts into one solid piece. Always use it in a well-ventilated area, open a window, work near a fan, or use it outdoors. Never use cement in a sealed room.
Panel Lining Markers add visual depth by highlighting engraved lines on your model. Tamiya Panel Line Accent Color is a pre-diluted enamel paint with a fine brush applicator. Draw the marker along panel lines, and the paint flows into engraved details. Once dry, clean excess paint from the surface with enamel thinner, leaving only paint inside the lines. This single step transforms a flat-looking model into one with mechanical depth.
Paint is optional for your first build but becomes important as you progress. Spray paint designed for plastic models (Tamiya or Mr. Hobby brands) works better than brush-on paint because it dries to a smooth, even finish.
Utopia Toys and Models stocks all these finishing supplies from trusted brands.
Common Mistakes to Avoid When Starting Out
The most common beginner mistake is cutting too close to the part. Builders see the nub and try to cut it flush in one pass, leaving barely any plastic to work with. Then they sand through the edge of the actual part, creating a rounded or damaged surface. Leave a small amount of plastic, roughly 1mm, then trim and sand that away to protect the actual part edge.
Another frequent error is applying too much cement. Excess cement can melt your part or create visible damage. Use a thin line along the seam, not a bead. If cement drips or pools, you've applied too much.
Skipping nub cleanup is tempting when excited to assemble, but nubs visible on the finished model are the most obvious sign of careless assembly. Spending an extra 10 minutes per part to remove nubs cleanly makes the difference between a handmade and professionally finished model.
Rushing assembly is another trap. Take your time fitting parts together. If a part doesn't fit smoothly, investigate before forcing it. Forcing parts together can crack plastic or snap small details.
Finally, many beginners neglect workspace safety. Hobby knives are genuinely dangerous. Cement fumes can cause headaches. Sanding creates plastic dust. Wear gloves, work in ventilated areas, and treat your tools with respect.
| Tool | Primary Purpose | Beginner Essential | Cost Range |
|---|---|---|---|
| Side Cutter (Nipper) | Cutting parts from sprue | Yes | $17-21 |
| Hobby Knife | Trimming nubs and flashing | Yes | $4-9 |
| Sanding Sponge | Smoothing nub marks | Yes | $2-5 |
| Precision Tweezers | Holding small parts | Yes | $3-8 |
| Plastic Cement | Bonding joints | Yes | $3-12 |
| Panel Lining Marker | Adding detail depth | Recommended | $7-14 |
| Cutting Mat | Work surface protection | Yes | $8-20 |
Starting Gunpla is an investment in both tools and time, but the barrier to entry is surprisingly low. A complete beginner toolkit costs under $80 and lasts through dozens of builds. The real investment is learning proper technique, cutting cleanly, finishing carefully, and assembling patiently.
When you're ready to start building, Utopia Toys and Models has everything you need. We stock current-generation HG kits from every major Gundam series, all the tools mentioned in this guide, and finishing supplies from trusted brands like Tamiya and Mr. Hobby. Our inventory is in stock and ships quickly, so you can start building within days of ordering.
Frequently Asked Questions
Q: What do I need to start building Gunpla?
A: Begin with side cutters (nippers) for separating parts from the sprue, a hobby knife for cleaning nub marks, tweezers for precision placement, and a cutting mat to protect your work surface. Add a sanding sponge for smoothing gate marks, panel line markers or enamel paint for detailing, and plastic cement for bonding parts. Safety gear including work gloves and eye protection is essential. Most beginners start with a High Grade (HG) Gundam model kit, which balances accessibility with articulation and detail.
Q: Do I need expensive tools to build Gunpla properly?
A: No. Quality tools don't require premium pricing. A basic set of side cutters, an X-Acto knife, and precision tweezers will handle most assembly tasks effectively. The Tamiya Modeler's Side Cutter and X-Acto No. 1 knife are both affordable and reliable. What matters more is technique: using flush cuts, taking time to clean nub marks, and working in a well-lit space. Many experienced builders use the same entry-level tools throughout their hobby.
Q: How to clean up nub marks on plastic parts?
A: After cutting parts from the sprue with nippers, small nubs remain where the part connected to the runner. Use a hobby knife to carefully trim the nub flush with the part surface. Follow up with a sanding sponge or fine-grit sandpaper (400-600 grit) to smooth the area. For visible seams or larger imperfections, apply Tamiya Basic Putty, let it dry, then sand smooth. Always sand in one direction and test on hidden areas first to avoid marring the plastic finish.
Q: What is the difference between High Grade and Real Grade Gundam kits?
A: High Grade (HG) kits are larger (1/144 scale), easier to assemble, and ideal for beginners. They have good articulation and detail without overwhelming complexity. Real Grade (RG) kits are smaller (1/144 scale) but feature highly detailed internal frames and advanced engineering, requiring more precision and patience. Master Grade (MG) kits are 1/100 scale with extensive detail and assembly time. Start with HG to learn fundamentals, then progress to RG or MG as your skills improve.
This article was written using GrandRanker