

Table of Contents
- What You'll Need: Essential Panel Lining Tools and Materials
- Preparation: Preparing Your Gundam Model for Panel Lining
- Gundam Marker vs. Panel Wash: Which Method Works Best
- Do You Need to Top Coat Gunpla Before Panel Lining
- Step-by-Step: How to Panel Line Gunpla Models Correctly
- How to Clean Up Panel Lines on Gunpla Effectively
- Common Panel Lining Mistakes to Avoid
- Budget-Friendly vs. Professional-Tier Panel Lining Setup
Last Updated: July 7, 2026
What You'll Need: Essential Panel Lining Tools and Materials
Panel lining transforms flat Gundam models into pieces with visual depth and dimension. The recessed lines molded into Gunpla kits become dramatic shadows when filled with the right materials. Without panel lining, even a well-painted model looks incomplete.
You need three core categories of supplies: markers, washes, and cleanup tools. Each serves a specific purpose, and mixing approaches often leads to frustration.
Panel Lining Markers vs. Panel Wash Solutions
Gundam markers and panel wash solutions represent two fundamentally different approaches to the same problem.
Gundam markers, primarily from Tamiya and Mr. Hobby, are thick paint markers designed specifically for panel lining. You apply them directly into recessed lines by hand, controlling placement with the marker's tip. The paint dries quickly with no mixing required. For beginners, this directness is appealing.
Panel wash solutions work differently. You thin paint with a solvent, creating a watery mixture that flows into recessed areas through capillary action. Once dry, you remove excess wash from flat surfaces, leaving dark lines only in the recesses. This produces more realistic, subtle results.
Markers give you control but require a steady hand. Washes require more setup and cleanup but deliver consistent results across complex surfaces. Many experienced modelers use both: markers for straight, accessible lines and washes for intricate detail work.
Additional Supplies for Cleanup and Finishing
Cleanup separates amateur panel lining from professional results. You'll need cotton swabs or small brushes for removing excess material. Isopropyl alcohol works as a solvent for markers; enamel washes need enamel thinner, while acrylic washes clean up with water before drying.
Lint-free cloth or coffee filters prevent smudging. Low-tack masking tape protects areas you don't want to touch. A top coat, either matte or gloss, seals everything and protects panel lines from accidental smudging during handling.
Preparation: Preparing Your Gundam Model for Panel Lining
Panel lining works best on clean, properly prepared surfaces. Preparation takes longer than the lining itself but determines whether your work looks sharp or muddy.
Surface Cleaning and Inspection
Start with a gentle wash using warm water and soft soap to remove mold release agent, the lubricant used during plastic injection molding. This invisible film prevents paint and panel wash from adhering properly. Rinse thoroughly and let parts dry completely.
Inspect for imperfections. Sand any rough edges from sprue cutting using fine-grit sandpaper (400-600 grit). Panel lines won't look crisp over rough plastic.
Priming Considerations for Better Adhesion
Primer isn't strictly necessary for panel lining on bare plastic, but it improves adhesion significantly. If you've painted your model, you already have a primer layer. For unpainted models, a light primer coat helps panel wash and markers stick consistently.
Spray primer works best for even coverage. Apply a thin coat so you still see the plastic grain through it. Let it cure fully before panel lining.
Gundam Marker vs. Panel Wash: Which Method Works Best
Both methods produce excellent results when executed properly. The choice depends on your comfort level, the complexity of the model, and your patience for cleanup.
Marker Application Technique and Control
Gundam markers offer direct control. Hold the marker at a shallow angle so the tip contacts the recess without pressing sideways into flat surfaces. Light pressure prevents bleeding outside the line.
For long, straight lines, work in one continuous motion. For curved or complex recesses, make shorter passes and overlap them slightly. This prevents gaps in coverage.
The marker method works exceptionally well for panel lines on large, accessible surfaces. It struggles with tight, intricate details where the marker tip can't fit properly.
Panel Wash Method for Recessed Detail Work
Panel wash excels at detail work and complex surfaces. The thin liquid flows into every crevice without requiring precise hand control. Apply wash with a brush, working across the surface. Let it sit for 2-3 minutes so the liquid settles into recesses. Then, using a clean, damp brush or cotton swab, wipe excess wash from flat surfaces.
This method requires more cleanup but produces more consistent results. The wash won't skip or blob. It settles evenly into every groove.
Do You Need to Top Coat Gunpla Before Panel Lining
The answer depends on which panel lining method you're using and what paint type you've applied.
Matte vs. Gloss Coat Impact on Panel Lining
A top coat creates a barrier between your paint and panel lining materials. Gloss coats work better for panel lining because the smooth surface allows wash to flow evenly. Matte coats have a grainy texture that can cause wash to settle unevenly.
If you're using acrylic paint and enamel-based panel wash, a protective coat becomes essential. The enamel thinner can soften acrylic paint. A gloss coat prevents this. If you're using acrylic paint and acrylic-based panel wash, the coat is optional but still recommended for protection.
Lacquer paint requires no protective coat. Panel materials won't damage it.
Timing: When to Apply Top Coat in Your Workflow
If you're using a top coat, apply it before panel lining. Let it cure fully, usually 24 hours for spray coats. Then panel line over the dried coat. After panel lining is complete and cleanup is done, apply a final top coat to seal everything.
If you're not using a protective coat, panel line first, then apply a final top coat afterward.
Step-by-Step: How to Panel Line Gunpla Models Correctly
Most modelers complete panel lining on a standard Gundam in 30-90 minutes, depending on complexity and method.
Step 1: Plan Your Panel Line Strategy
Examine your model carefully. Identify which lines are main panel seams and which are detail lines. Main seams should be darker and more prominent. Detail lines should be subtle.
Decide which method you'll use for each area. Straight, accessible lines suit markers. Curved, intricate details suit wash.
Step 2: Apply Panel Lines with Precision
If using markers, start with main panel seams. Hold the marker at a shallow angle and drag it along the recessed line in one smooth motion. Don't press hard. For curved lines, make multiple shorter passes rather than one long arc.
If using wash, apply it liberally with a brush across the entire area you're working on. Let the wash sit for 2-3 minutes. Then, using a clean, damp brush or cotton swab, gently wipe excess wash from flat surfaces. Work with light pressure.
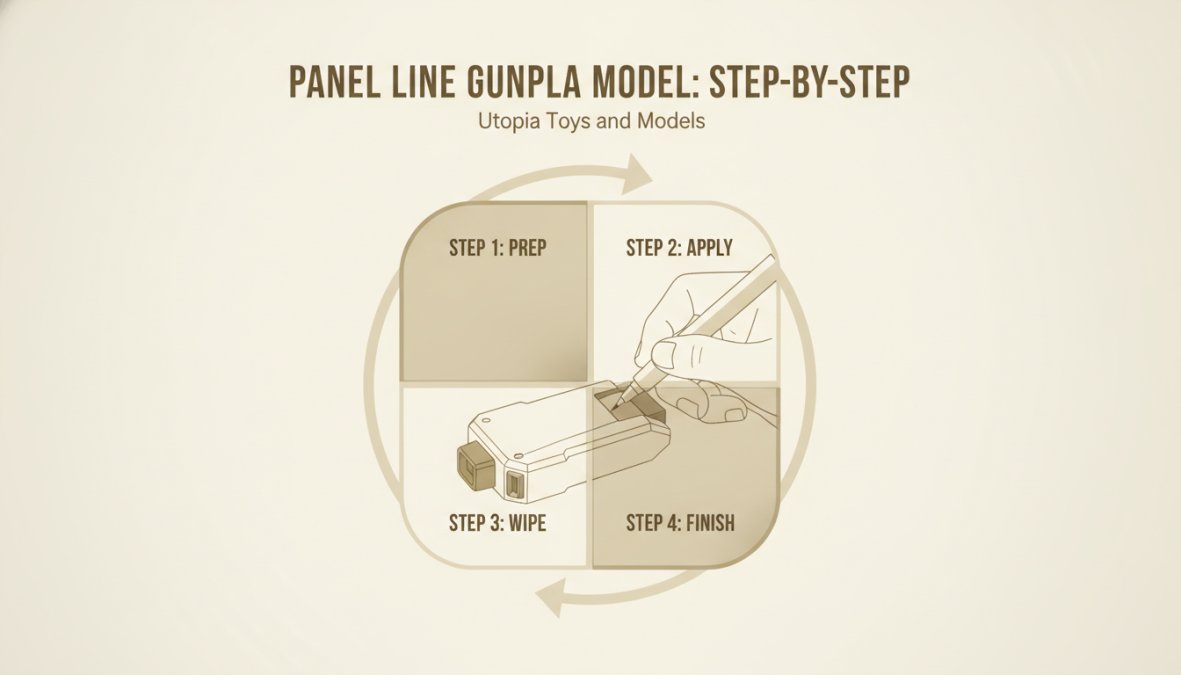
Step 3: Work Section by Section
Don't try to panel line the entire model at once. Work on one section at a time, completing it fully before moving to the next. This prevents accidentally smudging wet wash or fresh marker on completed areas.
Let each section dry completely before moving to adjacent areas. Marker dries in minutes. Wash takes 30-60 minutes depending on humidity and solvent type.
How to Clean Up Panel Lines on Gunpla Effectively
Cleanup separates polished results from amateurish work.
Removing Excess Marker and Wash Residue
For markers, use a cotton swab lightly dampened with isopropyl alcohol. Gently wipe flat surfaces, working perpendicular to panel lines so you don't drag marker out of recesses.
For wash, the cleanup approach depends on solvent type. Acrylic wash cleans up with water before it dries. Once dry, use rubbing alcohol. Enamel wash needs enamel thinner. Work with a small detail brush or cotton swab, applying solvent to remove excess while leaving recesses intact.
The key is light pressure and multiple passes. Heavy pressure removes wash from shallow recesses.
Fixing Over-Application and Mistakes
If you've applied too much marker or wash, mistakes are fixable. For marker over-application, use a clean cotton swab dampened with isopropyl alcohol. Gently rub the excess area. Multiple light passes work better than aggressive rubbing.
For wash that's too dark or spread too far, use a brush dampened with appropriate solvent. Carefully apply solvent to the problem area and wipe with a clean swab.
Common Panel Lining Mistakes to Avoid
Skipping surface preparation leads to uneven panel lines. Dust and residue cause material to flow inconsistently.
Using too much pressure with markers causes bleeding outside lines. Light contact with proper technique produces clean results.
Not letting material dry completely before cleanup causes smudging. Patience is harder than technique.
Mixing incompatible materials creates adhesion problems. Acrylic paint with enamel wash can cause lifting. Check compatibility before combining products.
Over-cleaning removes panel lines from shallow recesses. Light pressure with multiple passes beats aggressive single passes.
Ignoring model complexity leads to frustration. Intricate models suit wash better than markers. Match method to model.
Budget-Friendly vs. Professional-Tier Panel Lining Setup
Panel lining costs vary dramatically based on approach.
Entry-Level Tools and Materials
Starting with markers requires minimal investment. A single Gundam marker costs less than most hobby supplies. Add cotton swabs and isopropyl alcohol from any pharmacy. Total startup cost is under what most modelers spend on a single Gundam model kit.
An entry-level wash setup adds a few supplies: a small bottle of panel wash, a detail brush, and appropriate solvent. Pre-mixed washes eliminate the need for ratio guides.
| Setup Type | Initial Cost Range | Best For |
|---|---|---|
| Markers only | Under $30 | Beginners, simple models |
| Markers + basic wash | $50-75 | Intermediate learners |
| Professional wash setup | $100-150 | Experienced modelers |
Advanced Setup for Serious Hobbyists
Serious modelers invest in quality materials and workspace setup. A dedicated spray booth or ventilation system keeps fumes contained. Proper lighting reveals imperfections and prevents mistakes. Quality brush sets, multiple solvents, and various panel wash formulas allow customization per project.
This setup costs $200-400 initially but lasts years. For modelers planning to complete many kits, this investment pays dividends through faster, cleaner work.
However, starting with entry-level tools makes sense. You'll learn what you actually need before investing heavily.
Panel lining transforms Gundam models from flat plastic into dimensional, finished pieces. Whether you choose markers or washes, the fundamentals remain consistent: prepare properly, apply with control, and clean carefully. Start with quality materials matched to your skill level, and your models will reflect the effort you invest in this crucial finishing technique.
Frequently Asked Questions
What is the best way to panel line Gunpla models?
The best approach depends on your skill level and desired finish. Gundam markers offer direct control for beginners, while panel wash solutions (thinned acrylic or lacquer) work well for recessed details. Most hobbyists use markers for bold lines and washes for subtle shading. Practice on spare sprues first to develop consistency and control before working on your main model.
Do you need to top coat Gunpla before panel lining?
A gloss or semi-gloss top coat before panel lining helps markers and washes flow smoothly into recessed areas and improves surface tension. However, it's optional for marker application on matte finishes. If using liquid panel wash, a gloss coat is recommended for better adhesion and easier cleanup. Apply your final matte coat after panel lining is complete and fully cured.
What's the difference between Gundam markers and panel wash for panel lining?
Gundam markers provide direct, controlled application with visible lines and work well for sharp panel definitions on flat surfaces. Panel wash is a thinned paint solution that flows into recesses naturally, creating subtle shading and depth. Markers suit beginners; washes suit experienced modelers. Many use both methods on the same model for layered detail.
How do you clean up excess panel line ink on Gunpla?
For marker lines, use a cotton swab or soft brush lightly dampened with thinner (acrylic or lacquer thinner, depending on your marker type) to wipe excess from flat surfaces. For panel wash, allow it to cure fully, then use a barely damp brush to gently remove overflow. Work carefully to avoid disturbing settled wash in recesses. Test your thinner on a hidden area first to ensure it doesn't damage your top coat.
This article was written using GrandRanker