

Table of Contents
- Why Beginner Gunpla Tools Matter: Quality Over Cost
- Essential Gunpla Tools for Beginners: The Core Five
- Gunpla Nub Removal Techniques: From Cutting to Finishing
- How to Panel Line Gunpla for Beginners
- Budget Tool Breakdown: Individual Tools vs. All-in-One Kits
- Tool Maintenance and Storage for Long-Term Use
- Common Mistakes Beginners Make With Budget Tools
- Your First Build: Getting Started the Right Way
Last Updated: August 17, 2026
Why Beginner Gunpla Tools Matter: Quality Over Cost
Building a Gundam model kit doesn't require expensive equipment. The real challenge is understanding which beginner gunpla tools actually deliver results without breaking your budget. Many new builders waste money on oversized all-in-one kits that include tools they'll never use, then struggle with the few that matter.
This guide from Utopia Toys and Models covers what separates a clean, professional-looking build from one marred by stress marks, rough nubs, and unfinished seams. The difference comes down to five core tools, most of which cost under $20 individually. Cheap multi-piece kits bundle incompatible tools together, forcing you to work around inferior equipment instead of investing in individual pieces that actually perform.
The cost isn't the barrier. The knowledge is.
Essential Gunpla Tools for Beginners: The Core Five
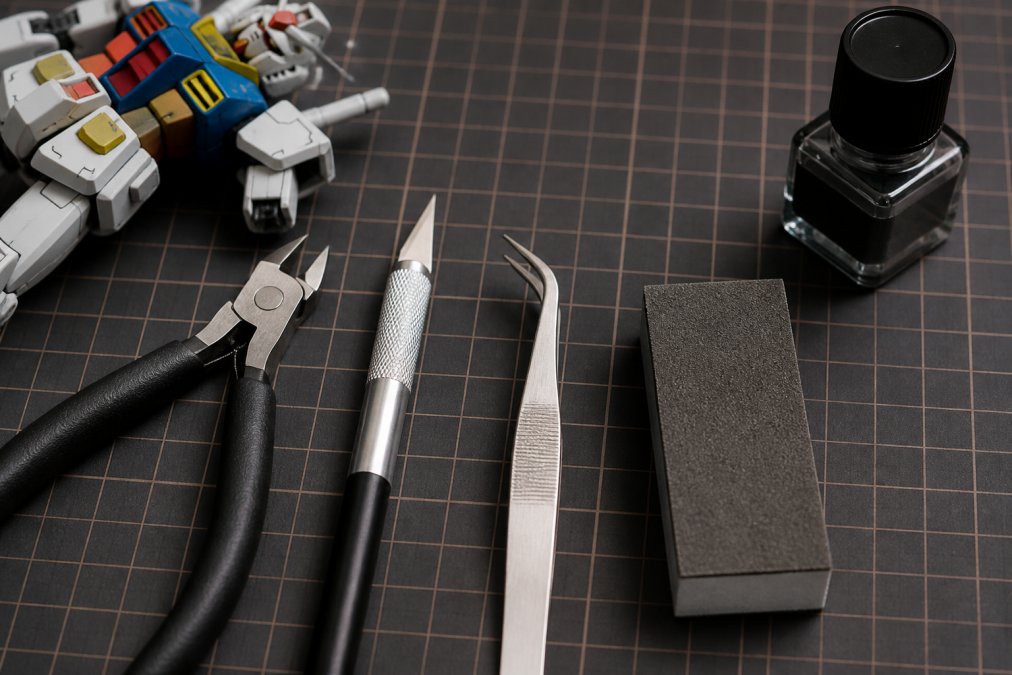
You need five tools to build a Gunpla kit properly: side cutters, a hobby knife, precision tweezers, sanding equipment, and panel lining markers. Everything else is optional. This foundation handles 95% of assembly and detailing work on entry-level and intermediate kits.
The mistake beginners make is buying a starter kit with twelve tools when they'll use five. The Tamiya Modeler's Side Cutter (TAM74093) at $17.99 removes plastic parts from sprues with minimal stress marks, doing one job better than a generic multi-tool can do twelve.
Side Cutters and Nippers: Removing Parts Cleanly
Side cutters are your first line of defense against nubs and stress marks. The Tamiya Modeler's Side Cutter is affordable and widely available, designed specifically for plastic model kits. What separates this tool from household cutters is the blade geometry: it creates a small flat surface where the cut happens, leaving behind a tiny nub rather than a jagged edge.
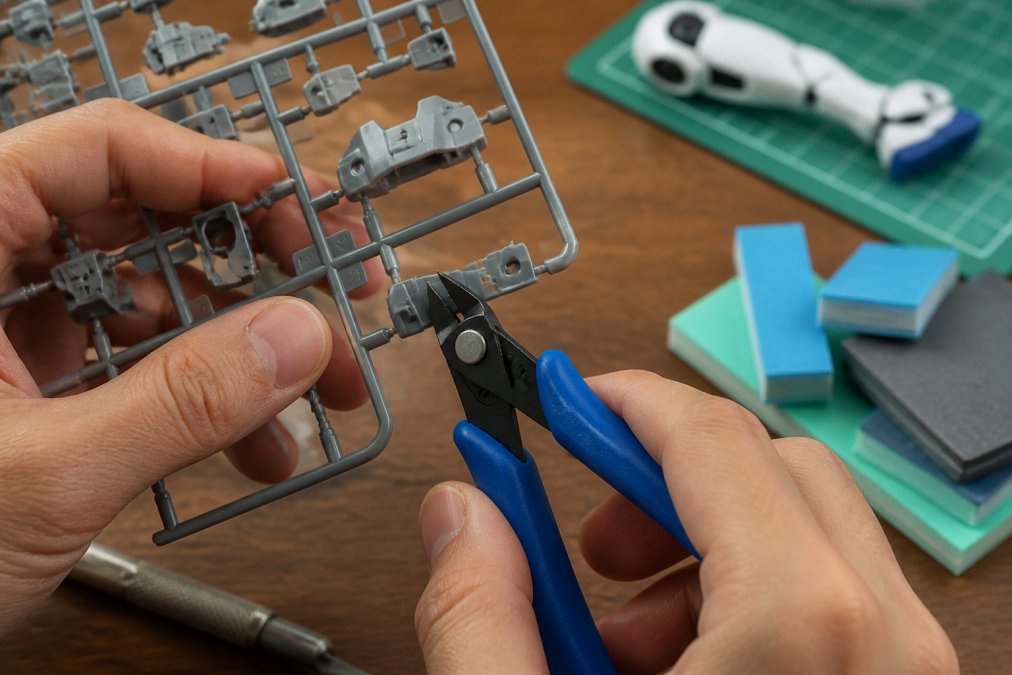
Use side cutters as your first pass on every part. Position the cutter so the flat side of the blade faces the model part and the angled side faces the sprue. Cut about 2-3mm away from the part itself, leaving a small tab to remove with your hobby knife and sanding.
Hobby Knife for Precision Work
An X-Acto knife or similar hobby knife handles detail work that cutters can't reach. The basic kit costs $5-10 and lasts through dozens of builds. Replace blades frequently, dull blades tear plastic instead of cutting it, creating stress marks that are harder to sand smooth than a clean cut. Let the blade do the work; pressing hard breaks blades and creates rough edges.
Precision Tweezers for Small Components
The Tamiya Craft Tweezers (74080) at $10.69-22.00 handle small parts that your fingers can't grip safely. The blunt, square tip won't puncture or scratch delicate plastic. Tweezers improve precision during assembly by letting you position parts exactly before gluing, and they're essential for applying water decals without fingerprints. The stainless steel construction resists rust and lasts indefinitely.
Gunpla Nub Removal Techniques: From Cutting to Finishing
Nub removal separates amateur builds from polished ones. A nub is the small plastic stub left where a part connected to the sprue. Removing it cleanly requires a two-step process: cutting and sanding.
The Two-Step Cutting Method
Step one: use side cutters to remove the part 2-3mm away from the model, leaving a small tab. Don't try to cut flush on the first pass. Step two: use your hobby knife to trim the remaining nub as close as possible with light, shallow cuts at a shallow angle. This two-step approach works because each tool does what it does best.
Sanding and Filing for Smooth Surfaces
After cutting, sanding transforms rough nubs into seamless surfaces. A sanding sponges variety pack with multiple grits ($9.90-19.99) handles this phase. Start with coarser grit (400-600) to remove the nub quickly, then progress to finer grits (1000-1500) for a smooth finish. Sanding sponges conform to curved surfaces better than sandpaper and are reusable. Wet sanding reduces dust and prevents residue from scratching adjacent parts. Most builders spend 30-60 seconds per part on this step.
How to Panel Line Gunpla for Beginners
Panel lining adds depth and realism to your model by highlighting the recessed lines molded into Gundam kits. Without highlighting them, your model looks flat and toy-like. With panel lining, it looks engineered.
The Tamiya Panel Line Accent Color (Black, Brown, or Gray) at $7.75-12.73 is the beginner standard. It's pre-diluted enamel paint that flows into panel lines automatically through capillary action. Start with black for most kits. Apply the paint with the brush that comes on the bottle cap, brush along the panel line, and wipe away excess with a dry cotton swab within 30 seconds. Use light, careful application rather than heavy coats; thick applications don't dry properly and can make plastic brittle.
Budget Tool Breakdown: Individual Tools vs. All-in-One Kits
A cheap 12-piece starter kit costs $15-25 and includes tools you won't use and tools that don't work well. Individual tools cost slightly more total but deliver dramatically better results.
| Tool | Individual Cost | Kit Cost | Quality Difference |
|---|---|---|---|
| Side Cutters | $17.99 | $3-5 in kit | Kit version has dull blades, poor ergonomics |
| Hobby Knife | $5-10 | $2-3 in kit | Kit blades are brittle, break easily |
| Tweezers | $10.69 | $1-2 in kit | Kit tweezers are flat, bend easily |
| Sanding Sponges | $9.90-19.99 | $3-5 in kit | Kit sponges are thin, wear out quickly |
| Panel Liner | $7.75-12.73 | Rarely included | N/A |
Individual tools cost $52-73 total. A cheap kit costs $20 but forces you to buy better tools anyway after your first build.
Why Individual Tools Beat Cheap Multi-Piece Kits
Cheap kits distribute a small budget across too many items, compromising each tool: dull blades, poor ergonomics, flimsy construction. A dull cutter takes three times longer to remove a part. A brittle hobby knife blade breaks mid-cut. Cheap tweezers slip and drop small parts. Individual tools are designed for a single purpose and last decades. The amortized cost of a quality tool is lower than replacing cheap ones repeatedly.
Building Your Starter Kit Strategically
Buy tools in this order: side cutters first, then hobby knife, then tweezers, then sanding sponges, then panel liner. This sequence lets you start building immediately while you save for remaining pieces. At Utopia Toys and Models, we recommend starting with the Tamiya Modeler's Side Cutter and an X-Acto knife. These two tools handle 70% of the work on a basic build.
Tool Maintenance and Storage for Long-Term Use
Quality tools last decades if you maintain them. Wipe side cutters and tweezers dry after each session; moisture causes rust. Store them in a dry container. Keep hobby knife safety caps on when not in use and replace blades as soon as they dull. Rinse sanding sponges thoroughly after wet sanding and let them dry completely; they'll last 20-30 builds before needing replacement. Panel lining bottles last indefinitely if you cap them tightly after each use.
Common Mistakes Beginners Make With Budget Tools
The first mistake is buying cheap tools expecting them to perform like expensive ones. A $5 side cutter from a hardware store cuts differently than a $18 model cutter. The second mistake is skipping sanding; even a perfectly cut nub is visible under light. The third mistake is applying panel lining too heavily; use light applications instead. The fourth mistake is neglecting tool maintenance; spend 30 seconds after each session wiping tools dry. The fifth mistake is buying a complete kit instead of individual tools; you'll outgrow cheap pieces within two builds.
Your First Build: Getting Started the Right Way
Start with a High Grade (HG) kit; these are designed for beginners and teach you the fundamentals. Popular beginner kits include the RX-78-2 Gundam and the Wing Gundam. Gather your tools before opening the box and lay them out within arm's reach. Follow the instruction manual exactly. Take your time on nub removal, this is where most builds succeed or fail. Panel line after assembly is complete. Building your first Gunpla teaches you what tools you actually need.
Starting your Gunpla hobby doesn't require expensive equipment or overwhelming tool collections. Five tools under $20 each handle everything a beginner needs to build, finish, and detail a model kit properly. The challenge is choosing quality over quantity; individual tools designed for modeling beat cheap multi-piece kits every time. At Utopia Toys and Models, we carry all the essential beginner gunpla tools from brands like Tamiya and X-Acto, with transparent stock status and reliable shipping so you can start building immediately. Bandai's official Gunpla building guide offers step-by-step instructions for your first kit, and investing in proper tools now saves you frustration and money on replacements later.
Frequently Asked Questions
What tools are absolutely essential for a Gunpla beginner?
Start with side cutters or nippers, a hobby knife, precision tweezers, sanding sponges, and a self-healing cutting mat. These five tools handle 90% of assembly and finishing work. Side cutters remove parts from the sprue, the hobby knife trims nubs, tweezers position small components, sanding sponges smooth rough edges, and the cutting mat protects your workspace. All five can be sourced for under $20 each, making a complete beginner setup affordable without sacrificing quality.
Can you build a high-quality Gunpla model with budget tools?
Yes. Budget tools under $20 produce results nearly identical to expensive alternatives when used correctly. The difference lies in durability and precision, not immediate output. A $10 hobby knife cuts nubs as cleanly as a $50 option on your first build. Where budget tools show wear is after 50+ uses, but beginners rarely reach that threshold quickly. Focus on technique: make two cuts instead of one, sand gradually, and let tools do the work rather than forcing them.
What is the difference between a hobby knife and side cutters for Gunpla?
Side cutters remove parts from the sprue closest to the plastic gate, leaving a small nub. Hobby knives trim that remaining nub flush to the part surface. Side cutters are faster for initial separation; hobby knives are more precise for final finishing. Many builders use both: side cutters first (rough cut), then hobby knife (clean cut), then sanding (smooth finish). For beginners, starting with side cutters is safer since they require less blade control.
Are cheap Gunpla tool kits on Amazon worth it?
Most multi-piece kits under $20 contain 10-15 tools where you'll use only 3-4. The rest are low-quality duplicates that break easily or perform poorly. Individual tools from established brands like Tamiya or GodHand, even at $10-18 each, outperform cheap kit bundles. Cheap kits hide their cost by using thinner metals, uncomfortable grips, and dull blades. Invest in 2-3 quality individual tools rather than 15 mediocre ones.
Do I need a sanding block for my first Gunpla build?
Not a traditional sanding block, but sanding sponges are worth the $10-15 investment. Sponges conform to curved surfaces better than rigid blocks, making them ideal for model parts. They're reusable, last through dozens of builds, and come in multiple grits for different stages (rough 400-grit down to fine 1500-grit). A variety pack handles both nub removal and surface finishing without requiring additional tools.
This article was written using GrandRanker