

Table of Contents
- Understanding Gunpla Grades Explained for Beginners
- Essential Gunpla Tools for Beginners: What You'll Need
- Best Gunpla for Beginners: Choosing Your First Model
- How to Start Building Gunpla Models: Assembly Basics
- Painting Your Gunpla: Primer, Paint Types, and Application
- How to Panel Line Gunpla: Detailing and Weathering
- Finishing Touches: Top Coats, Decals, and Curing
- Environmental Impact and Safe Paint Disposal
Last Updated: July 7, 2026
Learning to build gunpla models opens up a rewarding hobby combining precision, creativity, and patience. Whether you're drawn to iconic Gundam robots or simply seeking an engaging collectible experience, understanding the fundamentals is essential. At Utopia Toys and Models, we've guided countless beginners through their first builds and are sharing everything you need to start successfully.
Understanding Gunpla Grades Explained for Beginners
Gunpla kits are organized into distinct grades based on complexity, detail level, and build time. Knowing which grade matches your skill level is your first critical decision.
High Grade (HG) is the most beginner-friendly option. These kits stand 4-6 inches tall, contain 100-200 pieces, and take 2-4 hours to complete. HG models offer excellent value and provide a solid foundation for learning assembly techniques without overwhelming detail work.
Real Grade (RG) sits in the middle tier. Despite similar height to HG kits, RG models pack significantly more detail and articulation into a smaller frame. These require more precision and take 4-6 hours to build. RG is ideal after completing one or two HG builds.
Master Grade (MG) represents the premium experience. Standing 8-10 inches tall with 500+ pieces, MG kits demand 8-15 hours and reward you with exceptional detail and mechanics. This complexity isn't for beginners but worth knowing as a long-term goal.
Essential Gunpla Tools for Beginners: What You'll Need
Building gunpla requires specific tools, but you don't need to invest heavily upfront. A minimal starter kit costs significantly less than expected, and you can upgrade gradually.
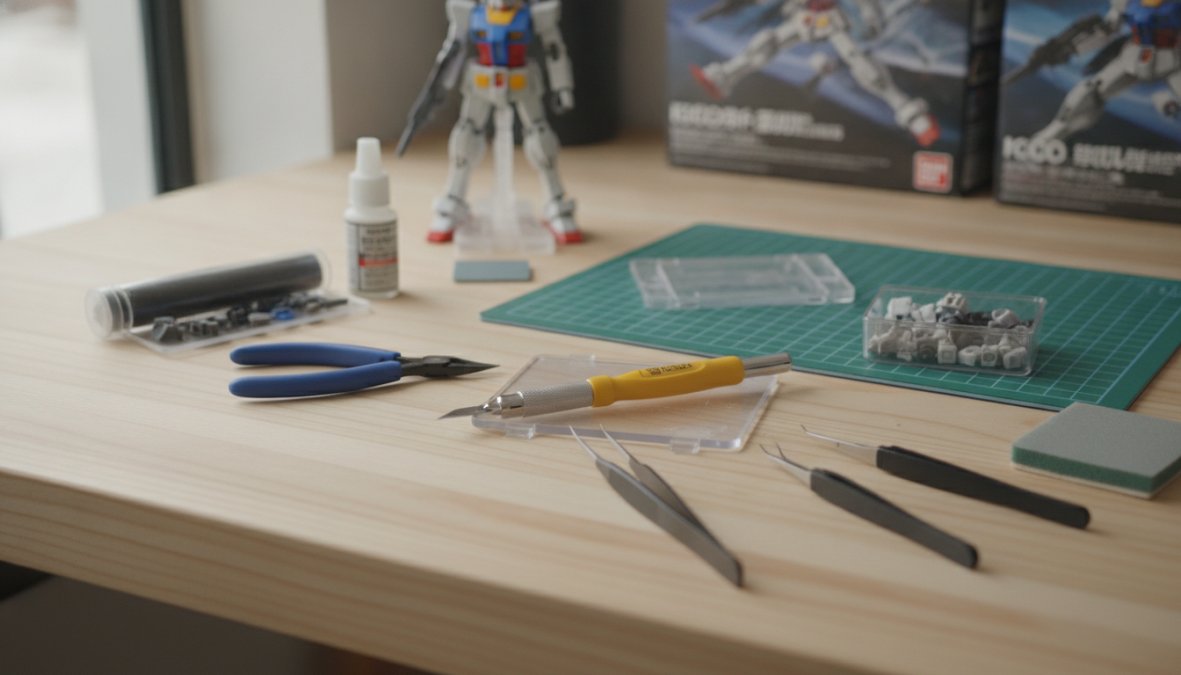
Cutting and Assembly Tools form your foundation. Hobby nippers cleanly separate plastic pieces from sprues. A hobby knife handles detail work and removes nub marks. Fine-grit sandpaper (400-600 grit) smooths those marks for a polished appearance. Plastic cement can reinforce joints on heavily-articulated pieces.
Painting Supplies depend on your approach. Hand-painting requires acrylic hobby paints (Tamiya, Vallejo, and Mr. Hobby are industry standards), brushes in various sizes, and paint thinner. An airbrush setup costs more but delivers professional results, requiring a compressor, airbrush unit, and ventilation solution.
Finishing Materials complete your toolkit: matte or gloss top coat, panel lining paint (usually black or dark brown), and decals for authentic markings.
Budget-Friendly vs Pro-Tier Tool Comparisons
| Tool Category | Budget Approach | Pro-Tier Approach | Impact |
|---|---|---|---|
| Cutting | Basic nippers, utility knife | Precision nippers, hobby knife set | Cleaner cuts, less cleanup |
| Sanding | Single 400-grit sandpaper | Assorted grits (200-1000) | Smoother surfaces, better paint adhesion |
| Painting | Hand-painting with brushes | Airbrush with compressor & booth | Even coverage, faster application, professional finish |
| Ventilation | Open window, fan | Dedicated spray booth with filter | Better air quality, consistent results |
| Workspace | Desk corner with newspaper | Dedicated workbench with task lighting | Comfort, precision, fewer mistakes |
A complete budget setup costs roughly $40-80 and covers everything needed for your first five builds. Professional setups run $300-800 but aren't necessary until you're consistently painting multiple kits monthly.
Best Gunpla for Beginners: Choosing Your First Model
Your first kit should be forgiving, visually striking, and completable in a single weekend.
Bandai's RX-78-2 Gundam (HG grade) is the quintessential beginner kit. It's instantly recognizable and specifically designed to teach fundamental assembly without frustrating complexity. Parts snap together satisfyingly without requiring glue, and most builders complete it in 2-3 hours.
The HGBD Gundam Build Divers kits offer modern engineering with straightforward assembly and excellent articulation while maintaining beginner-friendly construction.
Avoid Master Grade kits entirely on your first attempt. Their complexity will frustrate you, and you'll spend 12+ hours on a single build when you could complete three HG models and learn three times as much. Stick with readily available models from Bandai's core lineup.
How to Start Building Gunpla Models: Assembly Basics
The building process follows a consistent sequence that applies to every gunpla kit.
Preparation and Surface Cleaning
Before cutting a single piece, inspect your kit and organize your workspace. Read through the instruction manual completely to prevent assembly mistakes and reveal the intended build sequence.
Clean your workspace thoroughly. Dust particles settle on wet paint and create imperfections. Good lighting is essential; poor visibility leads to mistakes. Some builders wash plastic parts with warm soapy water before assembly to remove mold release agent, which can interfere with paint adhesion.
Cutting Sprues and Nipping Parts
Carefully remove each part from its sprue using hobby nippers. Cut about 2-3mm away from the part itself to prevent stress marks. After cutting, sand nub marks smooth using 400-grit sandpaper. This step transforms a rough-looking model into a polished one.
Assembling Core Components
Follow the instruction manual's sequence exactly. Start with the torso, then assemble arms and legs separately before attaching them to the body. This modular approach prevents accidentally breaking completed sections.
Pay attention to part orientation. Many pieces only fit one way, and forcing them causes damage. Test articulation as you build to ensure joints move freely.
Painting Your Gunpla: Primer, Paint Types, and Application
Painting transforms a basic plastic model into a display-worthy piece.
Choosing Between Acrylic, Lacquer, and Enamel Paints
Acrylic paints are water-based, non-toxic, and beginner-friendly. They dry quickly (15-30 minutes), have minimal odor, and clean up with water. Tamiya and Vallejo produce excellent hobby paints that adhere well to plastic. Hand-painting with acrylics works perfectly for beginners.
Lacquer paints offer superior durability and smooth finishes. They dry faster and require less thinning for airbrushing but produce strong chemical odors and require solvent-based cleanup. They're the professional standard for airbrushing but demand proper ventilation and safety equipment.
Enamel paints sit between acrylics and lacquers in durability but dry slowly (2-4 hours) and require solvent cleanup. Most hobbyists skip enamels in favor of acrylics or lacquers.
For your first builds, use acrylic paints with hand-painting or spray cans. Consider investing in an airbrush and lacquer setup once comfortable with fundamentals.
Paint Compatibility Matrix for Safe Layering
| Base Coat | Safe Second Coat | Avoid | Notes |
|---|---|---|---|
| Acrylic Primer | Acrylic Paint | Lacquer directly | Lacquer thinner dissolves acrylic |
| Lacquer Primer | Lacquer Paint | Acrylic (may crack) | Lacquer over acrylic requires isolation coat |
| Acrylic Paint | Acrylic Paint | Lacquer directly | Use isolation coat if switching to lacquer |
| Lacquer Paint | Lacquer Paint | Acrylic (risky) | Same-type layering is always safest |
Never apply lacquer directly over acrylic without an isolation coat. Always prime before painting; primer provides adhesion and color consistency.
Airbrushing, Spray Cans, and Hand-Painting Techniques
Hand-Painting requires only brushes and paint. Thin acrylic paint to milk-like consistency using water or dedicated thinner. Apply thin coats rather than one thick coat; multiple thin layers look smoother. Allow 15-30 minutes between coats.
Spray Cans offer a middle ground between hand-painting and airbrushing. They're affordable, require no equipment beyond a spray booth or well-ventilated area, and deliver even coverage quickly. Spray in light, overlapping passes from 6-8 inches away.
Airbrushing delivers professional results with precise control. It requires an air compressor, spray booth, and safety equipment. The learning curve is steeper, but once mastered, airbrushing is faster and produces superior finishes.
For your first build, hand-painting or spray cans are appropriate. Reserve airbrushing for after completing 3-5 painted models.
How to Panel Line Gunpla: Detailing and Weathering
Panel lining transforms a flat plastic model into a detailed, three-dimensional-looking piece. Apply dark paint (usually black or dark brown) into recessed panel lines using a fine-tipped brush or dedicated panel line pen. Paint flows naturally into grooves and settles there.
Weathering adds realistic wear through light dry brushing (dragging a nearly-dry brush across raised surfaces) to simulate dust and grime. Wash techniques (applying very thin, diluted paint to recesses) mimic dirt accumulation. Start subtle; weathering is easy to add but difficult to remove.
Decals apply insignia and markings. Soak them briefly in water until they slide freely, position carefully, and allow to dry completely.
Finishing Touches: Top Coats, Decals, and Curing
A gloss coat applied before decals helps them adhere and blend seamlessly. After decals dry completely (24 hours), apply your final top coat. Matte finishes hide dust and fingerprints better than gloss; most display models use matte finishes. Allow 48 hours of curing time before handling.
Store completed models away from direct sunlight, which fades paint over time. Display cases protect models from dust and accidental damage.
Environmental Impact and Safe Paint Disposal
Never pour paint down drains. Allow acrylic paint to dry completely in a container, then dispose as regular trash. Lacquer and enamel paint require solvent-based cleanup; collect these in sealed containers and take them to hazardous waste facilities. Research local hazardous waste disposal options in your area.
Building gunpla models rewards patience, precision, and a willingness to learn from mistakes. Your first kit will likely have imperfections; that's completely normal and part of the learning process. Each subsequent build improves noticeably as you internalize techniques.
Utopia Toys and Models stocks everything you need: HG kits from Bandai's core lineup, hobby tools from trusted brands, and paints in every color. Our team understands the hobby deeply and can recommend kits matched to your skill level. Visit Utopia Toys and Models today to select your first gunpla kit and begin building something you'll display with pride.
Frequently Asked Questions
What tools do I need to start building Gunpla models?
Essential Gunpla tools for beginners include nippers for cutting sprues, a hobby knife for cleanup, sandpaper for smoothing parts, masking tape for protecting areas during painting, and basic paint supplies. For painting, you'll need acrylic or lacquer paint, a primer, and either an airbrush, spray cans, or hand-painting brushes depending on your budget and preference. Utopia Toys and Models carries quality tools from brands like Tamiya and Mr. Hobby to get you started.
What is the best Gunpla grade for beginners?
High Grade (HG) models are generally considered the best Gunpla for beginners because they're affordable, relatively simple to assemble, and still offer excellent detail and articulation. HG kits typically have fewer parts than Real Grade (RG) or Master Grade (MG) models, making them less intimidating for new builders. They're also a great way to practice assembly and painting techniques before investing in more complex grades.
Do I need to paint my Gunpla models?
Painting is optional but highly recommended for how to start building Gunpla models. Many kits come with color-molded plastic that looks decent unpainted, but painting with acrylic, lacquer, or enamel paints significantly enhances detail, color separation, and overall appearance. Beginners can start with hand-painting or spray cans before investing in an airbrush. Even basic painting transforms a model's visual impact.
How long does it take to build a Gunpla model?
Assembly time varies by grade and complexity. High Grade models typically take 2-4 hours for basic assembly, while Real Grade kits may take 4-6 hours. Master Grade models can take 8+ hours. Painting, panel lining, weathering, and applying decals add additional time, often doubling or tripling the total project duration. Beginners should expect longer timelines as they learn techniques and work carefully.
This article was written using GrandRanker