

Table of Contents
- Why the Right Tools Matter for Gunpla Assembly
- Best Nippers for Gunpla: Cutting Parts Cleanly from Runners
- Hobby Knives and Blade Safety for Detail Work
- How to Remove Nub Marks from Gunpla: Sanding and Cleanup
- How to Panel Line Gunpla: Markers and Enamel Paint
- Precision Tweezers and Decal Application Tools
- Building Your Essential Gunpla Starter Kit
- Maintaining Your Tools for Long-Term Use
Last Updated: August 9, 2026
Why the Right Tools Matter for Gunpla Assembly
Building Gundam plastic models, or Gunpla, looks straightforward until you hold a kit in your hands. The plastic runners, gates, and nub marks are the first obstacles most builders face. Without the right tools, you'll spend hours fighting the model instead of enjoying the build. The difference between a rushed, frustrating experience and a satisfying one comes down to having essential tools for building gunpla models that match your skill level.
At Utopia Toys and Models, we've helped countless builders discover that investing in quality tools transforms the entire experience. You don't need an expensive collection. You need the right ones.
The tools covered in this guide handle the core tasks every Gunpla builder encounters: cutting parts cleanly, removing nub marks, panel lining for detail, and placing decals. Each tool solves a specific problem. Each one prevents damage to your model. By the end, you'll know exactly which tools to buy first and which ones to add as you level up.
Best Nippers for Gunpla: Cutting Parts Cleanly from Runners
The first cut determines everything. A clean cut leaves minimal nub marks. A rough cut creates work that takes hours to fix. This is where nippers matter most.
Nippers are the foundation of any Gunpla toolkit. They're what you use to separate plastic parts from the runner, the frame that holds all the pieces together. A good nipper cuts flush to the plastic, leaving barely any nub mark. A poor one crushes the plastic or leaves a large stub that requires aggressive sanding.
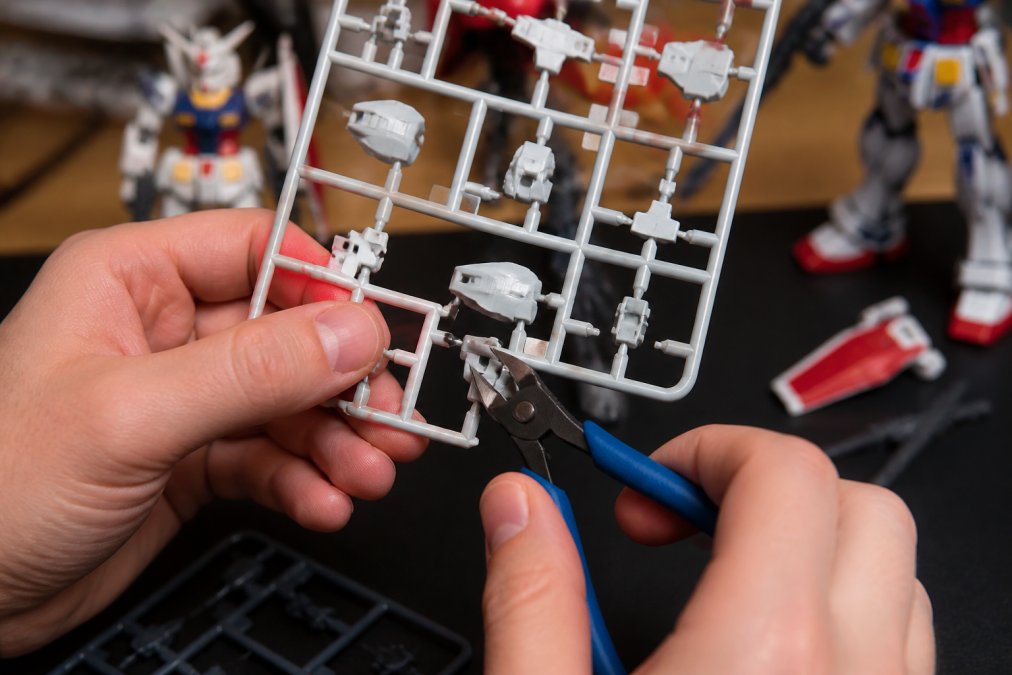
The Tamiya Modeler's Side Cutter (74035) is a common choice for Gunpla builders. It features hardened carbon steel blades, non-slip elastomer grips, and a slim jaw that fits into tight spaces between parts. Most builders report that these blades stay sharp through dozens of kits. The trade-off is that side cutters don't cut quite as flush as premium single-bladed nippers, so you'll still have small nub marks to clean up afterward. The Tamiya Modeler's Side Cutter (74035) has an MSRP of $45.00-$47.00.
Side Cutters vs. Single-Bladed Nippers
Side cutters work by crushing plastic between two hardened steel edges. Single-bladed nippers use a shear action, one blade slides past the other like scissors. The shear action leaves a cleaner cut closer to the part, which means less nub mark cleanup.
The catch: single-bladed nippers are more expensive and require more careful technique. If you angle the cut slightly wrong, you can damage the part. For beginners, side cutters are forgiving. For experienced builders who want the cleanest possible cuts, single-bladed nippers justify the extra cost.
Budget vs. Premium Nippers
Budget nippers work fine for a few kits. The blades dull faster, and the grip isn't as comfortable during long sessions. If you're testing whether Gunpla is a hobby you'll stick with, budget nippers make sense.
Premium nippers cost significantly more but hold their edge through 50+ kits and feature ergonomic designs that reduce hand fatigue. If you're building multiple kits per year, premium nippers save money over time because you're not replacing dull tools every few months.
Hobby Knives and Blade Safety for Detail Work
After cutting parts from the runner, you'll face nub marks and gate marks, the spots where parts attached to the runner. A hobby knife handles this detail work that nippers can't reach.
The X-Acto #1 Knife with precision blades is a standard for Gunpla detail work. The fine point blade lets you scrape away small nubs without damaging surrounding plastic. The lightweight aluminum handle gives you control for intricate cuts. Blades are cheap and widely available, so you can replace them frequently to maintain sharpness. The X-Acto #1 Knife has an MSRP of around $5.06 to $11.93, depending on whether it comes with additional blades.
Hobby knife safety is straightforward but essential. Always cut AWAY from your body and away from your hands. Use a cutting mat to protect your work surface, a knife blade that slips will either damage your model or your hands. Keep the blade sharp. A dull blade requires more pressure, which increases the risk of slipping. Replace blades as soon as they feel like they're tugging instead of slicing cleanly.
The most common mistake is applying too much pressure. Let the blade do the work. Light, controlled strokes produce better results than aggressive ones. If you're struggling to cut through something, your blade is probably dull, replace it rather than pressing harder.
How to Remove Nub Marks from Gunpla: Sanding and Cleanup
Nub marks are inevitable. Even the cleanest cuts leave a small stub. Sanding removes these marks and prepares the surface for paint or decals.
Progressive sanding is the technique that separates acceptable finishes from professional ones. Start with coarse grit sandpaper (400-600) to remove the bulk of the nub. Move to medium grit (800-1000) to smooth the area. Finish with fine grit (1200+) to create a surface ready for paint or decals.
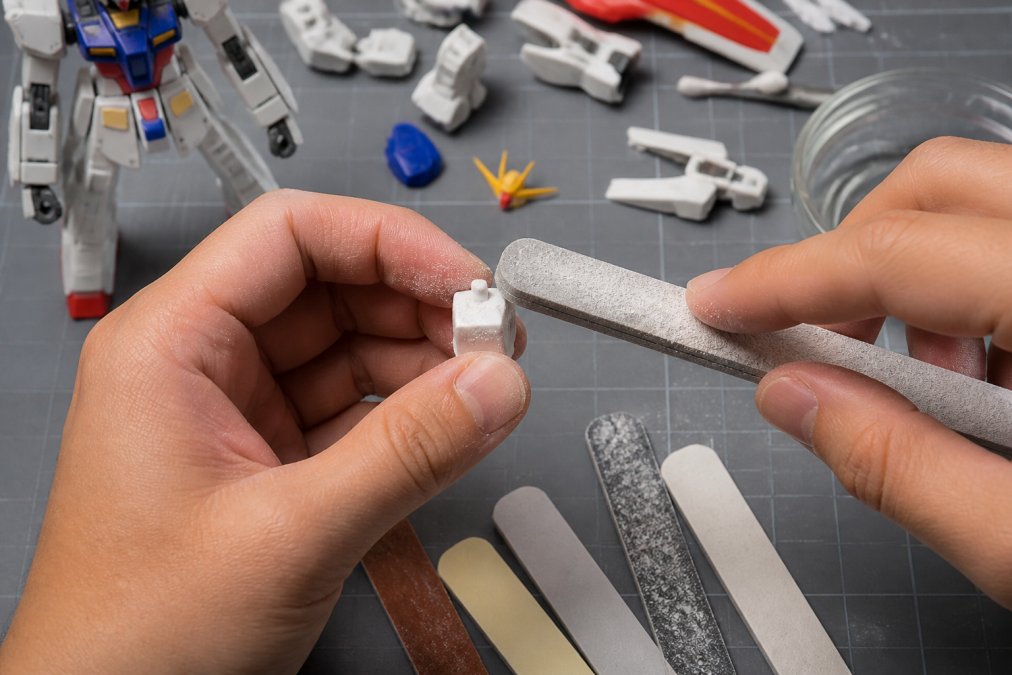
Sanding Sticks and Glass Files
Sanding sticks are sandpaper wrapped around a stick or block, they give you a flat surface to sand against. Tamiya and other manufacturers make sanding sticks in multiple grits specifically designed for plastic models. They're cheap and last through many kits.
Glass files are an alternative that works well for detailed areas. They're gentler on plastic than sandpaper and don't clog as easily. Many builders use a glass file for the initial cleanup, then finish with sandpaper for a smooth surface.
Progressive Sanding Technique
The goal is to remove the nub mark without damaging the surrounding plastic. Start by identifying the nub, the small stub left where the part attached to the runner. Use your coarse-grit sanding stick to sand the nub flat with the surrounding surface. This step removes the bulk of the material.
Once the nub is gone, switch to medium grit and sand the entire area again. This removes the scratches left by coarse grit. Finally, use fine grit to create a smooth surface. You should be able to run your finger across the sanded area and feel it blend seamlessly with the rest of the part.
Common mistake: sanding too aggressively and creating a depression or flat spot. Let the sanding stick do the work. Multiple light passes produce better results than one heavy pass.
How to Panel Line Gunpla: Markers and Enamel Paint
Panel lining adds depth and realism to your model. It involves applying ink or paint into the recessed lines that define the panel details on the plastic.
Panel lining transforms a flat plastic model into something with visual depth and dimension. The lines catch light and shadow, making the model look more detailed and realistic. There are two main approaches: Gundam markers and enamel paint.
Gundam Markers vs. Enamel Panel Line Accent
Gundam markers are paint pens designed specifically for panel lining. They're quick, convenient, and relatively forgiving. You apply the marker directly to the panel line, and the paint flows into the recess. If you make a mistake, you can wipe it away with a damp brush before it dries.
Tamiya Panel Line Accent Color is pre-diluted enamel paint in a bottle with a fine brush. It flows into panel lines via capillary action and creates sharp, consistent lines. Enamel paint can produce professional results, but it requires more careful application and cleanup with enamel thinner.
The trade-off is precision vs. convenience. Markers are forgiving and faster. Enamel paint can produce sharper, more refined results but demands more skill and patience.
Application and Cleanup
For markers: apply the marker tip to the panel line and let it flow. Don't drag the marker across the line, just touch it and let gravity and capillary action do the work. Excess marker can be cleaned with a damp brush before it dries.
For enamel paint: dip the brush into the bottle and apply to the panel line. The paint flows into the recess automatically. Any paint that lands on the flat plastic surface needs to be cleaned up with a brush dampened in enamel thinner. This cleanup step is where most builders struggle. Practice on a spare part first.
Many builders apply a protective top coat after panel lining. This seals the paint and prevents accidental smudging during handling.
Precision Tweezers and Decal Application Tools
Small parts and decals require precision placement. Tweezers give you the control that fingers can't provide.
Tamiya Craft Tweezers (74080) are precision tools with finely honed tips and ergonomic design. They're stainless steel, so they won't rust or degrade. The fine tips let you grip tiny parts without crushing them. The ergonomic design reduces hand fatigue during extended building sessions. The Tamiya Craft Tweezers (74080) typically cost around $16.50 to $24.75.
Decals, water-slide stickers that add graphics and details, are applied after panel lining and top coating. Use tweezers to position the decal on the model. Slide it into place with a damp brush. Once positioned, use a decal softener solution to make the decal conform to curved surfaces.
The key with tweezers is gentle pressure. You're gripping, not squeezing. Parts are plastic and can crack if you apply too much force.
Building Your Essential Gunpla Starter Kit
Not every tool matters equally when you're starting out. A focused starter kit gets you building quickly. You add tools later as you discover what you need.
Beginner Essentials: What You Need First
Start with these five tools:
- Side cutters (Tamiya Modeler's Side Cutter or equivalent), cuts parts from runners
- Hobby knife (X-Acto #1 or equivalent), removes nub marks and gate marks
- Sanding sticks (assorted grits, 400-1200), smooths nub marks
- Tweezers (Tamiya Craft Tweezers or equivalent), handles small parts and decals
- Cutting mat, protects your work surface
These five tools handle 90% of the work on most kits. You can build a complete model with just these. Total investment is reasonable, and each tool will last through multiple kits.
Intermediate Additions: Leveling Up
Once you've built a few kits, you'll discover what additional tools improve your results:
- Panel line markers (Gundam markers), adds visual depth without complexity
- Enamel paint and thinner, for professional-grade panel lining
- Glass files, alternative to sandpaper for detailed cleanup
- Hobby cement, bonds plastic parts for custom builds
- Top coat spray, seals paint and protects details
These tools expand what you can do, but they're not essential for basic assembly. Add them based on what you actually need for the kits you're building.
Tool Storage and Organization
Tool storage matters more than most builders realize. Tools stored carelessly get damaged, dulled, or lost.
Store nippers and tweezers in a drawer or toolbox where they won't roll around. Keep hobby knife blades in their original packaging or a blade storage case. Sanding sticks can be organized by grit in a small container. Paint and thinner should be stored upright in a cool, dry place away from sunlight.
A small toolbox or tackle box works well for organizing everything. Label compartments by tool type. This keeps everything accessible and prevents damage.
Maintaining Your Tools for Long-Term Use
Quality tools are an investment. Proper maintenance extends their life significantly.
Cleaning and Sharpening Techniques
After each building session, wipe down your nippers and tweezers with a dry cloth. Any plastic residue or dust left on the blades will accumulate and eventually affect performance. Store them in a dry place to prevent rust.
Hobby knife blades can't be sharpened, they're designed to be replaced when dull. Keep a supply of replacement blades on hand. Sanding sticks wear down with use. Replace them when they no longer create a smooth finish. Glass files last longer but eventually dull. You can sharpen them with a ceramic honing stick if you have the skill, but replacement is simpler.
Nippers can sometimes be sharpened by a professional tool service, but replacement is usually more economical. Some builders use a ceramic honing stone to touch up the blade edge between kits, which extends the time between replacements.
Preventing Repetitive Strain Injuries
Building Gunpla involves repetitive motions, cutting, sanding, gripping small parts. Hours of building can cause hand and wrist strain.
Take breaks every 30-45 minutes. Stretch your hands and wrists. Vary your tasks, don't spend three hours just sanding. Mix cutting, sanding, and assembly to engage different muscle groups.
Invest in ergonomic tools if you're building frequently. Nippers and tweezers with cushioned grips reduce strain compared to basic versions. A proper work surface at the right height prevents shoulder and neck strain.
Pay attention to your grip pressure. Many builders grip tools too tightly, which increases fatigue. A relaxed grip is actually more precise and less tiring. If your hands hurt after a building session, you're either gripping too hard or need to take more frequent breaks.
Building Gunpla should be enjoyable, not frustrating. The right tools remove obstacles and let you focus on the model. Start with essentials, add tools as your skills develop, and maintain what you have. Utopia Toys and Models stocks everything you need to get started, from basic starter kits to specialized tools for advanced builders. Whether you're buying your first nipper or upgrading to premium equipment, quality tools make the difference between a model you're proud of and one you're disappointed in.
Frequently Asked Questions
What tools do I need to start building Gunpla models?
At minimum, you need side cutters or nippers to remove parts from the sprue, a hobby knife for cleanup, sandpaper or sanding sticks for nub removal, and tweezers for handling small parts. Many builders add panel line markers or enamel paint for detailing. An essential gunpla starter kit typically includes these basics plus a cutting mat and safety gear. Pricing and specific product availability depend on your chosen brands, check Utopia Toys and Models for current options and bundles.
Do I really need a hobby knife for Gunpla?
A hobby knife like an X-Acto blade is highly recommended, not strictly required. While side cutters handle the bulk of cutting, a hobby knife excels at detail work: removing small nub marks, cleaning mold lines, and scraping away excess plastic. Many builders find it saves time versus relying solely on sanding. If you plan to build multiple kits or tackle more complex models, a hobby knife becomes essential for a professional finish.
What is the difference between side cutters and nippers for Gunpla?
Side cutters (also called side nippers) have two blades that meet at an angle, leaving a small nub that requires sanding. Single-bladed or flush-cut nippers have one blade that cuts flush against the sprue, leaving minimal cleanup. Side cutters are more affordable and durable for beginners, while flush-cut nippers cost more but save time on sanding. Most builders use side cutters initially and upgrade to flush-cut nippers as they progress.
How do I remove nub marks from Gunpla without damaging the plastic?
Start with a hobby knife to carefully trim excess plastic, then progress through sanding grits: 400, 600, 800, and 1000. Use light, circular motions on a sanding stick or glass file. Sand parallel to the part's surface, not perpendicular, to avoid gouges. For stubborn nubs, use mineral spirits on a cloth to check your progress without dust obscuring the surface. Always sand in a well-ventilated area and wear a dust mask to protect your respiratory system.
Is a sanding stick necessary for Gunpla models?
Sanding sticks or glass files are highly recommended, especially for removing nub marks and achieving a professional finish. While sandpaper alone works, sanding sticks provide a flat surface that prevents accidental gouging and ensures even results. Glass files are gentler on plastic and don't shed fibers. If you're building multiple kits or want a polished appearance, investing in a set of sanding sticks with multiple grits (400-1000) is worthwhile.
What is panel lining and why does it matter for Gunpla?
Panel lining involves applying paint or markers to the recessed panel lines and engraved details on a model, enhancing depth and realism. It transforms a flat-looking kit into a more detailed, lifelike replica. Gundam markers offer quick, mess-free application for beginners, while enamel panel line accent colors provide sharper, more professional results for experienced builders. Panel lining is optional but dramatically improves visual impact, most serious Gunpla enthusiasts consider it essential.
What safety gear do I need when building Gunpla models?
Wear a dust mask or respirator when sanding to avoid inhaling plastic particles. Safety glasses protect your eyes from small plastic shards and dust. Work gloves prevent cuts from sharp edges and blades. Ensure good ventilation in your workspace, especially when using enamel paints or solvents like mineral spirits. Keep a first-aid kit nearby for minor cuts, and always keep hobby knife blades sharp, dull blades require more force and are more likely to slip.
This article was written using GrandRanker