

Last Updated: November 12, 2026
Quick Summary
Panel line detailing is the craft of darkening the recessed grooves on a model kit so they read as real panel gaps. Choose a fine-tip marker for speed on small kits and quick builds, or a thinned paint wash for even, painted-looking lines with more setup and drying time.
- Enamel and lacquer thinners can craze bare polystyrene if they pool in a recess.
- Bare plastic is best suited to an acrylic wash or a marker.
- Thin the wash until it moves like skim milk so it wicks along grooves.
- Wipe across the line rather than along it, using a fresh swab for each pass.
- Line before the final top coat so the coat seals the pigment and evens the sheen.
Table of Contents
- Choosing Your Panel Line Detailing Method
- Preparing the Model Surface for Panel Line Detailing
- The Panel Line Wash Technique: Dilution, Application, and Capillary Action
- Tamiya Panel Line Accent Color: Strengths and Limits
- How to Clean Panel Lines Without Damaging the Finish
- Panel Lining Before or After Top Coat: What Changes
- Scribing, Color Selection, and Troubleshooting by Symptom
- Picking Your Panel Line Detailing Supplies at Utopia Toys and Models
- Frequently Asked Questions
Choosing Your Panel Line Detailing Method
Panel line detailing is the craft of darkening the recessed grooves on a model kit so they read as real panel gaps. Builders often face the same choice: marker or wash. Both work. They just suit different kits and different hands.
A panel line is the shallow groove molded into a plastic model to suggest where armor plates meet. Filling that groove with pigment creates depth and contrast, and that contrast is what separates a toy-looking build from a display piece.
Below, we walk through both methods, surface prep, cleanup, and the fixes for when things go wrong.
Markers Versus Paint-Based Washes
Markers win on speed. A fine-tip panel line marker lays pigment straight into a groove, dries fast, and needs almost no cleanup. They suit beginners, small kits, and quick builds.
Washes win on realism. A thinned wash flows into every recess on its own, giving even, subtle lines that look painted rather than drawn. The trade-off is more setup and a longer dry.
| Method | Best For | Setup Time | Cleanup | Risk |
|---|---|---|---|---|
| Fine-tip marker | Beginners, small kits, quick builds | Minimal | Low | Visible stroke marks |
| Acrylic wash | Safe on bare plastic, easy cleanup | Moderate | Low | Can bead on glossy plastic |
| Enamel wash | Crisp lines, easy wipe-off | Moderate | Moderate | Attacks bare plastic if pooled |
| Oil wash | Slow, controllable blending | High | High | Long drying time |
Material Compatibility and Paint-Safety Workflow
Here is what most guides skip: solvent choice can ruin a kit. Enamel and lacquer thinners can craze bare polystyrene if they pool in a recess. Acrylic washes stay safer on unpainted plastic.
A common rule of thumb is that bare plastic is best suited to an acrylic wash or a marker. A clear-coated or painted surface can take enamel or oil, because the clear layer shields the plastic underneath.
Test on a runner first. A scrap piece from the same kit tells you more than any label.
Preparing the Model Surface for Panel Line Detailing
Surface preparation decides whether your lines stay crisp or smear. Clean plastic first. Mold release agents and finger oils make wash bead up and refuse to flow.
Wipe each part with a soft cloth dampened with mild soapy water, then let it dry fully. Next, decide on a clear coat. A thin gloss clear coat gives wash a smooth surface to travel along and makes cleanup far easier.
Matte surfaces grab pigment and stain. If you plan to line a matte finish, expect a heavier, dirtier look and much harder cleanup.
Quick prep checklist:
- Wash and fully dry all parts
- Test your wash on a runner
- Apply a thin gloss clear coat if using enamel or oil
- Assemble major sub-sections before lining
- Keep cotton swabs and clean thinner within reach
The Panel Line Wash Technique: Dilution, Application, and Capillary Action
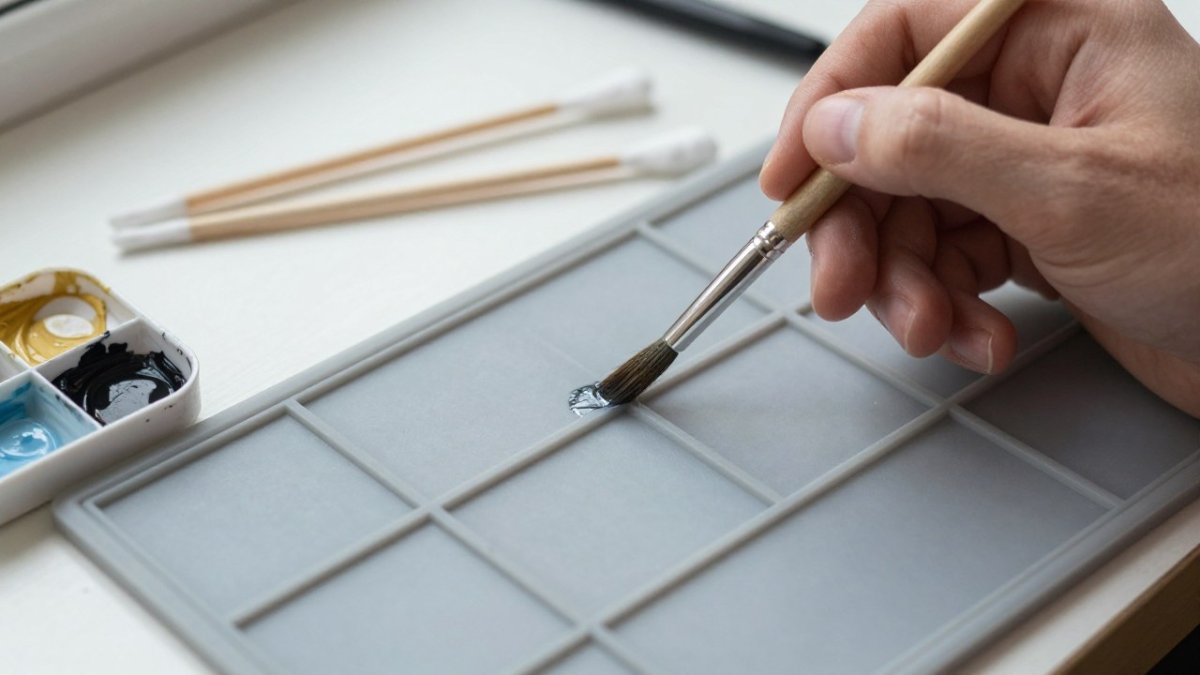
The panel line wash technique comes down to three things: thin the paint, touch it to the groove, and let physics do the work. A properly thinned wash flows into recessed lines by itself. Your brush barely moves.
Controlling Wash Consistency and Dilution
Thin the wash until it moves like skim milk. Too thick and it sits on top of the line. Too thin and it stains the surrounding plastic without filling the groove.
Mix small batches and add thinner a drop at a time. Load a fine brush, touch the tip to one end of a panel groove, and watch. If the pigment races along the line, your dilution is right.
Using Capillary Action to Fill Recessed Lines
Capillary action pulls liquid into narrow spaces (Narrower tube openings allow capillary action to pull water higher.). That is the whole trick. Touch the brush to a recessed line and the wash wicks along the groove on its own.
Work one section at a time. Let each pass dry before adding a second. Two thin passes beat one heavy flood, and flooding is how wash escapes onto flat panels and leaves tide marks.
Tamiya Panel Line Accent Color: Strengths and Limits
Solvent-based products can weaken bare polystyrene if they pool, so applying over a clear coat is a common precaution.
If you want marker alternatives before committing, our guide to the best metallic markers for Gunpla detailing covers specific picks and how they behave on different plastics.
How to Clean Panel Lines Without Damaging the Finish
Cleanup is where beginners often damage kits. Matching the fix to the symptom helps, because the right fix for a tide mark is not the right fix for a cracked corner.
The baseline sequence is the same for every method: let the wash dry fully, then wipe across the line rather than along it, using a fresh swab for each pass. A dry swab lifts surface residue with zero solvent risk. A swab dampened with the matching thinner cuts dried pigment, but only if you keep it barely damp, a soaked swab is how thinner reaches the clear coat and the plastic beneath.
Troubleshooting by Symptom
Staining on flat panels (tide marks). This is wash that escaped the groove and dried on the surface. Re-wet the stain with a barely damp swab of matching thinner and lift it in one direction, then switch to a clean dry swab.
Pooling in corners and deep recesses. Pooled enamel or lacquer is the main cause of crazed or softened plastic.
Broken or patchy lines. A line with gaps is usually a flow problem, not a cleanup problem. The groove was blocked by shavings, mold release, or finger oil, or the wash was too thick to wick.
Rough or dulled cleanup area. If the surface under a cleaned line looks dull or scuffed, you have cut through the clear coat. Stop wiping that area, let it dry, and plan to re-gloss that panel before the final coat.
Softened or cracked plastic. This is a solvent attack, not a cleanup mistake you can polish out. Stop applying solvent to that part, let it fully dry and harden, and treat the area as a structural repair.
Pigment that will not lift from a matte finish. Matte texture grips pigment, so wiping harder removes the matte and leaves a shiny patch.
Keep two swab piles, one damp, one dry, and change swabs often. A dirty swab redeposits pigment on the panel you just cleaned. Light passes with fresh swabs protect the finish better than any single aggressive wipe.
Panel Lining Before or After Top Coat: What Changes
Line before the final top coat. That order protects your work. The top coat seals the pigment, evens the sheen, and stops the lines from fading over time.
Lining after a top coat still works, but the wash sits on the surface and cleanup gets riskier. If you line over a matte coat, expect staining.
One more point: decals. Apply decals before the final clear coat so the coat seals them along with the lines. For the full finishing sequence, see our step-by-step Gundam painting guide.
Scribing, Color Selection, and Troubleshooting by Symptom
Scribing cuts new panel lines into plastic, and it is how advanced builders add detail a kit never had. Use a scribing chisel with light, repeated passes. Let the tool cut, not your force.
Advanced Scribing and Line Refinement
Guide tape keeps new lines straight and even. Score lightly, check the depth, then repeat. A scribed line needs a consistent depth or the wash will pool unevenly.
Clean the groove after scribing. Plastic shavings block capillary flow and leave gaps in your line. For a deeper walkthrough, read our guide on adding custom panel lines to Gunpla kits.
Color Selection and Scale-Aware Contrast
Dark gray suits white and light armor. Black reads too harsh on small scales, so save it for large kits and deep recesses. Brown works on warm tones and reds.
Match contrast to scale. A 1/144 kit needs lighter lines than a 1/100 build, or the detail overwhelms the model.
Troubleshooting by symptom:
- Wash will not flow: too thick, or the surface is oily. Thin it and clean the part.
- Tide marks on flat panels: too much wash applied. Wipe sooner and use less.
- Lines vanished after top coat: wash was too thin. Add a second pass.
- Cracked plastic: enamel pooled on bare plastic. Clear coat first.
Picking Your Panel Line Detailing Supplies at Utopia Toys and Models
Great panel line detailing comes down to a short supply list: a fine brush, a compatible wash, cotton swabs, the right thinner, and a clear coat. Add a scribing chisel once the basics feel easy.
At Utopia Toys and Models, we stock Bandai kits and the tools that go with them, with most items in stock and ready to ship. Our essential Gunpla tools guide rounds out a starter kit, and the Build Burning Gundam HG kit is an affordable model to practice these techniques on.
The challenge is simple: pick one method, prep the surface, and practice on a single runner before you touch a finished build. Start with a marker if you are new, move to washes as your confidence grows.
Frequently Asked Questions
What is the best way to clean panel lines after a wash?
Let the wash dry for 10 to 15 minutes, then dampen a cotton swab with the same solvent used to thin the wash and wipe gently across the surface, not along the groove. A light touch lifts excess product from the raised areas while leaving the recessed line intact. If you used an acrylic wash, water on a swab works; for enamel or oil washes, use the matching thinner. Work one section at a time and swap swabs often so you are not smearing pigment back into the line.
Should I top coat before or after panel lining?
For most builds, apply a gloss clear coat before panel lining and a matte or satin coat after. The gloss layer protects the plastic and decals, gives the wash a smooth surface so capillary action pulls it cleanly into recessed lines, and makes cleanup easier because excess product sits on top rather than soaking in. A final matte coat seals the lines and unifies the finish. If you panel line on bare plastic, skip the first coat but still seal with a top coat at the end.
How do I keep panel lining from looking messy?
Thin your wash more than you think you need, apply it with a fine brush tip touching only the recessed line, and let capillary action do the work instead of painting the surface. Clean excess with a barely damp cotton swab within 10 to 15 minutes. Test your wash on a spare runner first to confirm the dilution and drying time. A gloss clear coat before lining also reduces staining on the surrounding plastic, which is the most common cause of a messy result.
Is Tamiya Panel Line Accent Color safe on bare plastic?
Tamiya Panel Line Accent Color is an enamel-based product, and its thinner can weaken bare polystyrene if it pools or sits too long, especially in seams and joints. Many modelers apply it over a gloss clear coat to protect the plastic. If you use it on bare plastic, keep the application light, avoid flooding recesses, and let parts dry fully before handling. Always work in a ventilated space and keep the product away from children and pets.

