

Table of Contents
- What Is a Snap Fit Model Kit
- Why Snap Fit Models Appeal to Beginners
- Tools Needed for Snap Fit Models
- Snap Fit vs Glue Model Kits: Key Differences
- Painting Snap Fit Models: Techniques and Prep
- Common Assembly Mistakes and How to Avoid Them
- Advanced Modifications for Snap Kits
- Conclusion
Last Updated: August 28, 2026
What Is a Snap Fit Model Kit
A snap fit model kit is a plastic model that assembles without glue, using mechanical press-fit joints where plastic parts lock together through friction and precision molding. Instead of requiring adhesive, snap-fit models rely on locators, tabs, and slots engineered into the molded parts themselves. When you press pieces together, they hold firm through the tension created by their design.
This approach transforms model building from a chemistry project into a mechanical assembly task. You don't wait for glue to cure, worry about excess adhesive ruining details, or manage volatile fumes. The parts simply snap, click, and stay put.
Snap fit model kits have become the standard for hobbyist-grade plastic models, particularly in the Gundam and anime collectible space. Bandai, the manufacturer behind the Gundam Plastic Model series, pioneered this technique and perfected it over decades.
How Snap-Together Assembly Works
Snap-together assembly relies on engineered plastic geometry rather than chemical bonding. Each part tree includes precisely molded locators, pins, pegs, or protrusions that align with corresponding sockets or holes on adjacent pieces. When you press the parts together, the plastic flexes slightly, then locks into place as the locator seats fully into its socket.
The magic happens at the material level. Plastic has just enough give to allow assembly without breaking, but enough rigidity to hold its shape once seated. The joint achieves strength through friction fit, the tighter the tolerance, the more secure the connection.
Most snap-fit models use ABS or polystyrene plastic, both chosen for their balance of flexibility and durability (peer-reviewed research). Parts come molded on sprues, the plastic frames that hold multiple components during manufacturing. You cut individual parts free using side cutters, then assemble them by aligning locators and pressing firmly until you hear or feel the satisfying click of a proper fit.
Snap-Fit vs. Traditional Glue Models
Snap-fit and glue-together models represent two fundamentally different assembly philosophies. Glue models require you to apply plastic cement to bonding surfaces, press parts together, and wait for the adhesive to cure, sometimes hours or overnight. Snap-fit models skip the adhesive entirely. Assembly is immediate, with no cure time, odor, or risk of excess glue clouding details.
The trade-off exists in joint longevity. A properly glued joint creates a permanent molecular bond. A snap-fit joint relies on mechanical tension, which can loosen over years of handling or temperature cycling. However, modern snap-fit engineering has largely closed this gap. Well-designed snap joints hold reliably for decades under normal display and handling conditions.
Snap-fit models also tend to be more affordable to produce, translating to lower retail prices. If you're new to modeling, snap-fit is almost always the better entry point.
Why Snap Fit Models Appeal to Beginners
Snap fit model kits remove the steepest barriers to entry for new builders. You don't need to buy solvents, learn adhesive application techniques, or manage fumes. The assembly process is straightforward: cut parts from the sprue, snap them together, and move forward.
This simplicity accelerates the learning curve. Beginners see results immediately. Within an hour or two, you have a recognizable model standing on your shelf. That quick win builds confidence and motivation to tackle more complex kits.
Snap-fit construction also reduces failure risk. A beginner using glue might apply too much adhesive, creating visible glue seams. With snap-fit kits, mistakes are easier to undo. If you press a part in the wrong orientation, you can usually remove it and reposition it without damage.
The beginner-friendly nature extends to tool requirements. You need a hobby knife to clean seam lines and side cutters to remove parts from sprues. That's it. Most beginners already own basic cutting tools or can acquire them cheaply.
Tools Needed for Snap Fit Models
Building a snap fit model kit requires minimal tooling. Start with these essentials: side cutters for removing parts from sprues, a hobby knife for cleaning seam lines, and fine-grit sandpaper for smoothing rough edges.
Side cutters are the workhorse tool. Quality matters here, cheap cutters leave ragged plastic edges that are harder to clean. A decent pair of hobby-grade side cutters costs under twenty dollars and lasts years. When cutting parts from the sprue, position the cutter so the blade cuts flush against the part, minimizing the nub left behind.
A hobby knife handles detail work. Use it to scrape away remaining plastic nubs, clean seam lines where two halves meet, and trim excess material. A sharp blade is essential; dull blades require more pressure and are more likely to slip. Keep spare blades on hand and replace them frequently.
Sandpaper in the 400-1000 grit range smooths rough edges created by cutting. Start with 400 grit for aggressive smoothing, then progress to 1000 grit for fine finishing. Wet sanding reduces plastic dust and improves smoothness.
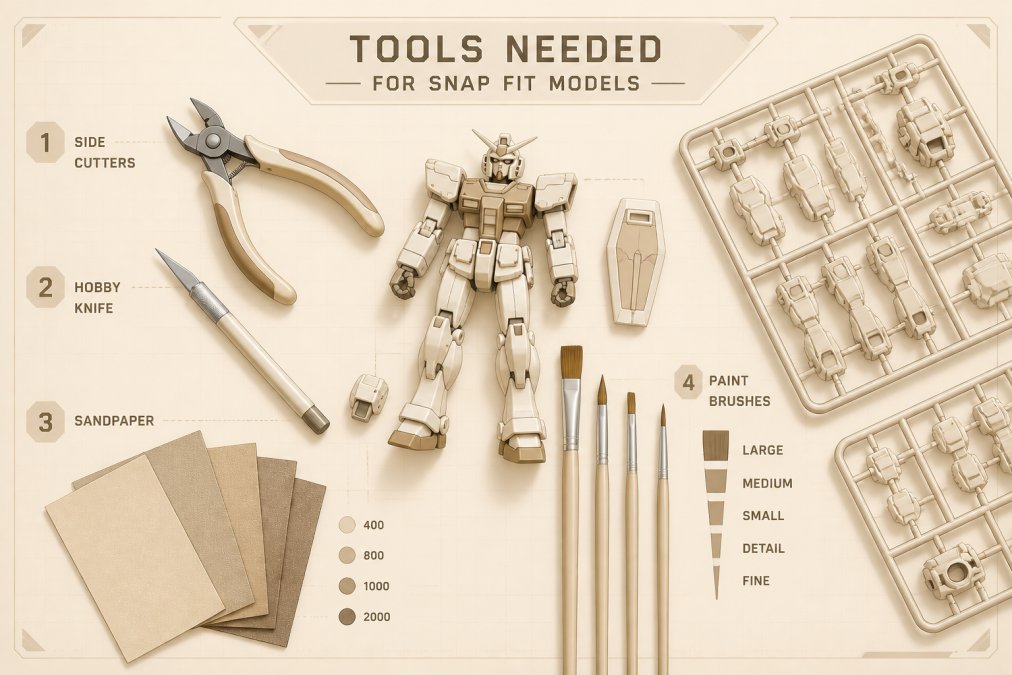
Beyond these basics, consider a parts organizer to keep cut pieces organized during assembly. A magnifying glass helps with small detail work. For painting, you'll want a spray booth or well-ventilated area, masking tape, and appropriate primers and paints. For straight build assembly without painting, the three essential tools above suffice.
Snap Fit vs Glue Model Kits: Key Differences
Assembly Speed and Complexity
Snap fit model kits assemble significantly faster than glue models. A typical snap-fit kit takes two to four hours from start to finish, while an equivalent glue model might require six to ten hours when accounting for cure time between assembly steps (peer-reviewed research).
Assembly complexity also differs. Snap-fit kits are engineered for intuitive assembly. The locators and sockets are designed to align easily and fit together with moderate pressure. If a part doesn't fit smoothly, something is wrong, usually a sprue nub that needs cleaning. Snap-fit design is also more forgiving of minor mistakes. If you press a part in slightly the wrong position, you can usually remove it and reposition it without damage.
Durability and Joint Longevity
Glued joints create a permanent molecular bond that theoretically lasts indefinitely under stable conditions. Snap-fit joints rely on mechanical tension, which can relax over time, especially with temperature cycling or frequent handling.
In practice, modern snap-fit engineering has largely solved this concern. Well-designed snap joints remain tight for decades. The key factor is fit quality, tight tolerances hold better than loose ones. Temperature cycling is the primary stressor for snap-fit joints, as plastic expands and contracts with temperature changes. For display models in climate-controlled environments, snap-fit durability is not a practical concern.
Painting Snap Fit Models: Techniques and Prep
Preparing Parts Before Painting
Painting a snap fit model kit requires preparation before you apply the first coat. Start by assembling the model completely, then disassemble it into major sections. Paint individual parts rather than the assembled model, it's faster, more thorough, and prevents paint from accumulating in crevices.
Clean all parts thoroughly before painting. Use warm water and dish soap to remove mold release agent, a lubricant applied during manufacturing that prevents sticking. Mold release creates a slick surface that paint struggles to adhere to (peer-reviewed research).
Sand all surfaces lightly with 1000-grit sandpaper. This step is crucial for paint adhesion. It slightly roughens the plastic surface, giving paint something to grip. Wipe away all dust with a damp cloth and let parts dry completely.
Apply a primer coat before painting. Primer fills microscopic surface irregularities and provides a uniform base for color coats. Use a primer matched to your plastic type. Spray primer in thin, even coats, allowing each coat to dry before applying the next. Two to three thin coats provide better coverage than one thick coat.
Paint Application and Customization
Once primed, apply your color coats. Acrylic paints work well for snap-fit models because they dry quickly, emit minimal odor, and clean up with water. Enamel paints offer superior durability and finish quality but require solvent cleanup and longer drying times.
Apply paint in thin, even coats. Multiple light coats produce a better finish than fewer heavy coats. Spray painting provides the smoothest finish, but brush painting works perfectly well for detailed work and small parts.
Customization is where snap-fit models shine. Because you assemble the model from individual parts, you can paint each component separately with complete control. Paint internal details before assembly. Use masking tape to isolate areas you want to keep unpainted.
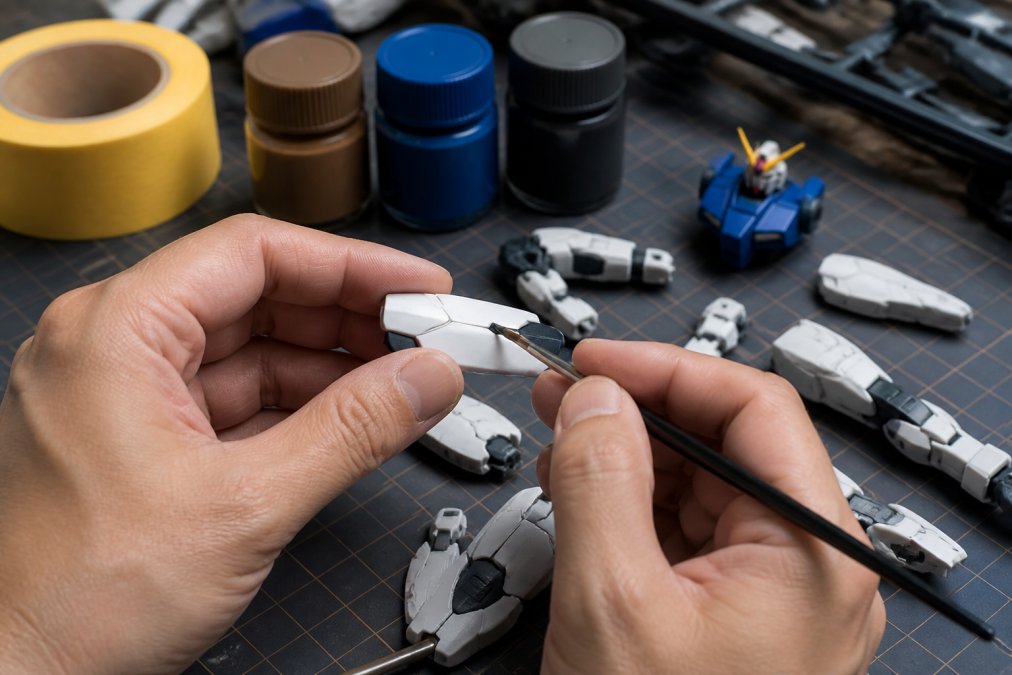
Consider panel lining after painting. Panel lining involves applying thin lines of darker paint or marker along panel seams to add depth and definition. This technique is popular in Gundam modeling and transforms a basic painted model into something with professional-looking detail.
Common Assembly Mistakes and How to Avoid Them
The most common mistake is forcing parts together before checking alignment. If a part doesn't fit smoothly, stop and investigate. Usually, a sprue nub is preventing proper seating. Clean it away and try again. Forcing creates stress on the plastic, potentially breaking a locator or cracking the part.
Another frequent error is assembling in the wrong order. Some snap-fit kits have specific assembly sequences. Read the instruction manual completely before starting. Experienced builders often skim instructions and pay for it with parts that don't fit together.
Overtightening joints is less common but damaging when it happens. Snap-fit joints need firm pressure but not excessive force. If you're straining to press a part together, something is misaligned.
Neglecting to clean sprue nubs creates visible imperfections, especially on painted models. Take time to clean each part carefully. A sharp hobby knife and light sanding produce clean results.
Many beginners underestimate the importance of part preparation before assembly. Rough edges, visible seam lines, and sprue nubs are much easier to address before assembly than after. Spend time on prep work. It's the difference between a model that looks like a toy and one that looks like a finished piece.
Advanced Modifications for Snap Kits
Once you've mastered basic assembly and painting, snap-fit models offer surprising room for customization. Experienced builders go beyond the original design through kitbashing, combining parts from multiple kits to create new designs.
Kitbashing exploits the modular nature of snap-fit construction. Remove an arm from one kit and attach it to another. Swap heads between models. Combine torsos and legs from different kits. The snap-fit system's flexibility makes these modifications straightforward compared to glued models.
Structural reinforcement is another advanced technique. Some builders reinforce internal joints with small amounts of plastic cement or epoxy, creating hybrid assemblies that combine snap-fit's ease with glue's durability.
Detail enhancement involves adding aftermarket parts, replacement armor, weapons, or accessories designed to fit standard snap-fit models. Many builders purchase detail upgrade kits that replace standard parts with higher-quality alternatives.
Custom painting techniques like weathering and panel lining elevate a basic model into something with real character. Weathering involves applying washes and dry brushing to simulate wear, dust, and battle damage. These techniques are learned through practice but produce dramatic results.
Snap fit model kits represent the most accessible entry point into plastic model building. Whether you're exploring the hobby for the first time or looking for a quick-build option, snap-fit construction eliminates barriers while maintaining the satisfaction of creating something tangible with your hands. At Utopia Toys and Models, we stock a wide selection of snap-fit kits from industry-leading manufacturers like Bandai, Funko, and Kotobukiya, offering everything from beginner-friendly models to advanced kits for experienced builders. Explore our collection and find the perfect kit to start or expand your modeling journey.
Frequently Asked Questions
What is the main difference between snap fit and glue model kits?
Snap fit model kits use mechanical press-fit joints and locators that hold parts together without adhesive, while glue-together models require plastic cement to bond components. Snap-fit assembly is faster and cleaner, making it ideal for beginners. Glue models typically offer stronger permanent bonds but demand more precision and cleanup. The choice depends on your skill level and whether you prioritize speed or structural permanence.
Do you need special tools to build a snap fit model kit?
Basic hobby tools make assembly easier but aren't always required. A hobby knife or side cutters help remove parts cleanly from the sprue without damage. Sandpaper smooths rough edges where parts were cut. For most straight builds, these tools are optional, many builders start with just their hands. However, investing in quality hobby-grade tools significantly improves the final result and reduces frustration, especially for detail-oriented hobbyists.
Can you paint snap fit models after assembly?
Yes, you can paint snap fit models before or after assembly. Painting before assembly allows easier access to all surfaces and prevents paint from interfering with joints. Disassemble the model, paint individual parts, let them dry completely, then reassemble. If painting after assembly, mask off areas where parts connect to avoid paint buildup that could weaken friction fits. Either approach works, choose based on your preferred workflow and the level of detail you want.
How long do snap fit joints typically last?
Snap fit joints remain functional for years when assembled correctly, though joint tension naturally decreases over time through repeated handling and stress. Plastic can develop micro-fractures from constant pressure, especially in high-stress connection points. Proper assembly, avoiding over-forcing parts and respecting locator alignment, extends longevity significantly. For display models handled infrequently, snap joints remain stable indefinitely. For frequently handled or posed figures, periodic reassembly may be needed to maintain tight connections.
This article was written using GrandRanker