

Table of Contents
- Defining Lacquer vs. Acrylic Paint for Model Building
- Head-to-Head Comparison: Lacquer and Acrylic for Gunpla
- Acrylic vs. Lacquer Durability for Gunpla
- Best Airbrush Paint for Gunpla: Performance Breakdown
- Safety Precautions for Lacquer Model Paint
- Hybrid Painting Workflows: When to Mix Both Types
- Which Paint Should You Choose?
Last Updated: August 25, 2026
Defining Lacquer vs. Acrylic Paint for Model Building
Lacquer paint is a solvent-based coating that cures through evaporation, creating a hard, durable finish prized for smooth surfaces and vibrant color saturation. Acrylic paint is a water-based formula where pigments suspend in a polymer emulsion, drying through water evaporation and offering safety advantages without sacrificing durability. For Gunpla builders, the choice between lacquer and acrylic fundamentally shapes your workflow, workspace requirements, and final model finish.
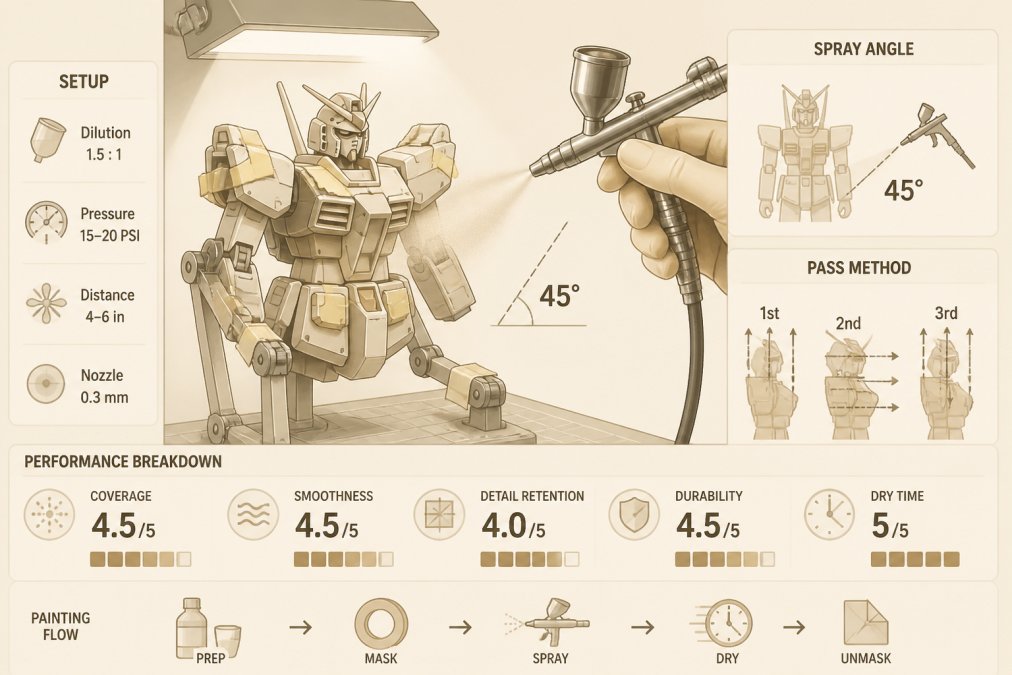
Lacquer flows through airbrushes with exceptional consistency, atomizes into a fine mist, and levels itself on the model surface, producing a glass-smooth finish. Acrylic requires more careful thinning ratios and multiple thin coats to achieve opacity, but eliminates the ventilation demands and solvent exposure that come with lacquer. Neither is objectively "better", the real question is which aligns with your skill level, workspace, and priorities.
Head-to-Head Comparison: Lacquer and Acrylic for Gunpla
| Feature | Lacquer Paint | Acrylic Paint | Winner for Most Builders |
|---|---|---|---|
| Drying Time | 15-30 minutes | 30-60 minutes | Lacquer (faster layering) |
| Airbrush Flow | Excellent, minimal thinning | Requires careful thinning | Lacquer (more forgiving) |
| Surface Finish | Ultra-smooth, self-leveling | Smooth with proper technique | Lacquer (less effort) |
| Ventilation Required | Yes, dedicated setup | Minimal, basic airflow | Acrylic (easier workspace) |
| Solvent Exposure | High, requires PPE | None, water cleanup | Acrylic (safer) |
| Scratch Resistance | Excellent once cured | Very good with proper technique | Lacquer (slightly tougher) |
| Color Range | Extensive (GaiaNotes, Tamiya) | Strong (Vallejo Mecha Color) | Tie |
| Learning Curve | Moderate to steep | Beginner-friendly | Acrylic (more forgiving) |
| Layering Compatibility | Lacquer over acrylic works; reverse causes melting | Acrylic over lacquer works only with primer | Lacquer (more flexible) |
| Cost per Model | Higher per coat | Lower per coat | Acrylic (budget-friendly) |
The table reveals a pattern: lacquer excels at professional-grade results but demands infrastructure and safety precautions. Acrylic trades some performance for accessibility. For most builders starting out, acrylic wins on practicality. For experienced modelers with proper ventilation, lacquer unlocks superior finishes.
Acrylic vs. Lacquer Durability for Gunpla
Once fully cured, lacquer paint creates a harder film that resists scratching and environmental exposure better than most acrylics. The solvent-based curing process produces a chemical bond with the plastic substrate that feels genuinely tougher under stress.
Acrylic durability depends heavily on application technique. A properly applied acrylic finish with multiple thin coats and appropriate primer adhesion resists handling and minor impacts remarkably well. Vallejo Mecha Color, specifically formulated for robots and mechas, achieves scratch resistance comparable to lacquer through maximum pigment density. For display-only Gunpla, the durability gap barely matters. For handled models, lacquer's harder cured state provides genuine insurance against wear.
Lacquer also maintains gloss and color saturation longer under UV exposure and environmental stress. Temperature stability favors lacquer as well, acrylic finishes can soften slightly in extreme heat, while lacquer's chemical cure produces a finish stable across wider temperature ranges.
Best Airbrush Paint for Gunpla: Performance Breakdown
Lacquer paint dominates airbrushing because its viscosity and volatility create ideal atomization conditions. The solvent content keeps the paint flowing without clogging, and quick evaporation prevents orange peel texture.
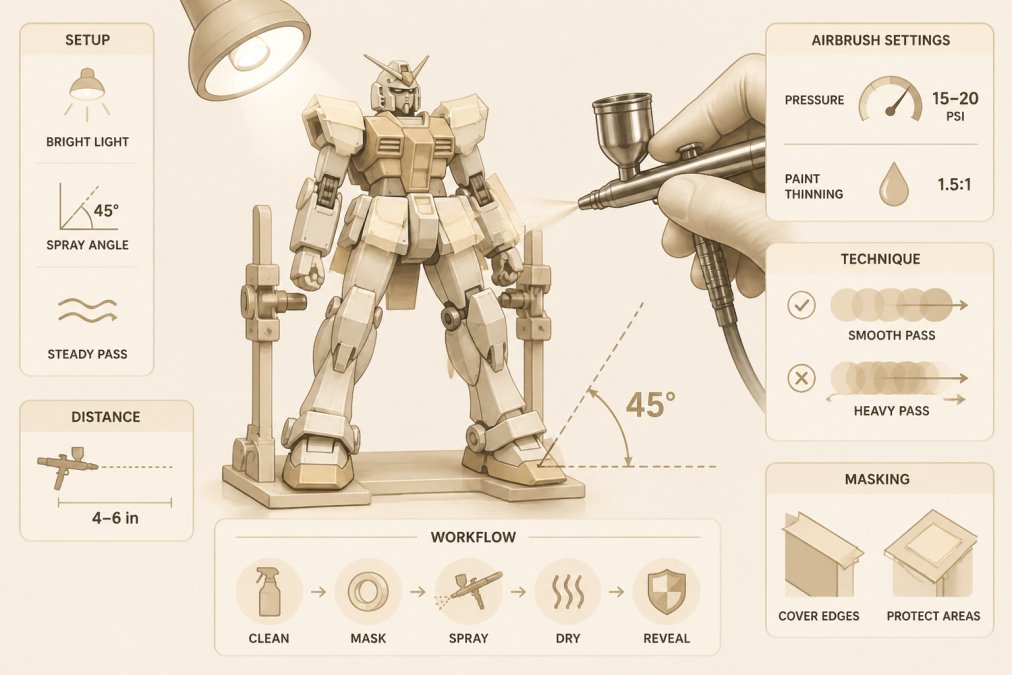
Acrylic airbrushing requires discipline. The paint thickens quickly as water evaporates, demanding frequent needle cleaning and precise thinner ratios. Many builders thin acrylics to 1:1 or 1:1.5 (paint to thinner) for airbrush consistency, compared to lacquer's more forgiving 1:1 baseline. This means 3-4 thin acrylic coats versus 2-3 lacquer coats for the same opacity.
GaiaNotes Lacquer Paint and Tamiya Lacquer (LP Series) excel at airbrushing with ultra-fine pigments and consistent flow. For acrylic, Vallejo Mecha Color was engineered specifically for airbrush application on model kits and requires less aggressive thinning. The performance gap narrows with experience, a skilled builder produces excellent results with acrylic, while a beginner with lacquer might struggle without understanding thinner ratios. Lacquer's advantage is forgiveness: it wants to flow smoothly and level itself.
Safety Precautions for Lacquer Model Paint
Lacquer paint's solvent content creates legitimate health and fire risks. The fumes contain volatile organic compounds, primarily toluene, xylene, and hexane, that irritate respiratory passages, eyes, and skin. Prolonged exposure without protection causes headaches, dizziness, and respiratory irritation.
Respirator Selection and Ratings
A proper respirator is non-negotiable for lacquer work. Use a half-face or full-face respirator with replaceable cartridges rated specifically for organic vapors (the CDC). Look for cartridges marked OV (Organic Vapor) or OV/P100 (organic vapor plus particulate). The "P100" designation means the cartridge filters 99.97% of particles down to 0.3 microns (osha.gov).
Common cartridge options include 3M 6001 or 6002 (OV/P100), industry standard for lacquer work lasting approximately 40 hours of continuous use. Replace cartridges if you smell solvent fumes while wearing the respirator. Most builders replace cartridges every 4-6 weeks of regular use as a safety margin.
The respirator must seal properly. Perform a seal check before first use: cover the cartridge inlet with your palm and inhale gently. The mask should collapse slightly against your face. If air leaks around the edges, adjust the straps or try a different size.
Ventilation Infrastructure
A respirator alone is insufficient. You need ventilation to remove solvent vapors from your workspace before they accumulate to dangerous levels.
Minimum setup (apartment-friendly): A window fan positioned in a window frame, blowing outward, to create negative pressure in the room, with a secondary window or door cracked open for fresh air intake. This works for occasional spray sessions (1-2 hours per week) in a small room. application techniques.
Recommended setup (dedicated hobby space): A spray booth with an extraction fan rated for at least 200-300 CFM (cubic feet per minute) airflow, with ducting that vents fumes outside the building. A simple spray booth with a 200 CFM extraction fan and ducting to a window costs $150-$400 and provides reliable protection.
Skin and Eye Protection
Wear nitrile gloves for short sessions or latex/butyl rubber gloves for extended spraying, as lacquer thinner can degrade nitrile over time. Safety glasses with side shields prevent splashes and overspray. A full-face respirator eliminates eye protection concerns by covering the eyes.
Fire Safety and Storage
Lacquer thinner is flammable with a flash point around 100°F (fema.gov). Keep lacquer and thinner in approved metal cans in a cool, well-ventilated area away from heat sources and open flames. Never smoke while working with lacquer. Keep a fire extinguisher rated for flammable liquids (Class B) in your workspace.
Acrylic as a Safety Alternative
Acrylic paint eliminates these concerns entirely. Water-based acrylics produce no volatile organic compounds. A dust mask suffices for particulates. Cleanup is water and soap. No special ventilation required beyond basic airflow. No fire risk. This safety advantage alone justifies acrylic for builders in apartments, shared spaces, or without dedicated ventilation infrastructure.
Hybrid Painting Workflows: When to Mix Both Types
Advanced builders layer lacquer and acrylic strategically to combine their strengths. The key principle: lacquer can go over acrylic, but acrylic over lacquer creates adhesion problems.
A common hybrid workflow starts with acrylic primer for adhesion and easy cleanup. Once primed, spray lacquer base coats for a glass-smooth finish and quick drying. Then layer acrylic detail colors and weathering effects on top. The acrylic topcoat adheres to the lacquer base without issue.
Another approach uses lacquer for base coats and panel lines, then acrylic enamel washes for weathering and shading. Enamel washes flow into panel lines and recesses, creating depth and realism.
Hybrid workflows require understanding curing times. Acrylic needs 24 hours to fully cure before applying lacquer over it. Lacquer cures in 30 minutes, so you can layer acrylic over lacquer almost immediately. The real value emerges on complex models: acrylic primer for easy prep, lacquer for main color work, acrylic for details. You get the finish quality of lacquer without needing to spray every single color through a respirator.
Which Paint Should You Choose?
Choose lacquer if you have proper ventilation and are comfortable with safety precautions. Lacquer delivers superior finishes with less effort. The glass-smooth self-leveling surface, quick drying, and exceptional durability make it worth the setup investment for serious builders.
Choose acrylic if you're starting out, building in an apartment, or prioritizing convenience. Acrylic removes barriers to entry. No respirator, no spray booth, no solvent disposal concerns. Vallejo Mecha Color specifically designed for Gunpla delivers durability and finish quality that satisfies most builders. The learning curve is gentler.
Consider a hybrid workflow if you're experienced enough to manage both. Start with acrylic primer, spray lacquer base coats, finish with acrylic details. This captures lacquer's finish quality while keeping total solvent exposure manageable.
Lacquer is objectively superior for finish quality once cured. Acrylic is superior for accessibility, safety, and workspace flexibility. Your choice depends on whether you're optimizing for results or practicality. Most builders eventually use both, acrylic for learning and convenience, lacquer for projects where the finish matters most.
At Utopia Toys and Models, we stock both lacquer and acrylic options from trusted brands. Whether you're grabbing Tamiya Lacquer for your next High Grade or Vallejo Mecha Color for detail work, we have the paints, thinners, and supplies to support your workflow. Our team can help you figure out which approach matches your workspace and experience level.
Frequently Asked Questions
Which type of paint is better for Gunpla, acrylic or lacquer?
Neither is universally better, it depends on your priorities. Lacquer paint offers superior durability, scratch resistance, and smoother finishes with fewer coats, making it ideal for experienced builders. Acrylic paint is safer (water-based, no harsh solvents), easier to clean up, and better for beginners, though it may require multiple thin coats and longer drying times. For airbrush work on Gunpla, lacquer provides better atomization and flow. For safety and convenience, acrylic wins.
Do I need a respirator when using lacquer paint for models?
Yes. Lacquer paint is solvent-based and releases volatile organic compounds (VOCs) during application and curing. OSHA standards recommend respiratory protection when working with solvent-based paints in enclosed or poorly ventilated spaces. A respirator with organic vapor cartridges is essential, along with good ventilation. Acrylic paint, being water-based, does not require a respirator but still benefits from adequate airflow to prevent inhalation of fine mist particles.
What are the downsides of using lacquer paint?
Lacquer's main drawbacks are health and safety concerns: it produces strong fumes requiring respiratory protection, proper ventilation, and careful handling of flammable solvents. It also has a steeper learning curve, incorrect thinner ratios can cause poor atomization, runs, or orange-peel texture. Cost-per-model can be higher than acrylic. Additionally, lacquer requires specific thinners and cleanup solvents, adding to material expenses and disposal complexity.
What's the difference between acrylic and lacquer durability for Gunpla?
Lacquer cures to a harder, more scratch-resistant finish due to its chemical composition and solvent evaporation process. It resists handling wear, impacts, and abrasion better than acrylic. Acrylic paint, when properly applied in thin layers and sealed with a clear coat, achieves good durability and can withstand moderate handling. However, lacquer's cured state is inherently tougher. For display models with minimal handling, acrylic is sufficient; for frequently handled or competitive display pieces, lacquer is superior.
The choice between lacquer and acrylic ultimately reflects your priorities. If you're building your first Gundam, acrylic removes friction and lets you focus on assembly and basic painting. As your skills develop and you invest in proper ventilation, lacquer becomes the natural next step for builders chasing competition-level finishes. Both paths lead to excellent models, the route you take depends on your constraints and ambitions.
This article was written using GrandRanker