

Table of Contents
- The Real Cost of Starting With Cheap Tools
- Essential Model Building Tools for Beginners
- How to Clean Up Plastic Model Parts Without Overspending
- Beginner Model Building Mistakes to Avoid
- When Specialized Tools Actually Pay for Themselves
- Ergonomics and Hand Fatigue: Why Tool Quality Matters
- Tool Longevity and Maintenance for Long-Term Builders
- Frequently Asked Questions
Last Updated: September 17, 2026
The Real Cost of Starting With Cheap Tools
Beginners often assume budget tools suffice for their first model, but cheap tools fail mid-project or produce poor results that force costly replacements. The real cost isn't the initial price, it's the replacement cycle that follows.
How Cheap Tools Fail
A cheap hobby knife dulls quickly and provides poor control, tearing plastic instead of cutting cleanly. This requires an extra hour of sanding per kit and creates visible defects that are nearly impossible to fix after assembly.
Budget cutters crush plastic, creating stress marks that require aggressive sanding. Mid-range nippers ($25-35) minimize crushing; premium nippers ($50-70) maintain sharpness through dozens of kits. Budget cutters require 30-45 minutes of sanding per kit versus 10-15 minutes for quality cutters.
Cheap adhesives fail under stress. Superglue creates brittle bonds; budget plastic cement has inconsistent viscosity, leading to weak joints. A failed joint mid-build forces you to buy specialty cement, adding $8-12 to your total cost.
The Replacement Cycle
A beginner starting with a $15 budget kit typically replaces tools after the first kit: a mid-range knife ($12-18), quality cutters ($30-40), proper cement ($6-10), and sanding supplies ($15-20). Total spent on replacements: $75-110 over 2-3 kits, plus the original $15 kit.
Starting with $80-120 in quality basics (X-Acto #1 knife, mid-range nippers, Tamiya cement, sanding sticks, cutting mat) lasts 15-20 kits. Per-kit cost: $5-8 in wear versus $25-40 per kit when replacing cheap tools.
The Hidden Cost: Frustration and Skill Development
Cheap tools create a frustration cycle that damages skill development. Dull blades force harder pressing, increasing slip risk. Poor ergonomics cause hand cramping. Worn sanding sticks leave rough seams. Most people quit before developing real skills.
The real cost is the lost opportunity to develop a hobby you might have loved. Beginners with quality tools complete their first kit successfully and stay engaged. Those who start cheap often abandon the hobby after one frustrating build, having spent nearly as much on tools they'll never use again.
Essential Model Building Tools for Beginners
Building a plastic scale model requires precision cutting, clean adhesive application, and smooth surface preparation. The right tools make the difference between a project you enjoy and one you abandon.
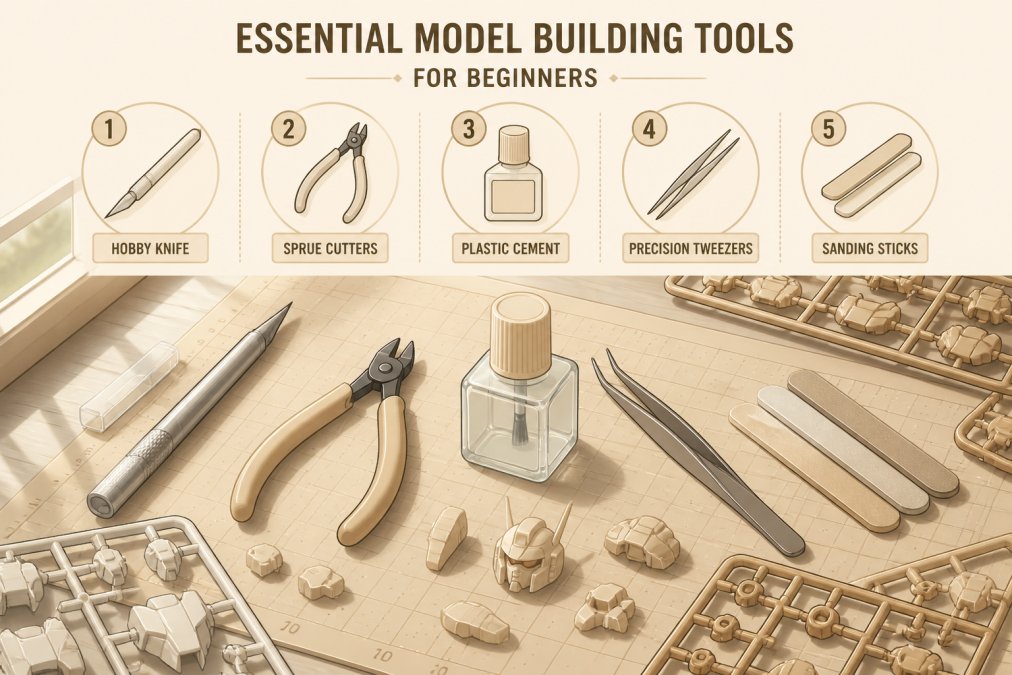
Hobby Knives and Precision Cutters
The X-Acto #1 Precision Knife is the industry standard for beginners, lightweight, with solid control and cheap, widely available replacement blades.
Sprue cutters cut plastic cleanly without crushing. The GodHand SPN-120 Ultimate Nipper ($55) uses a single-blade design that minimizes stress marks. The difference between a $10 cutter and a $55 cutter is measured in post-cutting sanding time.
A standard nipper works fine for most kits; a specialized nipper cuts cleanup time dramatically. Both prevent spending hours sanding parts that could have been cut cleanly.
Adhesives and Bonding Supplies
Plastic cement welds plastic together; superglue creates brittle bonds that fail under stress. Tamiya Extra Thin Cement is beginner-friendly, flowing into joints via capillary action with minimal residue.
The brush applicator lets you apply cement precisely; the fast-acting formula keeps parts aligned while curing.
Sanding and Surface Preparation
Sanding removes mold lines and rough edges. Start with 400-600 grit for material removal, then 800-1000 grit for smoothing. This progression prevents scratches that catch light and ruin your finish.
A cutting mat protects your work surface and makes cleanup faster. File sets smooth hard-to-reach areas that sanding sticks can't reach.
How to Clean Up Plastic Model Parts Without Overspending
Part cleanup is where beginners waste the most time and money: cut parts from the sprue, remove the gate, sand smooth, then inspect.
Cut parts away from the sprue, leaving a small gate stub. Cutting right at the surface creates stress marks and cracks. Leave plastic and trim carefully.
Make small, controlled cuts to remove the remaining gate. A dull blade forces harder pressing, increasing slip risk and damage.
Sand to remove the gate mark and stress marks. Start coarse, finish fine to prevent scratches. Many beginners skip fine-grit and get rough results under paint.
Precision tweezers let you hold small parts steady, keeping fingers clear of cutting edges and adhesives, and position parts accurately during assembly.
Beginner Model Building Mistakes to Avoid
The most common mistake is rushing part cleanup. Every hour spent on surface preparation saves two hours later fixing visible defects.
Using the wrong adhesive is another mistake. Superglue on plastic creates weak bonds; plastic cement on metal doesn't work. Kit instructions specify adhesive for a reason.
Skipping safety equipment is a third mistake. Use a dust mask, gloves, and good airflow. Safety isn't optional.
Underestimating eye strain is another mistake. A good work lamp and breaks every 30 minutes prevent headaches and accidents.
When Specialized Tools Actually Pay for Themselves
Whether specialized tools are worth it depends on your building journey. Ask whether you've mastered the skill that tool supports. This prevents overspending on equipment you're not ready to use.
The Beginner Foundation (Kits 1-3)
Your first three kits should use: hobby knife, basic cutters ($10-15), plastic cement, sanding sticks (400/600/1000 grit), cutting mat, and tweezers. Total: $50-75. These teach fundamentals. You're not ready for upgrades yet.
Don't buy premium tools before mastering basic technique. A $60 nipper in inexperienced hands produces barely better results than a $15 cutter. Build 2-3 kits first to develop the muscle memory that makes premium tools worthwhile.
The Intermediate Upgrade (Kits 4-8)
After 3-4 kits, you've identified which tools slow you down. This is when specialized upgrades pay for themselves:
If sanding takes forever: Upgrade to a mid-range nipper ($30-40). The difference is 20-30 minutes of sanding per kit. Over five kits, that's 2-2.5 hours saved.
If your hands cramp: Invest in ergonomic tools. A cushioned-grip knife ($15-20) or padded-handle nippers ($40-50) reduce fatigue and let you build longer.
If your paint finish looks rough: Upgrade to fresh sanding sticks (1000/1200/1500 grit, $12-18). This low-cost upgrade has visible results.
If you're struggling with small parts: Precision tweezers ($8-12) and a magnifying lamp ($25-40) make skilled work possible.
Total intermediate investment: $100-150 across 2-3 upgrades, each addressing a bottleneck you've identified.
The Advanced Stage (Kits 9+)
Once you've completed 8-10 kits and mastered surface preparation, you're ready for tools that require skill to use effectively:
Airbrush system ($160-250): Not a beginner tool. Requires learning spray technique, paint mixing, and maintenance. Intermediate builders with 8+ kits and paint knowledge are ready. The payoff is professional finishes. Only invest if you plan 15+ kits.
Specialized sanding tools ($40-80): Motorized pens and rotary tools reduce strain and speed surface prep, but only if you already know how to sand by hand.
Airbrush compressor and paint booth ($300-500): This is infrastructure, not a tool. Only consider after 15+ completed kits prove long-term commitment.
The Decision Framework
Before buying any specialized tool, ask:
- Have I completed 2-3 kits with basic tools? If no, wait.
- Does this tool address a specific bottleneck? Buy tools to solve problems you've encountered.
- Do I have the skill to use it effectively? A premium nipper is wasted without proper technique.
- Will I use this on 5+ more kits? If yes, the upgrade pays for itself.
- Can I maintain this tool? Nippers need sharpening; airbrushes need cleaning.
Master basics, upgrade where you bottleneck, add advanced tools only when you've proven commitment. This ensures you spend money on tools you'll actually use.
Ergonomics and Hand Fatigue: Why Tool Quality Matters
Building models is physically demanding. Poor tools force harder gripping, creating fatigue, cramping, and pain.
A well-designed knife has a comfortable handle; cheap knives tire your hand quickly. Premium nippers have ergonomic grips that keep hands comfortable longer.
Good lighting lets you work at a comfortable distance. Taking breaks prevents cumulative strain.
Hand fatigue is why many people quit. Usually, they just have poor tools that make the work harder than it needs to be.
Tool Longevity and Maintenance for Long-Term Builders
Quality tools last years with maintenance. Keep blades sharp by avoiding hard materials. Cap adhesives tightly after each use.
Clean tools after each session. Wipe blades and occasionally clean with appropriate solvents to keep tools in working condition.
Store tools properly: blades in protective cases, nippers safely, adhesives in cool, dry storage away from sunlight.
This 10-minute maintenance routine extends tool life by years. Specialized model tools beginners buy will outlast dozens of kits if treated well.
Starting with the right specialized model tools beginners actually need transforms the building experience. You'll complete kits faster, produce better results, and actually enjoy the process.
Frequently Asked Questions
Do I need specialized model kit tools or can I use kitchen knives and scissors?
Kitchen knives and scissors are unsafe and ineffective for scale modeling. Hobby knives offer precise control and proper blade angles for clean cuts on plastic sprues. Specialized sprue cutters minimize stress marks that require extensive sanding later. Using wrong tools wastes time, damages parts, and increases injury risk. A basic hobby knife costs $5-10 and pays for itself in the first few projects by reducing rework.
What are the essential model building tools for beginners that actually matter?
Start with a hobby knife, sprue cutters or flush cutters, plastic cement, tweezers, and sanding sticks. These five items cover part removal, assembly, and surface prep, the core tasks of any build. A cutting mat protects your workspace. Everything else is optional until you've completed 3-5 kits and know your building style. Investing in quality versions of these basics reduces frustration and improves results far more than buying expensive specialty tools you won't use.
How much should I spend on model building tools as a beginner?
A functional beginner setup costs $30-50: basic hobby knife ($5-10), standard sprue cutters ($8-15), plastic cement ($6-8), tweezers ($5-8), and sanding sticks ($3-5). This covers all essential tasks. Avoid cheap tool sets that bundle low-quality items you don't need. Upgrade individual tools as you identify bottlenecks in your building process, not based on marketing. Quality matters more than quantity for beginners.
Are premium tools like GodHand nippers worth buying as a beginner?
Not initially. Premium nippers ($50-60) excel at minimizing cleanup on delicate parts, but beginners benefit more from learning proper technique with standard tools first. After completing 5-10 kits, if you're spending hours sanding seam lines, an upgrade makes sense. Premium tools reward builders with established habits and high-detail projects. Start basic, identify your specific pain point, then upgrade that single tool rather than buying a premium set upfront.