

Quick Summary
Yes, sanding plastic models before painting is usually worth doing, but only where it removes visible flaws such as mold lines, seam lines, nubs and flash. Sanding that smooths the surface gives primer and paint a better grip, while over-sanding can flatten panel lines and thin parts. Stop one grit finer than your deepest visible scratch, then clean away all dust before priming.
- Sand only where you see mold lines, seam lines, nub marks or flash.
- Use 400 grit for nub and flash removal, and keep pressure light.
- Use 600 grit to blend seam and mold lines without gouging.
- Finish bare plastic with 800 to 1000 grit before priming.
- Wash parts with mild dish soap after sanding and let them dry before priming.
Table of Contents
- Should You Sand Plastic Models Before Painting?
- Why Sanding Matters Before You Paint a Plastic Model
- Deciding When to Sand and When to Leave the Plastic Alone
- Best Sandpaper Grit for Plastic Models at Each Stage
- Cleaning Plastic Models After Sanding to Remove Dust
- Priming Plastic Model Kits Before Paint
- Step-by-Step Workflow: Sanding to Paint
- Troubleshooting Finish Defects and Recovering From Over-Sanding
- Choosing Your Next Build: Tools and Supplies From Utopia Toys and Models
- Frequently Asked Questions
Should You Sand Plastic Models Before Painting?
Last Updated: November 18, 2026
Sanding plastic models before painting is one of the most common questions hobbyists ask, and the honest answer is that it depends on the kit and the surface. Because surface preparation matters beyond plastic kits, the same care with sanding and paint adhesion can help you finish a 3D-printed prop.
Sanding removes mold lines, seam marks, and nub residue, giving paint a smooth base to grip. Done poorly, though, it leaves scratches that show through every coat. If you have already sanded through primer or taken off too much, recover from over-sanding with a step-by-step fix.
Why Sanding Matters Before You Paint a Plastic Model
Sanding matters because paint shows every flaw underneath it. Plastic kits come off the sprue with small bumps, faint seam lines, and tiny nubs where parts attached.
A smooth surface also helps paint adhesion. Many hobbyists find that sanded plastic accepts primer more evenly than raw, glossy plastic.
Sanding is about preparation, not perfection. Aim to remove what shows and stop there.
Deciding When to Sand and When to Leave the Plastic Alone
Not every part needs sanding. Over-sanding is one of the fastest ways to ruin a model, so take a moment to assess each piece first.
Sand when you see:
- Visible mold lines running across smooth surfaces
- Seam lines where two halves joined
- Nub marks left after cutting parts from the sprue
- Flash, which is thin excess plastic along edges
Leave alone when:
- Surface detail is fine and crisp, such as panel lines or engraved textures
- The part is thin and could snap or lose its shape
- The area is already smooth from the mold
A common mistake is sanding detail lines flat. Once a panel line is gone, filling it back in takes real effort. Work around detail instead of through it.
Best Sandpaper Grit for Plastic Models at Each Stage
Grit choice matters more than most beginners expect, and the right number depends on what you are trying to remove. Coarse paper cuts fast but leaves deep scratches that can telegraph through primer.
Use this task-to-grit map as a starting point:
- Removing sprue nubs and heavy flash (400 grit): Start here only where material actually needs to come off. Keep pressure light and check often, because 400 grit can flatten surrounding detail quickly.
- Smoothing seam lines and mold lines (600 grit): After the nub is flush, 600 grit blends the repair into the surrounding surface without gouging.
- Final smoothing on bare plastic before primer (800 to 1000 grit): This is the working range for most modelers. It leaves a surface that primer can grip without polishing the plastic so slick that paint beads.
- Leveling primer and knocking down dust nibs (1000 to 1500 grit): Use these grits between primer coats to remove roughness and minor orange-peel texture without cutting through to bare plastic.
- Polishing a glossy base or clear coat (2000 grit and up): Reserved for final finish work, not for preparing bare plastic for paint.
A common pattern is to stop one step finer than the deepest scratch you can still see under good light. Going finer than that rarely improves adhesion and can actually reduce it on glossy polystyrene, because paint and primer need a slight mechanical tooth to bond.
Matching Grit to the Plastic and the Part
Not all model plastics behave the same. Polystyrene, the most common material in injection-molded kits, sands predictably and tolerates a wide grit range. ABS and polycarbonate parts, found on some joints and inner frames, are tougher and can gum up paper at high speeds, so use fresh paper and lighter pressure.
Part size and detail also drive grit choice. On a large armor plate or a smooth aircraft fuselage, you can work through the full progression.
Wet Sanding Versus Dry Sanding
Wet sanding uses water with the paper and keeps dust down.
For most model work, dry sand at coarse grits, then wet sand at finer grits. Let parts dry fully before primer.
Watch out: wet sanding around decals, bare metal finishes, or any water-sensitive detail can lift or stain the surrounding area, so mask or remove those parts first.
The grit progression below summarises the stages the article walks through, from rough removal to final smoothing.
| Task | Grit | Note |
|---|---|---|
| Removing sprue nubs and heavy flash | 400 | Keep pressure light and check often |
| Smoothing seam and mold lines | 600 | Blends repairs without gouging |
| Final smoothing before primer | 800 to 1000 | Gives primer a grip without a slick surface |
| Leveling primer between coats | 1000 to 1500 | Removes roughness and orange peel |
| Polishing a glossy base or clear coat | 2000 and up | For finish work, not bare plastic prep |
Cleaning Plastic Models After Sanding to Remove Dust
Sanding leaves a fine layer of plastic dust that will ruin paint adhesion if left behind. Clean every part before priming.
A simple process works well:
- Brush away loose dust with a soft brush
- Wash parts in warm water with a drop of mild dish soap
- Rinse thoroughly and let them air dry for at least a few hours
- Check for oily fingerprints, which can block paint
Oil from your hands is easy to miss. Handle cleaned parts with clean gloves or by the sprue where possible.
Priming Plastic Model Kits Before Paint
Primer gives paint something to bond to and reveals remaining flaws in a contrasting color.
Apply primer in thin, even coats from about 6 to 8 inches away. Two light coats work better than one heavy one, which can pool in recesses and hide detail.
Check the primer surface under good light. Any remaining scratches or seam lines will show up now, which is the best time to correct them.
Step-by-Step Workflow: Sanding to Paint
Follow this sequence for a reliable finish:
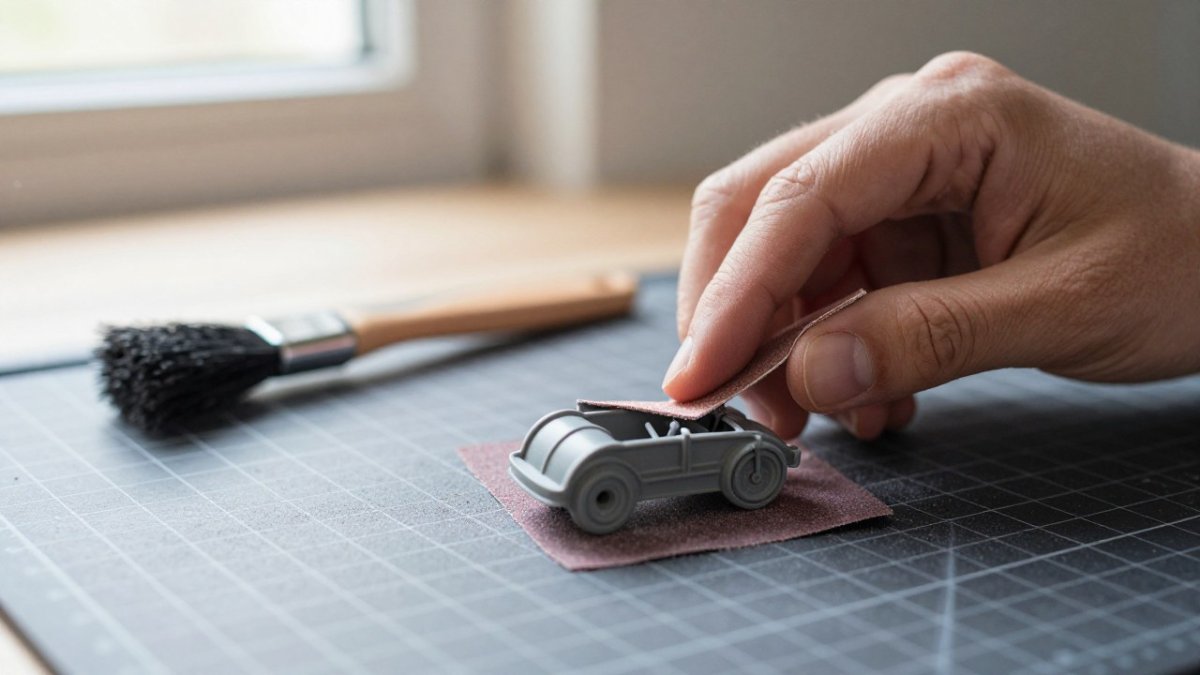
- Inspect the kit: Mark which parts need sanding and which need care.
- Trim nubs: Remove sprue residue with a sharp hobby knife before sanding.
- Coarse sand: Use 400 grit only where needed, keeping pressure light.
- Medium sand: Smooth seams and mold lines with 600 grit.
- Fine sand: Finish with 800 to 1000 grit until the surface looks even.
- Clean: Remove all dust and let parts dry completely.
- Prime: Apply two thin coats and inspect under good light.
- Fix and re-prime: Touch up any remaining flaws, then re-prime if needed.
- Paint: Apply color in thin coats once the primer is smooth and dry.
Work in small sections and check your progress often. Stopping early is always safer than sanding too far.
Watch out: sanding too aggressively on thin parts can snap them, so reduce pressure as the part gets thinner.
Troubleshooting Finish Defects and Recovering From Over-Sanding
Even careful builders run into problems, and the difference between a fixable mistake and a ruined part is usually how quickly you identify the cause. Work through the symptom first, then apply the fix that matches it.
Sanding Through Primer to Bare Plastic
This is the most common recovery scenario, and it is fixable if you catch it before the color coat.
Recovery follows a short sequence:
- Stop sanding immediately. Continuing widens the exposed area and deepens the edge.
- Feather the edge. Use 1000 to 1500 grit to taper the transition between primer and bare plastic so there is no visible step. A hard edge will show through every subsequent coat.
- Clean the area. Brush away dust, then wipe with a mild dish-soap solution or a plastic-safe surface cleaner. Let it dry completely.
- Re-prime the exposed patch. Apply a thin coat of the same primer, building it up in two light passes rather than one wet coat. A heavy coat can pool at the feathered edge and create a new ridge.
- Level and inspect. Once cured, sand lightly with 1000 grit if needed and check under good light before moving to color.
A common pattern is to sand through primer repeatedly in the same spot because the underlying seam was not fully leveled before the first primer coat. If the same area keeps exposing, stop and re-check the bare plastic for a remaining high spot rather than adding more primer.
Other Common Finish Defects
- Visible scratches after primer: The scratch is deeper than the grit you finished with. Re-sand with the next finer grit, clean, and re-prime. If the scratch persists, it may be a gouge that needs filler.
- Lost panel lines: Re-scribe the line with a fine scribing tool or a hobby knife guided by tape, then clean the edges. Rebuilding a line with thin filler is possible but harder to keep straight.
- Gouges or deep marks: Fill with a plastic-compatible filler, let it cure fully, then sand smooth through the grit progression. Sanding a filled spot too hard can expose the gap again, so check the fill under light before priming.
- Paint beading on the surface: The part was likely not cleaned well, or the primer did not adhere. Wash again, re-prime, and avoid touching the surface with bare hands before painting.
- Rough or grainy primer: Usually caused by spraying too far from the part, in high humidity, or in a heavy coat that dried before leveling. Sand the roughness with 1000 to 1500 grit, clean, and apply a thinner coat.
Deep gouges usually need filler rather than more sanding. When in doubt, stop, clean, and inspect under raking light before adding another coat, because each additional layer makes a hidden defect harder to correct.
Choosing Your Next Build: Tools and Supplies From Utopia Toys and Models
Good results start with the right tools. At Utopia Toys and Models, we carry Gundam and other model kits from brands like Bandai, along with other model-building products.
Browse our Gunpla selection to find your next kit, and check availability before you order. Items arriving soon and pre-order items are clearly marked.
Ready to take on your next build? Utopia Toys and Models has the kits and supplies to help you get a smooth, paint-ready finish.
Frequently Asked Questions
Do I need to sand down plastic before painting?
Not always. Sanding is needed when a model has visible mold lines, seam lines, or glue residue that paint would highlight. Parts that are already smooth and clean can go straight to primer. Sanding also removes the factory mold release film on some kits, which helps primer grip. Use a light touch with fine grit, check the part under a bright light, and stop once the imperfections are gone. Over-sanding can soften details, so sand only where needed.
Can I paint immediately after sanding?
It is better to wait. Sanding leaves fine dust and fibers in the surface, and any oil from your fingers can keep paint from adhering. Wash the parts with warm water and a mild dish soap, rinse, and let them dry fully, which usually takes several hours. Then apply primer. Paint applied directly over bare sanded plastic often chips or peels, especially with rattle-can products.
What grit sandpaper should I use on a plastic model before painting?
Start around 400 grit for removing seam lines or mold marks, then move to 600 and 800 grit to smooth the scratches left behind. Many modelers finish with 1000 to 1500 grit or a polishing stick before priming. Coarser grits, such as 220, can gouge plastic and erase fine panel lines, so reserve them for heavy damage only. Choosing the best sandpaper grit for plastic models depends on how much material needs to come off.
How long should primer dry before painting a plastic model?
Most spray primers need about 30 minutes to one hour to dry to the touch, but allow at least 12 to 24 hours before painting so the coating fully cures. Check the can label, since drying times vary by product and humidity. Inspect the primed surface under good light. If you see remaining scratches or dull spots, lightly sand with fine grit, clean the dust away, and prime again before adding color.

