

Table of Contents
- Assess the Damage Before You Start Sanding
- Clean and Prep the Surface for Repair
- Plastic Sanding Grit Progression: From Coarse to Fine
- How to Polish Plastic After Sanding for a Gloss Finish
- Best Plastic Polish for Model Kits and Collectibles
- How to Restore Clear Plastic After Sanding Without Haze
- Restoring Textured Plastic Without Flattening the Grain
- Protect the Finish with UV Protection and Coatings
- Frequently Asked Questions
Last Updated: October 15, 2026
Assess the Damage Before You Start Sanding
You cannot restore plastic finish after sanding until you know what you are working with. Different plastics need different treatments, and the wrong grit on the wrong surface creates more work than you started with.
At Utopia Toys and Models, we see this constantly with Gunpla builders. Someone sands a part, the surface clouds up, and they panic. The good news: most damage is fixable.
Ask three questions before you touch sandpaper:
- Is the plastic faded, scratched, or both?
- Is the surface smooth or textured?
- What type of plastic is it?
Faded, Oxidized, and Scratched Plastic
Faded plastic looks chalky and pale. Oxidized plastic feels slightly rough to the touch. Scratched plastic shows visible lines that catch light at an angle.
Each problem needs a different approach. Faded and oxidized surfaces often just need polishing. Deep scratches need sanding first, then polishing.
Identifying Plastic Type and Surface Texture
Most model kits use polystyrene (PS) or ABS plastic. Both sand well, but ABS is softer and scratches more easily. Clear parts are usually polycarbonate or acrylic, and these haze fast if you rush.
Rub a hidden area with your fingernail. If it leaves a mark, the plastic is soft. Use finer grits and lighter pressure on soft plastics.
Check the texture too. Smooth plastic shows every scratch. Textured plastic hides small scratches but flattens if you sand too hard.
Clean and Prep the Surface for Repair
Surface preparation is the step most builders skip. It is also the step that causes most failures.
Wash the part with warm water and a drop of dish soap. This removes mold release agents and skin oils that stop polish from working.
Dry the part with a clean microfiber cloth. Do not use paper towels. They leave fibers behind that clog sandpaper.
For stubborn grime, wipe the surface with isopropyl alcohol. Let it dry fully before sanding.
Plastic Sanding Grit Progression: From Coarse to Fine
Plastic sanding grit progression is simple: start coarse only if you must, then step through finer grits one at a time. Skipping grits leaves deep scratches that polish cannot remove.
For most model kit repairs, here is the sequence:
- 400 grit for removing deep scratches or seam lines
- 600 grit for smoothing out the 400-grit marks
- 800 grit for refining the surface
- 1000 grit for pre-polish smoothing
- 1500 to 2000 grit for a near-gloss finish before polishing
Soak wet sandpaper in water for 10 minutes before use. This keeps the paper from clogging.
Wet Sanding vs. Dry Sanding
Wet sanding uses water to flush away plastic dust and keep the paper cutting smoothly. Dry sanding is faster but clogs paper quickly and generates heat that can melt soft plastic.
For restoring plastic finish after sanding, wet sanding wins almost every time. Use a spray bottle to keep the surface wet. Add a drop of dish soap to the water for extra lubrication.
Dry sanding works for rough shaping on thick parts. Switch to wet sanding by 600 grit.
Removing Sanding Scratches with Overlapping Passes
Move the sandpaper in overlapping passes. Each pass should cover about half of the previous one. This keeps the surface even.
Use light pressure. Let the grit do the work, not your arm. Heavy pressure creates heat and deep gouges.
Change direction between grits. Sand left to right with 600 grit, then up and down with 800 grit. This makes leftover scratches from the previous grit easy to spot.
Rinse the part between grits. Check it under bright light. If you see scratches, keep sanding with the current grit before moving on.
How to Polish Plastic After Sanding for a Gloss Finish
Polishing brings back the shine. Start with a rubbing compound on a foam pad, then move to a finer polish.
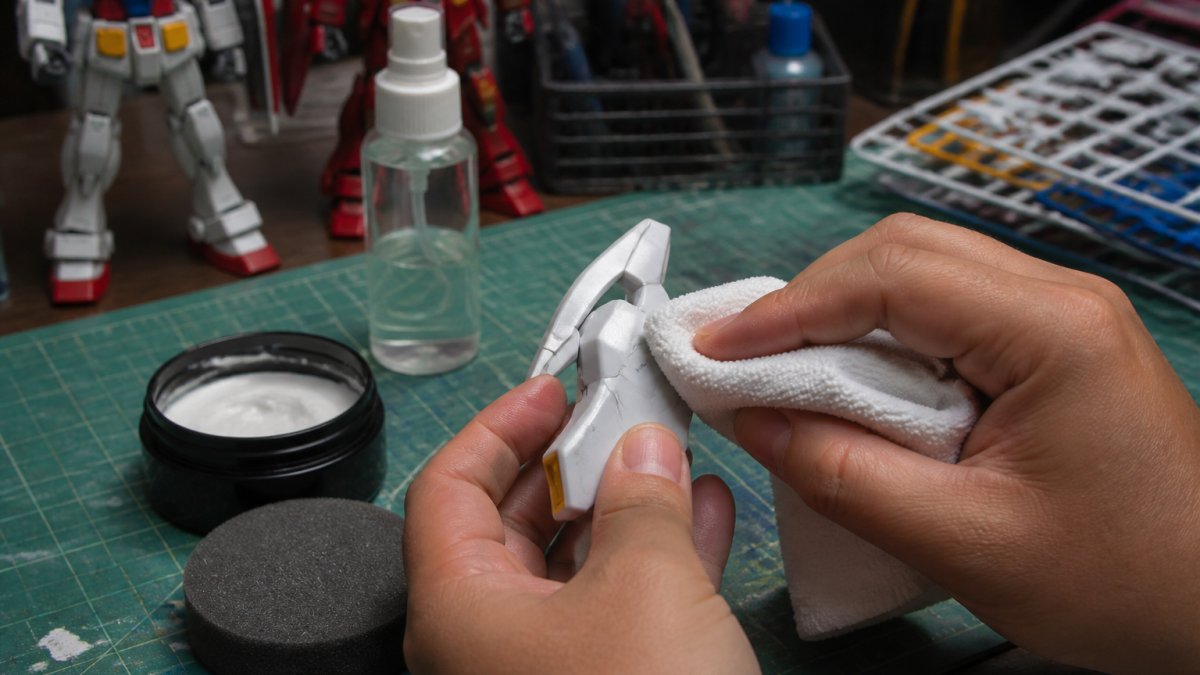
Apply a small amount of compound to the pad. Work it into the surface with light circular motions. Keep the pad moving.
Wipe away residue with a clean microfiber cloth. Check the surface under a lamp.
Finish with a plastic polish designed for clear or glossy surfaces. Buff until the surface reflects light evenly.
For the best plastic polish for model kits, look for products made for hobby use.
Best Plastic Polish for Model Kits and Collectibles
Model-specific polishes are formulated for polystyrene and ABS. They cut slower than automotive compounds, which makes them safer for thin parts and fine details.
Look for these qualities:
- Water-based formula for easy cleanup
- Fine abrasive that leaves no swirl marks
- Safe on clear plastic and painted surfaces
- Works with a foam pad or microfiber cloth
How to Restore Clear Plastic After Sanding Without Haze
Clear plastic hazes because of micro-scratches left by sanding. The fix is the same grit progression, but you must go finer and polish longer.
Start at 800 grit for clear parts. Never use coarse paper on clear plastic unless you are removing a deep scratch.
Work up to 3000 grit if you can find it. Then use a plastic polish made for clear surfaces. Buff in small circles with light pressure.
If haze remains, the scratches are still there. Go back one grit and sand again.
Restoring Textured Plastic Without Flattening the Grain
Textured plastic is where most restoration jobs go wrong. Sanding removes the peaks of the grain first, and once those peaks are gone, no polish or dressing brings them back. The result is a shiny bald patch that catches light differently from the surrounding trim, often more noticeable than the original scratch.
The goal is not to sand the texture. The goal is to remove the defect while leaving the grain intact, then protect what is left.
Match the Grit to the Grain Depth
Texture depth, not scratch depth, sets your starting grit. A useful rule of thumb:
- Fine grain (shallow, almost matte): start at 2000 grit or higher, or skip sanding entirely and polish. Anything coarser will flatten the grain before it removes the scratch.
- Medium grain (visible stipple, like interior trim): 1500 to 2000 grit is the practical floor. Work wet, keep pressure feather-light, and check the surface every few passes.
- Deep grain (heavy stipple, like automotive cladding): sanding is usually the wrong tool. Spot-polish the scratch with a fine compound on a foam pad, then blend the edges. If you must sand, use 2000 grit or finer and accept that some flattening is likely.
A worn piece of sandpaper cuts shallower than a fresh one. Save your broken-in paper for blending edges, it removes the sharp transition between sanded and unsanded areas without digging into the grain.
The Blending Technique That Saves Texture
Never sand the whole panel to fix one scratch. Work only the damaged area, then feather the boundary:
- Polish the scratch first with a fine compound on a soft foam pad. Many light scratches on textured trim disappear at this stage without any sanding.
- If the scratch remains, sand a small area, no larger than the scratch plus a half-inch margin, with the finest grit that removes it.
- Switch to a worn piece of the same grit and sand the boundary in overlapping passes, extending outward by small increments. This softens the transition.
- Rinse, dry, and inspect under raking light. If the sanded area looks shinier than the surrounding grain, you have flattened it. Stop sanding and move to a texture-matched dressing.
A sanding block with a thin foam interface pad follows the grain better than a hard block. A hard block bridges the peaks and cuts them flat.
When Texture Is Already Lost
If a previous owner, or an earlier attempt, already flattened the grain, you have three realistic options:
- Texture-matched dressing: A trim restorer or dressing with a matte or satin finish can visually blend a flattened patch into the surrounding grain. This is the least invasive fix and often the most convincing.
- Texture spray: Aerosol texture coatings can rebuild a grain pattern, but matching an existing texture is difficult and the result is usually visible on close inspection. Best reserved for large, uniform panels.
- Replace or refinish the whole panel: If the flattened area is large, a uniform refinish may look better than a patch. This is the most expensive option and the last resort.
Protect the Grain After Restoration
A restored textured surface fades and chalk again without protection. Match the protectant to the finish:
- Matte or satin trim restorers preserve the original look and add UV resistance. Reapply every few months on exterior trim.
- Ceramic coatings formulated for trim last longer, often a year or more, and resist washing and UV better than dressings. They tend to add a slight sheen, so test on a hidden area first.
- Dyes and pigmented restorers restore color on faded black or gray trim and can hide minor flattening. They are not a substitute for texture, but they reduce contrast between sanded and unsanded areas.
- Clear coats are usually the wrong choice on textured trim. They fill the grain and produce a glossy, plastic-looking surface that defeats the purpose.
Protect the Finish with UV Protection and Coatings
A restored finish fades again without protection. UV light breaks down plastic over time, especially on display pieces near windows.
Apply a clear coat made for plastic models. Matte, satin, and gloss options are available. Match the original finish of the part.
For clear parts, use a UV-blocking clear coat. It prevents yellowing and keeps the plastic looking new.
Store finished models away from direct sunlight. A display case with UV-filtering glass helps too.
Reapply protective coating every year or two for pieces on open shelves.
Frequently Asked Questions
What grit sandpaper should I use to restore plastic after sanding?
Start with 800-grit if the damage is light, or 400-grit for deeper scratches. Work up through 1000, 1500, 2000, and finish with 3000-grit. Each step removes the scratches left by the previous grit. Skipping grits leaves visible sanding scratches that polish cannot hide. Keep a spray bottle handy for wet sanding and use light pressure with a sanding block for flat areas.
How do you remove sanding scratches from plastic?
Sanding scratches are removed by progressing through finer grits, not by polishing harder. After your final 3000-grit pass, switch to a rubbing compound on a foam pad, then a finer polishing compound. Use overlapping passes and light pressure. If scratches remain, drop back one grit and repeat the progression. Persistent marks often mean you skipped a grit or used too much pressure.
Can you restore clear plastic after sanding?
Yes. Clear plastic responds well to wet sanding with 1500 through 3000-grit, followed by a plastic polish designed for clear surfaces. Avoid acetone vapor unless you have proper ventilation and experience, since it can frost or craze the surface. For canopies and lenses on model kits, finish with a dedicated clear plastic polish and check the result under bright light before reassembling.
How do you restore the finish on textured plastic after sanding?
Textured plastic needs a different approach because sanding flattens the grain. Use the finest grit that removes the damage, sand in one direction only, and avoid overworking the area. A trim restorer or plastic dye can blend the repaired spot back into the surrounding texture. For model kits, masking off adjacent textured panels protects the grain while you work on the damaged section.
Restoring a plastic finish takes patience, the right grits, and a light touch. Most builders rush the polishing step and end up with haze. At Utopia Toys and Models, we stock the kits, tools, and finishing supplies that make the process smoother, with most items ready to ship and clear status on pre-orders. Browse our selection of Bandai kits and hobby supplies, and get the finish your build deserves.
