

Last Updated: November 5, 2026
Quick Summary
To safely remove yellowing from plastic figures, apply a 3% hydrogen peroxide paste to cleaned ABS parts, seal them in a clear container, and expose them to bright indirect sunlight or a UV lamp. Test a hidden spot for 24 hours first, then inspect on a fixed interval and stop when the yellowed area matches a hidden white reference.
- Yellowing is a chemical change inside ABS plastic caused by a brominated flame retardant, not surface grime.
- Mix roughly one part cornstarch or baking soda to three or four parts 3% peroxide in glass or plastic, never metal.
- Apply the paste about 1/16 to 1/8 inch thick and keep it off painted faces, decals, and clear parts.
- Never mix peroxide with bleach or ammonia, because the combination releases harmful gas.
- A Magic Eraser cannot remove bromide yellowing; it only scrubs the surface and dulls the finish.
Table of Contents
- Why Plastic Figures Turn Yellow and What You Can Realistically Fix
- Hydrogen Peroxide for Yellow Plastic: What It Can and Cannot Do
- Step-by-Step: Preparing, Applying, and Monitoring the Peroxide Treatment
- Safety Precautions for Handling Peroxide, UV Light, and Heat
- How to Whiten Yellowed Plastic Without Hydrogen Peroxide
- How to Prevent Plastic Figures From Yellowing in Storage and Display
- Choosing the Right Supplies for Your Figure Restoration Project
- Frequently Asked Questions
Why Plastic Figures Turn Yellow and What You Can Realistically Fix
Yellowing is a chemical change inside the plastic, not a layer of grime on top of it. That single fact explains why some yellowed figures come back and others never will, Learning how to safely remove yellowing from plastic figures starts with knowing which kind of yellowing you are actually looking at.
Most white and light-colored figures are made from ABS plastic. Because ABS can discolor with age and exposure, keeping it away from prolonged sunlight and heat can help preserve its original color, much as careful storage can prevent resin art yellowing.
Bromide Yellowing Versus Dirt, Sun Fade, and Paint Wear
Not every yellow figure has bromide yellowing, and treating the wrong problem wastes time or makes it worse.
- Bromide yellowing: even, uniform yellowing across all white areas, often worse on the side that faced a window.
- Surface dirt: brownish film that lifts off with a damp cloth, concentrated in crevices and panel lines.
- Sun fade: colors look washed out and pale, not yellow; the plastic has lost pigment rather than gained it.
- Paint wear: yellow shows through where paint has rubbed off, usually on edges and high points.
Check the underside or an area that never saw light. If it is still white there, you are dealing with light-driven yellowing. If it is yellow all the way through, the change is deep and treatment may only partially help.
Hydrogen Peroxide for Yellow Plastic: What It Can and Cannot Do
Hydrogen peroxide for yellow plastic works by reversing the oxidation that turned the plastic yellow. The peroxide breaks down into water and oxygen, and the reactive oxygen species attack the yellow-brown brominated breakdown products, bleaching them back toward colorless.
What it will not do matters just as much:
- It will not restore yellowed paint or printed decals; those are pigment and ink, not oxidized plastic.
- It will not fix yellowing caused by embedded dirt, smoke residue, or nicotine film.
- It will not work evenly on every plastic blend. ABS is the best candidate; PVC, soft vinyl, and some polystyrene blends can cloud, go tacky, or leach plasticizer, and clear or translucent parts can frost.
- Results fade over time if the figure goes back into the same light conditions, because the underlying brominated compound is still in the plastic.
Set your expectations at "much better," not "brand new." A figure that has yellowed for years will usually improve noticeably but rarely return to its factory white, and a figure that is already chalky or brittle is a poor candidate for treatment at all.
Strength, Volume, and Mixing Ratios That Keep the Plastic Safe
Use the lowest strength that does the job. Drugstore hydrogen peroxide is typically sold as a 3% solution, and that is the right starting point for cautious work.
A practical starting mix for a paste:
- 3% hydrogen peroxide, enough to wet the area
- A small amount of cornstarch or baking soda to thicken it into a spreadable paste, roughly one part thickener to three or four parts liquid by volume
- Mix in a glass or plastic bowl, never metal, because peroxide reacts with many metals
Watch out: never mix peroxide with bleach or ammonia. The combination releases harmful gas. Keep the mix simple and label the container. Mixed paste loses potency as it sits, so make only what you will use in a session and discard the rest.
Step-by-Step: Preparing, Applying, and Monitoring the Peroxide Treatment
Here is the repeatable process we recommend, in order. The numbers below assume a 3% drugstore peroxide paste; if you step up to a 6% or 12% cosmetic developer, shorten every interval and test more carefully.
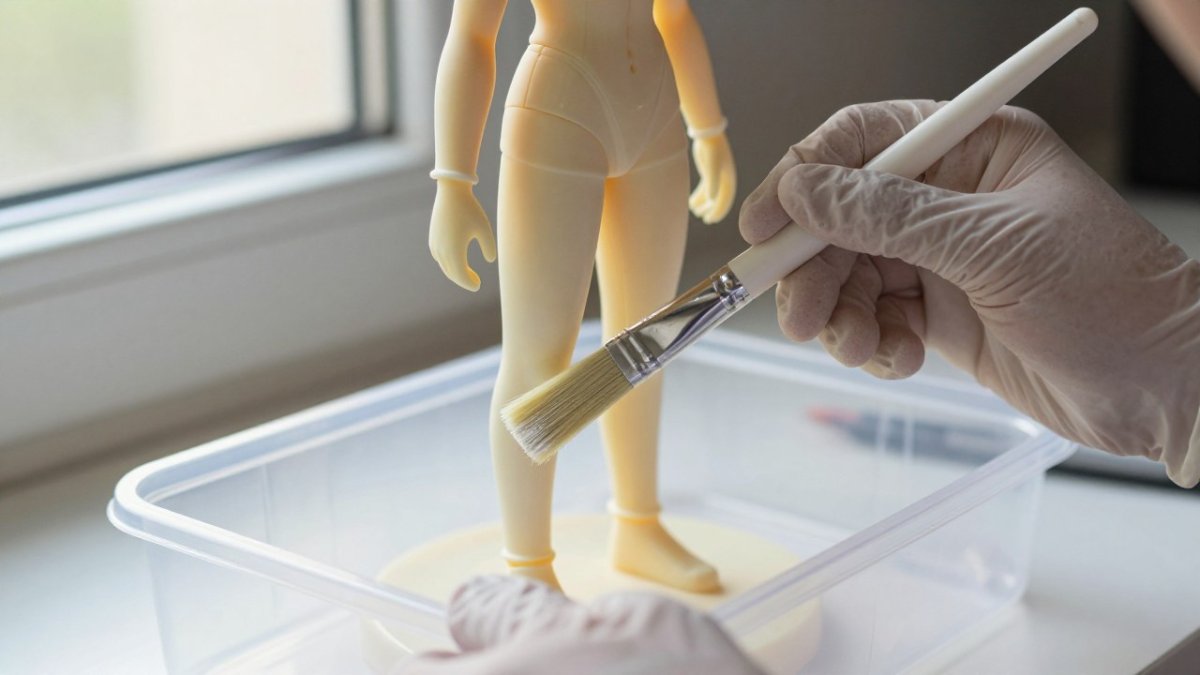
- Disassemble and clean. Pop off removable parts and wash the figure with mild dish soap and water. Rinse and dry fully. Peroxide cannot reach plastic that is still coated in oils, mold release, or fingerprints.
- Map the material before you treat. ABS, polystyrene, PVC, and polypropylene respond differently. White ABS usually lightens well; PVC and soft vinyl can cloud, leach plasticizer, or go tacky; clear and translucent parts can frost. Painted faces, printed decals, and tampo markings are not restorable and may lift or bleach, so mask them with painter's tape or keep the paste off them entirely.
- Test a hidden spot. Apply a little paste to the inside of a leg or the back of a part. Wait 24 hours and check for softening, clouding, tackiness, or gloss changes. If the test spot feels sticky or looks chalky, stop and do not treat the visible surfaces.
- Apply the paste. Brush an even coat roughly 1/16 to 1/8 inch thick over the yellowed areas with a soft paintbrush. Keep it off painted faces, decals, clear parts, and joints, where paste can wick in and be hard to rinse.
- Seal and expose. Place the figure in a clear container or wrap it in clear plastic film to keep the paste from drying out. Set it in bright indirect sunlight or under a UV lamp rated for the distance the maker specifies.
- Inspect on a fixed interval. Look for uneven lightening, paste drying to a crust, surface distortion, or a chalky bloom. Rotate the figure a quarter turn at each check so all sides get exposure.
- Know when to stop. Stop when the yellowed area matches the hidden white reference you checked earlier, or when two consecutive inspections show no further change. Do not chase a perfect match; over-treatment is how figures go chalky or brittle.
- Rinse thoroughly. Remove the paste with cool water and a soft brush, working around joints and panel lines. Dry completely before reassembly, and give the figure 24 hours to settle before judging the result.
Total treatment time runs from a few hours to a couple of days depending on strength and how deep the yellowing goes.
Watch out: paste that dries to a hard crust can leave a visible tide line where the peroxide concentration was uneven.
Safety Precautions for Handling Peroxide, UV Light, and Heat
Peroxide is a household chemical, but it still deserves respect. Wear nitrile gloves and eye protection when handling stronger solutions. Work in a ventilated space, and keep the container away from children and pets.
The UV and heat side carries its own risks:
- Sun exposure: long sessions in direct sun can warp thin plastic and overheat sealed containers.
- UV lamps: follow the lamp maker's distance and timing guidance, and never look directly at the bulb.
- Heat buildup: a closed clear container left in full sun acts like an oven. Vent it or use indirect light.
Watch out: a figure left sealed in a hot container for too long can distort or develop a chalky surface. That damage is permanent. Check often and err on the side of shorter sessions.
How to Whiten Yellowed Plastic Without Hydrogen Peroxide
If you would rather avoid peroxide, there are gentler options. None of them reverse bromide yellowing the way peroxide can, but they can improve appearance or slow the decline.
- Deep cleaning: warm water, mild soap, and a soft brush lift surface film that makes plastic look duller and darker.
- Gentle abrasives: a light polish can brighten the surface, but it removes material and risks dulling gloss.
- Concealment: repainting a yellowed part in the correct white is a legitimate fix for display pieces.
- Retrobright-style pastes: these are peroxide-based, so they belong in the treatment section above, not here.
For a deeper look at related plastic repairs, our guide on how to safely remove stress marks from plastic covers the whitening and stress-mark fixes that pair well with figure restoration.
Can a Magic Eraser Remove Yellowing From Yellow Plastic?
No. A Magic Eraser is a fine abrasive sponge, and it scrubs the surface rather than reversing the chemistry inside the plastic. It can lift scuffs and grime, but on bromide yellowing it will only dull the finish and, over time, wear away detail on edges and panel lines. If a Magic Eraser seems to help, it is removing surface dirt, not the yellowing itself.
How to Prevent Plastic Figures From Yellowing in Storage and Display
Prevention is the cheapest fix available. The same UV and heat that caused the yellowing will cause it again, so control both.
- Display figures away from direct sun and windows.
- Use LED lighting rather than halogen or incandescent, which run hot.
- Keep figures out of hot attics, garages, and cars.
- Store in acid-free boxes with silica gel packs to manage moisture.
For display setups, our guide on the best lighting for Gunpla display cases explains which lighting choices keep yellowing in check. A little planning at the display stage saves a lot of restoration work later.
Choosing the Right Supplies for Your Figure Restoration Project
The right kit makes the difference between a clean result and a damaged figure. Here is a general list of supplies to consider before starting.
| Supply | Purpose | Notes |
|---|---|---|
| 3% hydrogen peroxide | Base treatment | Start here; stronger only if needed |
| Cornstarch or baking soda | Thickens into paste | Mix in glass or plastic, never metal |
| Soft paintbrush | Even application | Keep off decals and painted faces |
| Nitrile gloves and eye protection | Safety | Essential for stronger solutions |
| Clear container or film | Seals in moisture and UV | Vent to avoid heat buildup |
| Mild dish soap | Pre-clean | Removes oils before treatment |
| Silica gel packs | Storage | Manages moisture in boxes |
Frequently Asked Questions
Does hydrogen peroxide actually remove yellowing from plastic figures?
Results with hydrogen peroxide depend on the plastic and how deep the discoloration goes. It works by breaking down the bromine compounds that cause the yellow tint, usually with UV light or sunlight speeding the reaction. It will not fix dirt, paint wear, or sun fade, and darker or painted parts may lighten unevenly. Test a hidden area first and expect gradual rather than instant results.
Can yellowed plastic be whitened without damaging the figure?
Yes, if you control the variables. Keep exposure times short and check the figure regularly during treatment. Avoid heat buildup and never let the paste dry onto the surface. Figures with painted details, decals, or clear parts need extra caution because peroxide can dull or lift them. When in doubt, test on an inconspicuous spot like the inside of a leg or the base.
Can a Magic Eraser remove yellowing from plastic?
A Magic Eraser works by abrasion, so it removes surface dirt, scuffs, and grime rather than the chemical yellowing inside the plastic. It can brighten a figure that looks dull from handling, but scrubbing too hard will scratch the surface and leave a cloudy finish. Use it lightly with water on soiled areas, and rely on peroxide treatment for true bromide yellowing.
How do you prevent plastic figures from yellowing in the first place?
Keep figures out of direct sunlight and away from heat sources, since UV exposure and warmth speed up yellowing. Display them in a shaded cabinet or behind UV-filtering glass, and store boxed figures in a cool, dry place with silica gel to control moisture. Avoid sealing figures in airtight containers that trap fumes, and rotate display pieces so no single figure takes years of constant light exposure.
Restoring a yellowed figure takes patience, the right supplies, and realistic expectations. At Utopia Toys and Models, we stock a wide variety of collectible figures and Gundam models from brands like Bandai, Funko, and Kotobukiya, with most items in stock and ready to ship. Our clear status indicators for arriving soon and pre-order items keep you informed, and reliable shipping protects your collection in transit. Get started with Utopia Toys and Models and find your next display piece.

