

Last Updated: November 4, 2026
Quick Summary
Safely remove stress marks by warming the whitened area with controlled heat so stretched polymer chains relax, using a heat gun on its lowest setting or a hair dryer on medium held 6 to 8 inches away in 2 to 3 second circling passes. Stop when the whiteness fades or stops improving, since extra heat risks glossing or melting the plastic.
- Stressed plastic turns white because polymer chains stretch and separate, scattering light.
- Hold the heat tool 6 to 8 inches away and sweep in 2 to 3 second passes.
- Let the part cool at least 30 seconds before checking whether the mark improved.
- If two or three heat passes produce no change, more heat will not help.
- Sharp nippers and two-stage trimming prevent most stress marks before they happen.
Table of Contents
- What Causes White Stress Marks in Plastic
- Diagnosing the Damage: Hard vs Soft Plastic
- How to Safely Remove Stress Marks with Controlled Heat
- Sanding and Plastic Cement for Surface Repair
- Best Tools for Plastic Model Repair
- How to Fix Stress Marks on Gundam Models
- Preventing Plastic Stress Marks on Model Kits
- Gather Your Repair Supplies at Utopia Toys and Models
- Frequently Asked Questions
What Causes White Stress Marks in Plastic
That pale, cloudy smear on a freshly trimmed part is not dirt and it is not a scratch. It is a sign that the plastic itself has been stretched beyond what it can handle.
Understanding the cause matters because the fix depends on it. A mark from a dull nipper needs different handling than one from a bent limb joint.
Why Stressed Plastic Turns White
Stressed plastic turns white because the polymer chains inside it stretch and separate under pressure.
On colored plastic, the effect looks like a faded patch. On white or light gray kits, it reads as a bright, obvious blemish.
That distinction drives everything that follows. You are not cleaning a mark off the surface. You are trying to relax stretched material back into place.
Diagnosing the Damage: Hard vs Soft Plastic
Diagnosis starts with identifying the plastic. Hard plastics, like polystyrene used in most model kits, respond well to careful heat and cement. Soft plastics, like PVC used in some toy parts and figure accessories, react differently and can sag or melt faster.
Here is how to sort the common cases before touching a tool:
| Damage Type | Likely Cause | Best First Approach |
|---|---|---|
| Sharp white mark at a cut gate | Dull or pinched nippers | Trim farther away, then sand |
| Broad cloudy patch on a limb | Bending or pressure | Controlled heat, low setting |
| Cracked or split part | Over-flexing | Plastic cement, then sand |
| Melted or glossy spot | Prior heat damage | Sand and refinish, no more heat |
A practical test: press a hidden area with a fingernail. Hard plastic resists and springs back. Soft plastic dents and recovers slowly. If you are unsure, practice on a spare runner or an old toy part first.
How to Safely Remove Stress Marks with Controlled Heat
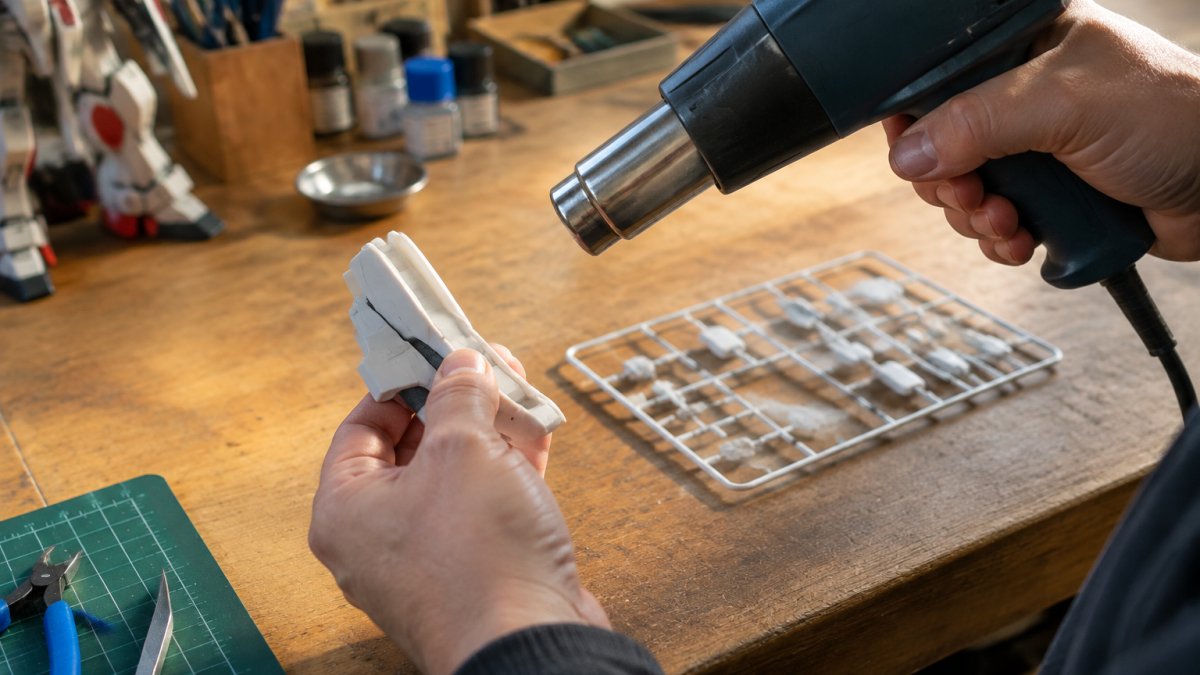
Controlled heat is a common method for mild white stress marks on hard plastic, but "controlled" is doing a lot of work in that sentence. The goal is to warm the stretched area just enough for the polymer chains to relax, without softening the part so much that it warps or glosses. Slow, small passes beat fast, close ones every time, and the plastic type determines how much heat it can take before it fails.
Match the Heat to the Plastic
Different plastics respond to heat at very different thresholds, so identify the material before you aim a heat gun at it. Most model kits and many toys are polystyrene (PS), which softens gradually and tolerates short, low-heat passes well. ABS, common in appliance housings and some hobby parts, softens at a lower temperature than PS and can gloss or sag quickly, so keep the tool farther away and use shorter passes.
A practical identification check: look for a resin identification code stamped on the part (1 through 7 inside a triangle). PS is usually code 6, PP is 5, PVC is 3, and ABS is often unmarked or labeled ABS. If there is no marking, press a hidden area with a fingernail. Hard plastic resists and springs back; soft plastic dents and recovers slowly. When in doubt, practice on a spare runner or an old toy part before touching the visible surface.
A Repeatable Heat Procedure
Follow this sequence for a controlled, repeatable pass:
- Clean the part and let it dry completely. Moisture can cause surface clouding when heated.
- Test on a scrap runner or hidden surface first, and note how the plastic reacts.
- Set a heat gun to its lowest setting, or use a hair dryer on medium. A heat gun typically runs far hotter than a hair dryer, so distance matters more with the gun.
- Hold the tool 6 to 8 inches (15 to 20 centimeters) away from the part. Start farther and move closer only if nothing happens.
- Sweep in a circling motion for 2 to 3 seconds at a time. Keep the tool moving; never hold it still over one spot.
- Stop, let the part cool for at least 30 seconds, and check the mark. Plastic often looks glossier while warm than it will when cool.
- Repeat in short passes until the whiteness fades or stops improving. If two or three passes produce no change, more heat will not help and may damage the part.
Watch out: holding heat in one spot too long will gloss or melt the surface, which is a far worse problem than the mark you started with. Thin parts like antennae, fins, and small joints are the most vulnerable, and heat also softens glued seams, so assembled models can shift.
Heat Gun vs. Hair Dryer
A heat gun gives you faster, more targeted results, but it demands respect. Keep it moving, keep your distance, and never walk away mid-pass. A hair dryer is slower and safer for beginners, though its wider airflow makes precision harder on small parts and it may not reach the temperature needed to relax a stubborn mark on thicker plastic. For small parts, a heat gun with a narrow nozzle and a low setting gives the most control; for large flat panels, a hair dryer's broader airflow can actually help you heat evenly.
Safety Precautions
Heat tools introduce real hazards that forum posts often skip. Wear safety glasses to protect against spitting plastic or debris, and use heat-resistant gloves when handling a warmed part. Work in a well-ventilated space, especially with PVC, which can release fumes when heated. Keep a damp cloth and a fire-safe surface nearby, and never use an open flame or a soldering iron on delicate plastic; both concentrate heat far beyond what the material can take and create a fire risk.
Realistic Outcomes
Some marks improve noticeably with heat. Others only fade partway, and that is normal. A superficial white stress mark on intact plastic has the best chance of improvement. A crack, gouge, or permanently deformed area will not be restored by heat alone; those need cement, sanding, or replacement.
Sanding and Plastic Cement for Surface Repair
Sanding handles surface blemishes that heat cannot fix. Start with a fine grit, work in one direction, and finish with a glass file or polishing cloth for a clean surface finish.
Plastic cement works differently. It softens and re-bonds compatible plastics, which makes it useful for cracks and splits.
For deeper damage, combine methods: cement the crack, let it cure, then sand the repaired area smooth.
Best Tools for Plastic Model Repair
The right tools prevent most stress marks before they happen. Sharp nippers are the single biggest upgrade for any builder. Cut farther away from the part first, then trim closer in a second pass, a technique called cutting farther away or two-stage trimming.
A short list of what we keep on the bench:
- Sharp flush nippers for clean gates
- A glass file for smoothing cut points
- Fine sanding sticks in several grits
For a reliable starting nipper, the Entry Nipper White Box 10 Bandai Hobby Tools is a solid pick for clean gate cuts on model kits.
How to Fix Stress Marks on Gundam Models
Gundam kits are where most builders first meet white stress marks, usually right at the gate. The fix follows the same rules: diagnose, then choose heat, sanding, or cement based on the damage.
Bandai's polystyrene responds well to short heat passes. For a kit to practice on or replace a damaged build, the Moon Gundam Hguc 1 144 Model Kit is a great candidate for hands-on learning.
Backward cutting, where you trim with the flat side of the nipper against the part, also reduces pinching on thin edges.
Preventing Plastic Stress Marks on Model Kits
Prevention beats repair every time, and most white marks come from a handful of avoidable habits: dull nippers, cutting too close on the first pass, forcing parts together during assembly, and storing parts under stress. The same principles extend beyond model kits to toys, household plastic items, and anything else that bends or flexes.
Cutting and Trimming
Sharp nippers are the single biggest upgrade for any builder. Cut farther away from the part first, then trim closer in a second pass, a technique called two-stage trimming. Backward cutting, where you trim with the flat side of the nipper against the part, also reduces pinching on thin edges. Support thin parts with your finger when cutting so the plastic does not flex away from the blade, and replace or sharpen nippers when cuts start looking ragged.
Bending, Assembly, and Handling
Stress marks often appear away from the cut line, at joints and snap-fit connections. Test-fit joints before pressing them together, and if a peg is tight, sand it slightly rather than forcing it. When bending a part into place, warm it gently first or flex it slowly and evenly rather than in one sharp motion. Support the part from behind when you press components together so the force goes into the joint, not into a thin wall.
Storage and Environment
Built kits and plastic toys stored under load or in heat can develop new stress marks over time. Store built kits away from heat and direct sun, and avoid stacking heavy items on top of delicate parts. For household plastic items, avoid overtightening screws and clamps, which compress the plastic and leave white rings around fasteners. If a part must bear weight, distribute the load rather than concentrating it at one point.
A Prevention Checklist
Keep these habits in rotation:
- Replace or sharpen nippers when cuts start looking ragged
- Trim in two stages: rough cut, then flush cut
- Test-fit joints before pressing them together
For non-Gundam builds, the same rules apply. The Kotobukiya Megami Device Buster Doll Knight Plastic Model Kit uses similar hard plastic, so the trimming and heat guidance carries over directly.
Gather Your Repair Supplies at Utopia Toys and Models
Every fix in this guide starts with the right tools and a kit worth protecting. At Utopia Toys and Models, we stock Bandai, Kotobukiya, and Funko releases. Check our website for current availability and status indicators for arriving soon and pre-order items.
Whether you are repairing a favorite build or starting a new one, visit our website to browse kits and supplies.
Frequently Asked Questions
Can you permanently remove stress marks from plastic?
Most white stress marks can be reduced or removed permanently if the plastic has not torn or crazed. Controlled heat lets the polymer chains relax and the whiteness fades. Deep gouges or torn plastic need filling or plastic cement instead. Test on a hidden area first, apply heat in short passes, and stop as soon as the color returns. Results depend on the plastic type and how far the damage has spread.
Why does plastic turn white when bent or stressed?
Bending or pinching stretches the polymer chains until tiny voids form inside the material. Those voids scatter light instead of letting it pass through, which shows up as white stress marks. Hard plastic like polystyrene and ABS whitens this way; soft plastic tends to stretch or tear instead. The fix works because heat lets the chains move back into place and close the voids.
Does sanding help remove stress marks from plastic?
Sanding removes the whitened surface layer, so it works well on shallow scuffs and blemishes. Start with a fine grit, then move to a glass file or progressively finer abrasives to restore the surface finish. On model kits, sanding can flatten detail, so use it after heat treatment or on flat panels only. Always sand in one direction and finish with a polish to blend the repair.
What tools are best for repairing stress marks on collectibles?
A variable-temperature heat gun or a hair dryer on high handles most whitening. Add plastic cement for compatible model plastics, sharp nippers for trimming, a glass file and sanding sticks for cleanup, and painter's tape to mask nearby detail. Keep a scrap sprue as a test area. Check the Utopia Toys and Models website for current availability.

