

Quick Summary
To learn how to paint and customize Gundam models at home, start with a clean kit, primer, and a few acrylic or spray paints in a ventilated space. Prepare and clean every part, apply thin primer and color coats, then add panel lining. A kitchen table and good lighting are enough to begin.
- Wear a respirator rated for organic vapors when using solvent-based products, since a dust mask is not enough.
- Apply two thin primer coats and let them cure for at least 24 hours before painting.
- Build color with two to four thin coats rather than one heavy coat to avoid drips.
- Wipe panel liner in one direction with a soft cloth dampened with thinner.
- A gray primer plus three to five acrylic bottles is a practical beginner setup.
Table of Contents
- What You Need Before You Start Painting a Gundam Model
- Choosing the Best Paint for Gunpla Models
- Step 1: Preparing and Cleaning Model Parts
- Step 2: How to Prime Gunpla Before Painting
- Step 3: Applying Paint in Thin, Even Coats
- Step 4: Panel Lining and Shading Recesses
- Frequently Asked Questions
What You Need Before You Start Painting a Gundam Model
Last Updated: October 29, 2026
Learning how to paint and customize Gundam models at home is one of the most rewarding hobbies in model building. You do not need a studio or expensive equipment to get started.
Most beginners make the same mistake. They buy a pile of paints and tools before they know what their first project needs. The smarter approach is to plan the build, then buy only what that build requires.
This guide walks through the supplies that matter most for a home painting project.
Basic supplies to gather:
- Gunpla kit: Choose a High Grade or Real Grade kit for your first custom build. These kits generally have clean parts and clear instructions.
- Nippers: A sharp pair of sprue cutters removes parts without leaving large marks.
- Hobby knife: Use it to trim gate marks and clean up small imperfections.
- Sanding sticks or files: Smooth seams and remove mold lines before painting.
- Painting stand: Holds parts at a comfortable angle while you work.
- Primer: Creates a surface that paint grips well.
- Paint: Acrylic paints, spray cans, or paint markers, depending on your skill level.
- Panel liner: Fills in recesses so details stand out.
- Clean workspace: A well-lit, dust-free area with good airflow.
Safety and ventilation, the part most guides skip:
Spray paint and solvent-based products produce strong fumes. Work in a well-ventilated area, and wear a respirator rated for organic vapors, a simple dust mask is not enough for solvent fumes.
Protect your skin and eyes. Nitrile gloves keep paint off your hands and prevent oils from transferring to parts. Safety glasses are worth wearing when spraying overhead or using an airbrush.
Store paints and thinners in a cool, dry place away from heat sources and out of reach of children and pets. Check local household hazardous waste rules for disposal of leftover solvent-based products; many communities hold collection days rather than allowing them in regular trash (the EPA).
Watch out: Spray paint produces strong fumes. Work in a well-ventilated area, and wear a mask rated for organic vapors. Never paint in a closed room.
Before buying, set a budget and decide your goal. A simple color swap needs far fewer tools than a full custom paint job with weathering. Starting small keeps costs low and builds your skills step by step.
Choosing the Best Paint for Gunpla Models
The best paint for a Gunpla model depends on your experience level, your budget, and the look you want. Each paint type has strengths and trade-offs, so match the paint to your project rather than buying everything at once.
Paint types compared:
| Paint Type | Best For | Skill Level | Main Drawback | Typical Starter Cost |
|---|---|---|---|---|
| Acrylic bottles | Detail work, small color changes, brush painting | Beginner | Slow to cover large areas; needs thinning | $3-$6 per 10-17 ml bottle |
| Spray cans | Full-part color coats, primer, clear coat | Beginner to intermediate | Needs ventilation; limited color mixing | $8-$15 per can |
| Airbrush paint | Smooth gradients, fine control, custom mixes | Intermediate to advanced | Requires compressor, airbrush, and cleanup | $80-$200 for a starter airbrush and compressor |
| Paint markers | Quick accents, edges, trim, panel lines | Beginner | Limited coverage on large parts; tip wear | $4-$8 per marker |
For a first project, many hobbyists start with spray primer and a few acrylic bottles. Spray cans give even coverage on larger parts, while bottles handle the smaller details. A practical beginner kit is one can of gray primer, three to five acrylic bottles in your chosen colors, one black panel liner, and a soft brush set.
Match the workflow to your space and budget:
- Brush-only workflow: Best for apartments, dorm rooms, or shared spaces. You need acrylic bottles, a few soft brushes, a palette, and a cup of water. No overspray, low odor, and easy cleanup. Downside: large flat armor panels show brush strokes unless you thin the paint and apply several coats.
- Spray-can workflow: Best for garages, patios, or well-ventilated rooms. You need primer, color cans, and a clear coat. Fast coverage and a smooth finish on large parts. Downside: cans are single-color, so custom mixes are limited, and you must manage overspray and fumes.
- Airbrush workflow: Best for hobbyists who plan to paint multiple kits. You need a compressor with a moisture trap, an airbrush (gravity-feed is easiest to learn), paint thinned to a milky consistency, and a cleaning station. Highest upfront cost but the most control over color mixing, gradients, and thin coats.
Check the label before buying. Make sure the paint works on plastic. Some paints bond poorly to hard plastic without primer, which can lead to chipping. Proper surface preparation prevents common structural issues, though you may still encounter the frustration of fixing loose joints after repeated posing.
Paint compatibility matters too. Avoid mixing solvent-based and water-based products on the same part. Stick with one paint system per project to prevent lifting, bubbling, or poor curing. If you switch brands mid-project, test on a spare sprue first.
A basic set of acrylic paints plus one can of gray primer is a common starting point for most beginners. This combination covers most color schemes and keeps starting costs reasonable. Add an airbrush later, once you know you enjoy the hobby and want smoother finishes on larger kits.
Step 1: Preparing and Cleaning Model Parts
Surface preparation decides how well paint adheres. Skipping this step is the most common cause of a poor finish.
Start by removing parts from the sprue with nippers. Cut close to the part, then trim the leftover nub with a hobby knife. Leave a tiny bit of material and smooth it down later. Cutting too close can gouge the part.
Next, clean each part to remove mold release agents and dust. Wash the parts in warm water with a drop of dish soap. Dry them completely before moving on.
Sand the surfaces lightly to smooth seams and gate marks. Use fine-grit sanding sticks, and work in short strokes. Sanding too hard can wear away fine details, so take your time.
Common mistakes to avoid:
- Painting over fingerprints or oils from your hands
- Skipping the wash step, which leaves residue behind
- Sanding away panel lines you want to keep
Once the parts are clean and dry, check each one under good light. Any remaining marks will show up under paint, so fix them now.
Step 2: How to Prime Gunpla Before Painting
Primer creates a base coat that helps paint stick to the plastic. It also reveals flaws you missed during sanding.
Use a light gray primer for most color schemes. White primer works well for bright colors like yellow or red. Black primer suits dark colors and deep shadows.
Shake the spray can for about a minute. Hold it 8 to 12 inches from the part, and spray in short, sweeping passes. Apply two thin coats rather than one heavy coat, and let each coat dry fully.
Let the primer cure for at least 24 hours before painting. Rushing this step can cause the paint to wrinkle or peel.
Check the primed parts under good light. Look for dust specks, uneven spots, or rough patches. Light sanding with very fine grit can fix small problems. Then add a light coat of primer to any spot you sanded.
Watch out: Heavy primer coats can fill in panel lines and fine details. Keep your coats thin to protect the design.
Step 3: Applying Paint in Thin, Even Coats
Thin coats are the key to a smooth Gunpla paint job. Thick coats drip, pool in recesses, and hide details.
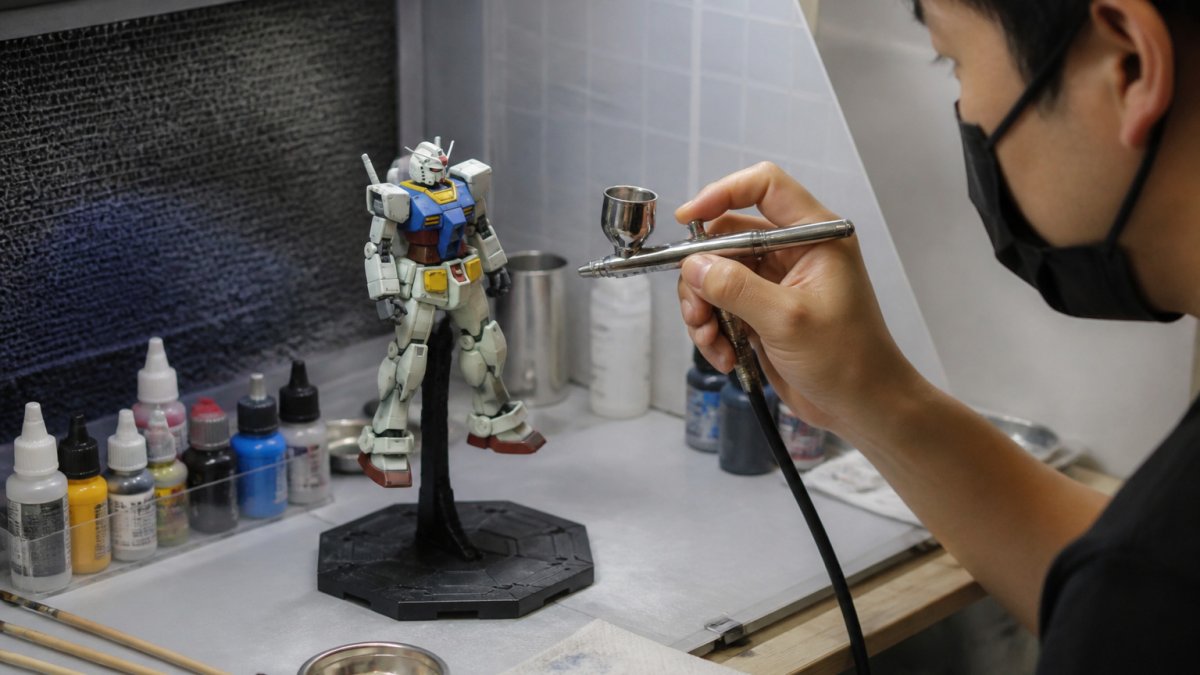
Set up your painting stand so each part sits at a comfortable angle. Work in a well-lit area with good ventilation.
For spray cans, hold the can 8 to 12 inches from the part. Use short bursts and keep the can moving. Build color with several light coats rather than one heavy coat. Wait about 10 to 15 minutes between coats, or follow the drying time on the label.
For airbrushing, start with paint thinned to a milky consistency. Keep the airbrush a steady distance from the part, and use low pressure. Practice on a spare sprue first.
For acrylic bottles, use a soft brush and thin the paint slightly. Apply thin layers, letting each one dry before adding the next.
Here is the basic pattern to follow:
- Apply the first coat lightly, enough to cover the surface partially
- Let it dry fully before the next coat
- Add two to four more thin coats until the color is even
- Check each coat under good light before continuing
Patience matters more than speed. Rushing leads to runs, orange peel texture, and uneven color.
Step 4: Panel Lining and Shading Recesses
Panel lining brings out the details of a Gunpla model. It fills in the recessed lines between armor plates, joints, and vents, making each part look sharper.
Apply panel liner with a fine brush or the applicator tip. Let the liner flow into the recess, then wipe away the excess with a soft cloth dampened with thinner. Wipe in one direction to avoid pulling liner out of the recess.
Wait for the liner to dry before handling the part. Drying time varies by product, so check the label.
Shading adds depth to recessed areas. Use a slightly darker shade of the base color, or a wash, to outline shapes and joints. A little shading goes a long way, so start with small amounts.
Common mistakes to avoid:
- Using too much liner, which stains the surrounding area
- Wiping in circles, which spreads the liner across the part
- Skipping the test on a spare part first
Once you finish lining and shading, let the whole model dry for at least 24 hours before assembly. This prevents smudges and keeps your finish clean.
Frequently Asked Questions
What kind of paint should you use on Gundam models?
Most builders use acrylic paints designed for plastic models, either in bottles for hand painting or thinned for an airbrush. Acrylics dry quickly, clean up with water or thinner depending on the brand, and adhere well to a properly primed surface. Enamel paints give a harder finish but need solvent cleanup and good ventilation. Whichever you choose, test a small area on a spare part first to confirm the paint bonds and cures without softening the plastic.
Do you need to prime a Gundam model before painting?
Priming is strongly recommended. A primer gives paint a uniform base to grip, hides small seams and sanding marks, and shows surface flaws before you commit to a color. Use a thin, even coat of plastic-safe primer, usually a spray can, and let it cure fully before applying topcoats. Skipping primer often leads to paint that chips, peels or looks blotchy.
How long should paint dry before applying a topcoat?
Follow the drying time printed on the paint label, but as a general guide, allow at least several hours between thin coats of acrylic and at least 24 hours before handling or applying a clear topcoat over a base color. Rushing the process can trap solvents, causing wrinkling, tackiness or a cloudy finish. Work in a dust-free area and let parts cure in a warm, ventilated space.
Is it better to hand-paint or airbrush Gunpla?
Both methods work well. Hand painting with brushes or paint markers is cheaper, requires less setup, and suits small details and beginners. An airbrush produces smoother, more even coverage on large panels and gradients, but it needs a compressor, thinned paint and practice to control spray distance. Many builders combine the two, spraying base colors and hand-painting fine details.
Ready to start your first custom build? At Utopia Toys and Models, we carry Gunpla kits, customization parts, and option sets to help you finish your project. Our in-stock items ship quickly, and our availability details show what is ready now and what is arriving soon. Browse our selection and pick the parts you need for your next build.

