

Table of Contents
- Why Gundam Joints Become Loose
- Tools and Materials You'll Need
- Best Glue for Gunpla Joints and When to Use It
- How to Fix Loose Gundam Joints with CA Glue
- Tightening Ball Joints with Floor Polish Method
- How to Fix Loose Polycap Joints
- Safety Precautions When Using Adhesives
- Reversible Solutions and Maintenance
Last Updated: August 13, 2026
Why Gundam Joints Become Loose
Gundam model joints loosen over time because plastic pieces fit together through friction alone, with no permanent bond unless adhesive is applied. As you handle and pose your model, contact surfaces wear down microscopically, dust accumulates, and UV exposure makes plastic slightly more brittle. Ball joints and peg joints are particularly vulnerable because they bear limb weight during dynamic poses. A loose arm joint can cause your model to flop unexpectedly or topple. Polycap joints wear out fastest of all, even on entry-grade kits within months of regular handling.
The good news: loose joints are fixable with solutions ranging from simple friction tricks to permanent adhesive repairs. Understanding what caused the looseness helps you choose the right fix. At Utopia Toys and Models, many builders face this issue, and the most successful fixes combine the right material with proper technique.
Tools and Materials You'll Need
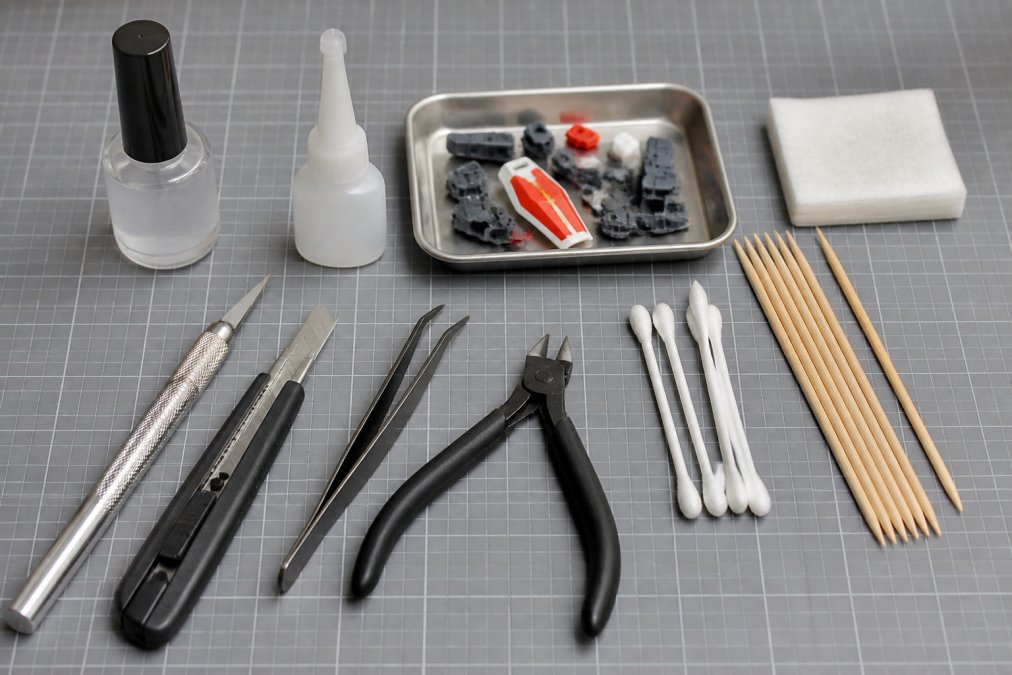
Gather the right supplies before attempting a repair. Most items cost very little and work as well as premium alternatives.
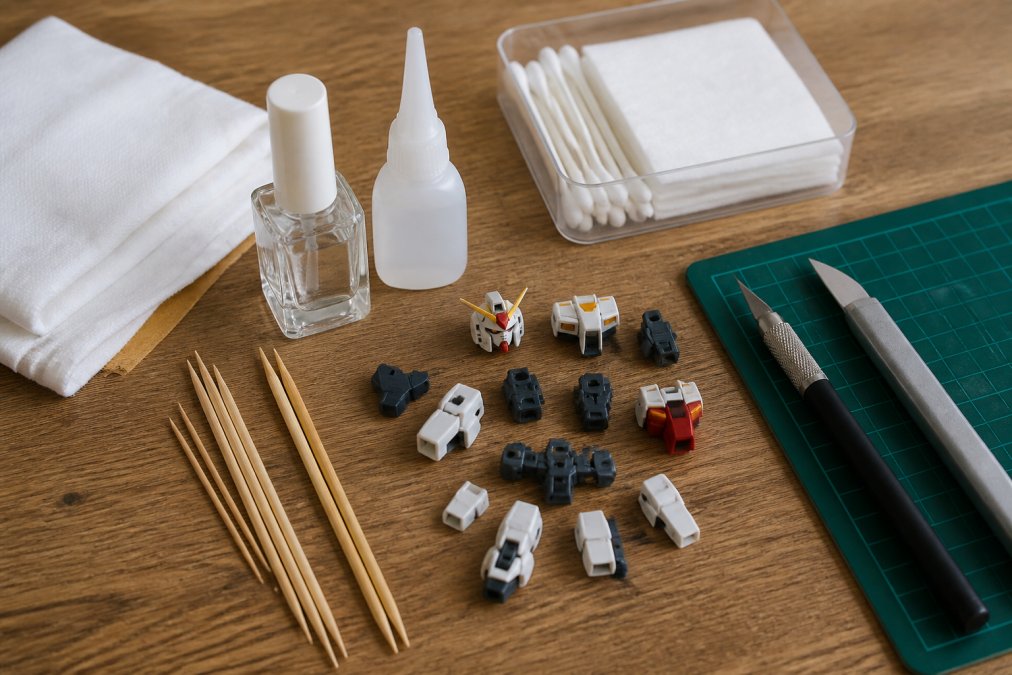
Essential supplies for CA glue application:
- Cyanoacrylate adhesive (CA glue) in a thin, precision bottle
- Toothpicks or bamboo sticks for precise application
- Small disposable container or ceramic tile for mixing
- Paper towels or cotton swabs for cleanup
- Gloves to protect your hands
For the floor polish method:
- Clear nail polish
- Small brush applicator (usually included with the bottle)
- Acetone or nail polish remover for cleanup
General workspace setup:
- Clean, flat surface away from pets and children
- Good lighting to see the joint clearly
- Well-ventilated area (CA glue fumes are strong)
- Newspaper or mat to protect your surface
Identify whether the joint is a ball joint, peg joint, or polycap joint before starting, as this determines which fix works best.
Best Glue for Gunpla Joints and When to Use It
Choosing the right adhesive depends on whether you want a permanent or reversible fix. Cyanoacrylate (CA glue) is the industry standard for permanent repairs because it cures fast, bonds plastic reliably, and doesn't require clamping. However, CA glue isn't your only option.
CA glue (cyanoacrylate) for permanent repairs: CA glue polymerizes instantly when exposed to moisture, creating a rigid bond ideal for display models where stability matters more than poseability. A single drop can transform a floppy joint into a solid connection within seconds. The downside: once cured, you cannot separate the joint without damaging the plastic. Use CA glue when the joint socket has degraded or when the ball joint is worn beyond recovery, or for master-grade and high-end kits where the investment justifies a permanent solution.
Clear nail polish for reversible tightening: Clear nail polish adds a thin, tacky layer to the joint surface, increasing friction without creating a chemical bond. As it dries, it hardens slightly, gripping the socket more tightly. The beauty: it's reversible. If the joint becomes too tight or you want to restore poseability, you can remove the polish with acetone. Nail polish is best for entry-grade and mid-range kits where you might want to disassemble or repose the model later.
Plastic cement and model glue: Some builders use plastic cement designed for model kits. These work similarly to CA glue but cure more slowly, giving you time to adjust the joint before hardening. Plastic cement is less common for joint repair because it's messier and requires longer curing times.
How to Fix Loose Gundam Joints with CA Glue
Fixing loose Gundam joints with CA glue requires precision. Apply too much and you'll destroy poseability; apply too little and the fix won't hold. The key is understanding where the adhesive needs to go.
Step 1: Identify the Problem Joint
Gently move each limb and body section to isolate the problem. A loose arm joint feels like it moves too freely with minimal resistance. A loose leg joint may cause the limb to sag under its own weight. Once you've identified the joint, examine it closely for visible wear on the ball joint surface, cracks in the socket, or tears in polycap sleeves. This assessment determines whether CA glue will work or whether you need the nail polish method instead.
Step 2: Clean and Prepare the Joint
Remove any dust, paint residue, or old polish from the joint before applying new adhesive. Use a dry cotton swab or soft brush to gently clean the ball joint and socket. If there's old nail polish buildup, use a cotton swab dampened with acetone to remove it completely. Let the joint dry for at least one minute before proceeding. Avoid touching the joint with bare fingers afterward, as skin oils can interfere with adhesion.
Step 3: Apply CA Glue Precisely
Precision is critical. Load a toothpick with a tiny amount of CA glue, roughly the size of a grain of rice. Apply the glue to the ball joint surface, not the socket, distributing it in a thin, even layer around the ball. Work quickly because CA glue begins curing within seconds. Once you've applied glue, immediately insert the joint into the socket and rotate it gently a few times to distribute the adhesive evenly across both surfaces. Hold the joint in the desired pose for 30-60 seconds while the glue cures.
Step 4: Allow Proper Curing Time
CA glue reaches initial set within 30 seconds, but full cure takes longer. Allow at least 24 hours before putting stress on the joint. This means no posing, no moving the limb, and no handling the model during this period. After 24 hours, gently test the joint. It should feel firm and stable without excessive resistance.
Tightening Ball Joints with Floor Polish Method
The floor polish method uses clear nail polish to restore friction to worn ball joints without permanent adhesive. This approach works well for polycap joints and moderately loose ball joints where you want to preserve some poseability.
Apply a thin coat of clear nail polish to the ball joint surface and let it dry. The dried polish creates a slightly tacky, textured layer that increases friction in the socket. As you repose the model over weeks and months, the polish gradually wears away and you can reapply it as needed.
Step-by-step application:
- Clean the ball joint thoroughly with a dry cloth to remove dust and debris
- Using the small brush applicator, apply a thin, even coat to the ball joint surface only
- Let the polish dry completely (typically 3-5 minutes)
- Gently insert the joint into the socket and rotate it a few times to test the fit
- If still too loose, apply a second thin coat and repeat
The advantage is reversibility. If the joint becomes too tight or you want to restore full articulation, soak the joint in acetone for 30-60 seconds, then wipe away the dissolved polish with a cotton swab. Many builders prefer this method for display models because it's non-permanent and works reliably on moderately worn joints.
How to Fix Loose Polycap Joints
Polycaps are small plastic sleeves that fit over ball joints to provide friction and prevent direct plastic-on-plastic contact. When a polycap wears out, the joint becomes loose even if the ball and socket are still in good condition.
Assessment first: Gently remove the polycap and inspect it for compression marks, tears, or permanent deformation. If visibly damaged, replacement is best. If just worn smooth and slippery, friction methods work well.
Option 1: Reapply the polycap with adhesive: Remove the polycap completely and apply a tiny amount of CA glue to the outer surface of the ball joint. Slide the polycap back on immediately. The glue bonds the polycap to the ball joint, preventing it from sliding off during use.
Option 2: Roughen the polycap surface: Use fine-grit sandpaper (220-grit or higher) to gently sand the inside of the polycap, creating microscopic texture that grips the socket more effectively. Be gentle, aim for a matte finish, not aggressive scratching.
Option 3: Replace the polycap: If severely worn or damaged, replacement is most reliable. Polycaps are inexpensive and come in various sizes. Remove the old polycap carefully with a hobby knife, then slide the new one onto the ball joint.
Polycaps are designed to be sacrificial, protecting the underlying ball and socket from direct contact. Replacing or maintaining them regularly extends the life of your entire model.
Safety Precautions When Using Adhesives
CA glue and clear nail polish are safe when used properly, but both require basic precautions.
When working with CA glue:
- Wear nitrile gloves to protect your hands. If you accidentally glue your fingers together, soak them in warm water with dish soap for 5-10 minutes
- Work in a well-ventilated area. CA glue fumes are irritating but not toxic in normal use
- Keep CA glue away from your eyes and face
- Store CA glue in a cool, dry place. Heat accelerates polymerization
- Never leave CA glue uncapped. It will polymerize within hours
When working with nail polish and acetone:
- Work in a ventilated space. Acetone fumes are stronger than CA glue
- Wear gloves to prevent skin irritation
- Keep acetone away from painted surfaces on your model, as it will dissolve paint
- Avoid contact with eyes. Rinse immediately with water if it gets in your eyes
General workspace safety:
- Keep your workspace organized and away from pets and children
- Never eat or drink while working with adhesives
- Wash your hands thoroughly after finishing
- Store all adhesives and solvents in clearly labeled, sealed containers
- If you experience headaches, dizziness, or nausea, stop immediately and move to fresh air
Reversible Solutions and Maintenance
Not every loose joint requires permanent adhesive. Many builders prefer reversible solutions that preserve the option to disassemble, repose, or restore their models.
Reversible methods: The nail polish method is fully reversible. You can remove the polish with acetone at any time, restoring the joint to its previous state. This makes it ideal for high-value models, limited editions, or kits you might customize later. Roughening a polycap surface with sandpaper is also reversible, you can replace the polycap with a new one if you want to restore the original finish.
Permanent repairs: CA glue creates a permanent bond that cannot be undone without damaging the plastic. Once cured, the joint is fixed in whatever position you set it in. This is appropriate for display models where poseability doesn't matter and stability is the goal.
Maintenance to prevent future loosening: Handle your Gundam models carefully, especially around articulated joints. Avoid extreme poses that stress joints beyond their design limits. Check joints every few weeks and tighten them with the nail polish method before they become too loose. Keep your models away from direct sunlight, which accelerates plastic degradation. Display cases with stable shelving protect your models from accidental bumps that can loosen joints suddenly.
Loose Gundam joints don't mean your model is ruined. Whether you choose the reversible nail polish method or permanent CA glue repair, you now have the knowledge to fix loose gundam joints effectively. Utopia Toys and Models carries the adhesives, polycaps, and replacement parts you need for any joint repair. Visit our shop for precision hobby tools, CA glue, and polycap replacements in stock and ready to ship. Get started today and restore your models to their original poseability and stability.
Frequently Asked Questions
What's the best glue for fixing loose Gundam joints?
CA glue (cyanoacrylate) is the most effective for tightening loose Gundam joints. It bonds plastic quickly and creates a strong permanent hold. Apply sparingly with a toothpick to avoid excess residue. For reversible repairs or minor looseness, clear nail polish offers friction without permanent adhesion. Always test on spare parts first and work in a well-ventilated area.
How long does CA glue take to cure on model joints?
CA glue typically sets in 30 seconds to 2 minutes, but full curing takes 24 hours for maximum strength. Avoid moving or posing the joint during this curing time. For ball joints and peg joints, allow the full 24-hour cure before applying stress. Patience here prevents the joint from loosening again after you've repaired it.
Can you use clear nail polish to tighten model joints?
Yes, clear nail polish works as a friction agent for loose joints. Apply a thin coat to the peg or ball joint socket and let it dry before reassembling. This method is reversible, if the joint becomes too tight, you can remove the polish with acetone. It's ideal for entry-grade and master-grade kits where you want customization without permanent bonding.
How do you prevent Gundam joints from loosening again?
Prevent wear and tear by limiting frequent posing and articulation of the same joints. Store display models in stable poses rather than dynamic positions. For play-use kits, apply light CA glue reinforcement to high-stress joints like shoulders and hips before looseness develops. Regular inspection catches saggy or flop joints early, making repairs easier and more effective.
This article was written using GrandRanker