

Table of Contents
- Best Airbrush Kits for Model Building: Quick Comparison
- How to Choose Your First Airbrush Kit: Selection Criteria
- Top Airbrush Kits for Beginners & Hobbyists
- Professional-Grade Airbrush Kits for Advanced Modelers
- Best Airbrush Compressor for Models: Tank & Regulator Essentials
- Airbrushing for Beginners: Essential Accessories & Setup
- How to Clean an Airbrush: Maintenance & Clogging Prevention
- Airbrush Paint Thinning Ratios: Acrylic, Enamel & Atomization
Best Airbrush Kits for Model Building: 2026 Guide
Last Updated: July 11, 2026
Finding the best airbrush kits for model building requires understanding gravity-feed versus siphon-feed systems, dual-action versus single-action triggers, and compressor tank capacity. At Utopia Toys and Models, we've helped hobbyists identify the right setup for their needs, whether painting detailed Gundam models, scale military aircraft, or fantasy miniatures. The kits below represent reliable, user-friendly options at every price point in 2026.
Best Airbrush Kits for Model Building: Quick Comparison
Quality options exist at every price point. The Master Airbrush Cool Runner II bundles everything a beginner needs without forcing expensive upgrades later. The Iwata Eclipse HP-CS delivers industry-standard reliability for all work from base coats to fine detail. For limited space, the Gaahleri Mobius with TurboX Mini Compressor offers modern engineering in a compact footprint.
| Airbrush Kit | Nozzle Size | Feed Type | Trigger Type | Best For | Approximate Price Range |
|---|---|---|---|---|---|
| Master Airbrush Cool Runner II | 0.3mm | Gravity | Dual-action | Complete beginners | Budget-friendly |
| Paasche H-Set | Multiple (1, 3, 5) | Siphon | Single-action | Base coats & stencils | Very affordable |
| Gaahleri Mobius 0.3 + TurboX | 0.3mm | Gravity | Dual-action | Space-constrained modelers | Mid-range |
| Iwata Eclipse HP-CS | 0.35mm | Gravity | Dual-action | All-around workhorse | Professional-grade |
| GSI Creos Mr. Hobby PS-270 | 0.2mm | Gravity | Dual-action | Fine detail & Gunpla | Mid-range |
| Badger Patriot 105 | 0.5mm | Gravity | Dual-action | Beginners wanting durability | Mid-range |
| Harder & Steenbeck Evolution 2024 | Modular | Gravity | Dual-action | Advanced modelers | Premium |
How to Choose Your First Airbrush Kit: Selection Criteria
Evaluating an airbrush kit centers on three variables: trigger mechanism, feed system, and nozzle size. Buying a kit that's "good enough" often leads to frustration when it doesn't handle your paint viscosity or lacks trigger sensitivity for detail work.
Gravity-Feed vs. Siphon-Feed Airbrushes
Gravity-feed airbrushes mount the paint cup on top, using gravity to deliver paint into the air stream. This requires less air pressure and keeps the paint cup directly above the nozzle for easier cleaning.
Siphon-feed systems mount the cup below and use air pressure to pull paint upward. They allow larger reservoirs but require higher PSI and more involved cleaning.
For model building, gravity-feed dominates. Lower air pressure pairs perfectly with compact compressors, paint cup placement enables fast color changes, and the design excels at precision work.
Dual-Action vs. Single-Action Triggers
Single-action airbrushes release paint whenever you press the trigger. Simplicity makes them ideal for large, uniform base coats or stencil work.
Dual-action triggers separate air and paint control: pressing down releases air, pulling back controls paint flow. This unlocks precision single-action cannot match, enabling fine lines, gradual color transitions, and mid-spray adjustments.
For scale models and Gundam kits, dual-action is nearly essential. Single-action remains ideal for primers, clear coats, and matte varnishes.
Nozzle and Needle Size Explained: 0.3mm vs 0.5mm
Nozzle diameter determines the finest line your airbrush can spray. Common hobby sizes are 0.2mm, 0.3mm, and 0.5mm.
A 0.2mm nozzle produces extremely fine lines but clogs more frequently and requires thinner paint. Best for experienced modelers focused on fine detail.
The 0.3mm nozzle is the sweet spot for most hobbyists. It handles fine detail reliably while remaining forgiving with paint viscosity, managing panel lines, weathering effects, and base coat coverage equally well.
A 0.5mm nozzle prioritizes coverage over detail, excelling at priming and base coating. More forgiving with thicker paints and less prone to clogging.
Top Airbrush Kits for Beginners & Hobbyists
Master Airbrush Cool Runner II Kit: All-in-One Starter Solution
The Master Airbrush Cool Runner II solves the beginner's dilemma of buying components separately or trusting a bundled kit. This package includes a gravity-feed dual-action airbrush, dual-fan piston compressor with air tank, moisture trap, pressure regulator, and air hose, everything needed to spray your first model immediately.
The included compressor runs quietly at around 60 decibels with an air-on-demand feature that cycles only when spraying. The 1/6-horsepower motor provides consistent 20-40 PSI operation suitable for dual-action gravity-feed work.
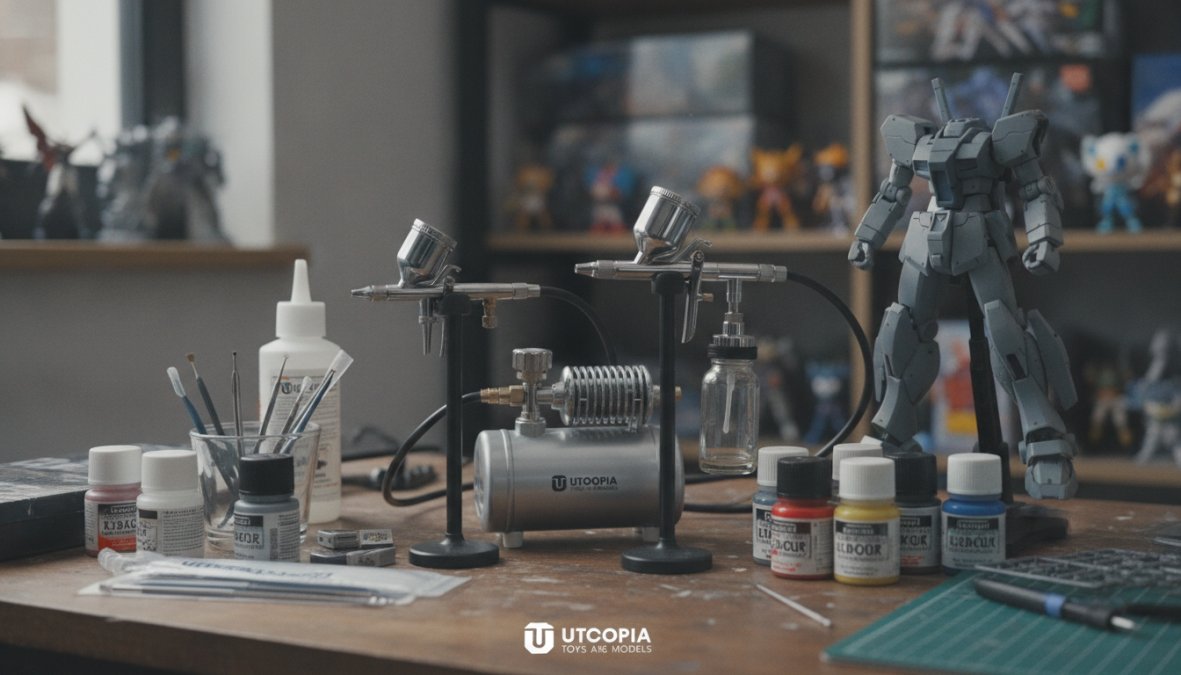
The included airbrush features a 0.3mm nozzle, 7ml gravity cup, and internal mix design that keeps maintenance simple. It performs reliably for base coats, color transitions, and detail work at this price point.
What works best: This kit eliminates decision paralysis. Beginners start airbrushing without researching compressor specifications or hose compatibility.
Where it falls short: The airbrush is entry-level. Serious modelers typically upgrade within 12 months.
Paasche H-Set: Budget-Friendly Single-Action Option
The Paasche H-Set has been the budget standard for decades. This single-action, siphon-feed system includes multiple head sizes (1, 3, 5) that screw onto the same body, providing flexibility without buying multiple airbrushes.
Single-action means simplicity: press to spray, release to stop. The siphon-feed design allows larger paint reservoirs and handles thin varnishes or thick base coats. This kit excels at priming collections, applying uniform base coats, and spraying varnishes. The chrome-plated body is durable, and spare parts remain inexpensive.
Single-action's limitation is lack of fine control. For Gundam models and detailed scale work, this becomes frustrating. The H-Set works best as a secondary tool paired with a dual-action airbrush for detail work.
Gaahleri Mobius 0.3 + TurboX Mini Compressor: Space-Saving Setup
Modelers in apartments or shared spaces need compact solutions. The Gaahleri system addresses this with a compact footprint and genuinely quiet operation.
The Mobius airbrush features ergonomic trigger design and smooth response. The 0.3mm nozzle handles detail work and base coats equally well. The TurboX Mini Compressor includes digital pressure control displaying exact PSI, letting you dial in 15 PSI for fine detail or 35 PSI for broader coverage. Noise stays below 50 decibels, suitable for evening sessions.
What works: Digital controls eliminate pressure guessing. The compact footprint is genuinely space-saving.
What doesn't: The smaller compressor has lower duty cycles. Extended sessions may require brief cooling breaks.
Professional-Grade Airbrush Kits for Advanced Modelers
Iwata Eclipse HP-CS: Industry Standard for Scale Models & Gunpla
The Iwata Eclipse HP-CS defines "industry standard" for professional modelers and serious hobbyists.
The 0.35mm nozzle handles virtually every model painting task: fine panel lines, camouflage patterns, weathering effects, and base coat coverage all work reliably. The needle and nozzle design delivers excellent atomization, requiring minimal paint thinning.
The gravity cup holds 7ml with a threaded lid, sealing leftover paint for quick color swaps. The trigger is where the Eclipse separates itself. Dual-action response feels natural with smooth engagement and no dead zones.
GSI Creos Mr. Hobby Procon Boy PS-270: Fine Detail & Precision
The GSI Creos Mr. Hobby Procon Boy PS-270 is the Japanese engineering answer to detail work obsession. The 0.2mm nozzle enables panel lines and camouflage masks rivaling hand-painted detail.
This airbrush demands respect. The 0.2mm nozzle requires paint thinned to specific consistency, too thick clogs it, too thin loses color saturation. What separates the PS-270 is consistency. Paint release is incredibly stable without sputtering or spitting. Japanese modelers, particularly Gunpla enthusiasts, choose this airbrush for reliability and fine-line capability.
The performance-to-price ratio is exceptional. You pay less than the Iwata Eclipse while gaining finer detail capability.
Badger Patriot 105: Durable American-Made Workhorse
Badger Airbrush's American heritage reflects straightforward engineering, proven reliability, and lifetime warranty on labor and PTFE seals.
The 0.5mm nozzle prioritizes coverage. This airbrush excels at priming collections, applying base coats, and spraying varnishes. The trigger response is forgiving, and internal mix design keeps cleaning straightforward. The patented handle includes fast needle release for swapping paint viscosities without full disassembly.
This is a specialist tool best for base coats and varnishes. In a two-airbrush system, the Patriot 105 is the logical choice for the first role.
Harder & Steenbeck Evolution 2024: Premium Modular System
The Harder & Steenbeck Evolution 2024 represents German engineering at the premium end. Redesigned in 2024 with improved airflow dynamics, it features a modular head system allowing needle and nozzle swaps without buying multiple airbrushes.
The modular design is genuinely innovative. Switch from 0.2mm to 0.4mm nozzles in under two minutes. The redesigned head improves atomization and reduces paint overspray. Build quality is exceptional with the smoothest trigger mechanism in the hobby market.
This is for modelers who've invested in airbrushing and want to eliminate compromise. For competition-level models or managing 20+ kits annually, the Evolution 2024's modularity and precision justify the investment.
Best Airbrush Compressor for Models: Tank & Regulator Essentials
Why a Compressor with Tank Matters
A compressor converts electrical power into pressurized air and stores it in a tank for consistent delivery. Compressors without tanks create frustrating experiences with erratic pressure fluctuations and continuous motor noise.
A tank-equipped compressor stores pressurized air, allowing the motor to cycle off while you paint. Stored air maintains consistent pressure, translating directly to stable paint flow and even coverage. For serious modeling, a tank-equipped compressor is non-negotiable.
Tank size matters. A 3-liter tank suits short sessions with small airbrushes. A 6-liter or larger tank handles extended painting without cycling.
PSI, Moisture Trap & Air Pressure Regulator Explained
PSI (pounds per square inch) measures air pressure. Gravity-feed dual-action airbrushes typically operate between 20-40 PSI. The air pressure regulator controls PSI and should include a built-in gauge to dial in the right setting.
A moisture trap is essential equipment. Compressed air contains moisture that condenses inside the tank. If this reaches your airbrush, it contaminates paint, causing sputtering and uneven coverage. Drain the moisture trap regularly after each session by opening the drain valve at the bottom.
Airbrushing for Beginners: Essential Accessories & Setup
Must-Have Accessories: Hose, Cleaning Kit & Quick Disconnect
The air hose connects the compressor to the airbrush. Upgrading to one with a quick disconnect makes color changes and maintenance dramatically faster.
A dedicated cleaning kit is invaluable. This includes small brushes for cleaning the nozzle, needle, and internal passages, plus cleaning solution. Isopropyl alcohol works for acrylic paints, while enamel-specific cleaners suit enamel paints.
A spray booth or ventilation setup is mandatory. Airbrushing generates fine paint particles that settle on everything. A simple cardboard box with a hole and small fan works for small models. At minimum, open a window and position a fan to draw paint overspray away from your breathing zone.
Ventilation & Respirator: Safety First
Paint particles suspended in air are not harmless. A proper respirator with P100 filters (for particulates) or organic vapor cartridges (for solvent-based paints) is non-negotiable. The respirator must fit snugly; gaps mean unfiltered air reaches your lungs.
Ventilation is equally important. Position your painting setup so paint overspray is drawn away from your breathing zone.
How to Clean an Airbrush: Maintenance & Clogging Prevention
Daily Cleaning Routine: Needle Seal & Internal Mix
Clean your airbrush immediately after each session to prevent paint from drying inside the nozzle and needle passages. Remove the paint cup and fill it with cleaning solution (isopropyl alcohol for acrylics, enamel cleaner for enamels). Spray solvent through the airbrush until discharge runs clear. Repeat 2-3 times.
For deeper cleaning, unscrew the nozzle and soak in cleaning solution for 10-15 minutes. Use a small brush to gently clean internal passages. Never force components apart.
Deep Cleaning & Common Clogging Issues
Clogging occurs when paint dries inside the nozzle or needle passages. Prevention is easier than repair: clean immediately after painting and ensure paint is properly thinned.
If clogging occurs, soak affected components in cleaning solution for 20-30 minutes. Use a small soft brush to gently loosen dried paint. Common clogging causes include paint that's too thick, insufficient cleaning between colors, and low humidity. Addressing these root causes prevents most clogging.
Airbrush Paint Thinning Ratios: Acrylic, Enamel & Atomization
Paint-to-Thinner Ratios for Acrylic & Enamel Paints
Paint consistency directly affects atomization, breaking paint into fine particles. Paint that's too thick won't break apart, resulting in grainy coverage and clogging. Paint that's too thin becomes translucent and requires multiple coats.
For acrylic paints, a starting ratio of 1 part paint to 2-3 parts thinner creates the right consistency for most airbrushes. The "milk test" is practical: thin paint until it flows like milk, not cream.
Enamel paints require enamel-specific reducers rather than water. A similar 1:2 to 1:3 ratio works, but enamel paints are more sensitive to over-thinning. Ambient humidity affects drying speed and clogging risk; adjust thinner ratios slightly based on your environment.
Spray Pattern & Base Coating vs. Detail Work
The spray pattern is the shape of paint exiting the airbrush. A tight, focused pattern suits detail work. A broader, diffused pattern covers large areas quickly.
Spray pattern is controlled by trigger position. Pulling the trigger back fully opens the paint valve completely, creating maximum paint flow and broader pattern. Barely pulling the trigger restricts paint flow, creating a tighter, controlled pattern.
Base coating requires broad, even coverage. Set your airbrush to 25-30 PSI and use moderate trigger pull for a diffused pattern. Apply paint in thin, overlapping passes rather than one heavy spray.
Detail work demands a tight pattern and precise trigger control. Increase PSI to 35-40 and use minimal trigger pull, moving your airbrush slowly and deliberately.
Choosing the right airbrush kit means matching your skill level, workspace, and budget to a system supporting your painting goals. The Master Airbrush Cool Runner II eliminates guesswork for complete beginners. The Iwata Eclipse HP-CS becomes your long-term workhorse once committed to serious modeling. Space-constrained hobbyists find genuine solutions in the Gaahleri system. At Utopia Toys and Models, we understand that your airbrushing setup directly impacts the quality and enjoyment you get from building Gundam models, scale military aircraft, and detailed fantasy miniatures. Visit Utopia Toys and Models to explore our curated selection of airbrushes, compressors, and hobby supplies from industry-leading brands like Badger, Iwata, and GSI Creos, all in stock and ready to ship.
Frequently Asked Questions
What is the best airbrush for beginners in model building?
For complete beginners, the Master Airbrush Cool Runner II Kit offers the best entry point because it includes everything needed: a gravity-feed dual-action airbrush, a quiet compressor with tank, regulator, moisture trap, and hose. Alternatively, the Gaahleri Mobius 0.3 paired with a compact compressor provides excellent performance at a lower price. Both options balance ease of use, atomization quality, and affordability for hobbyists starting with scale models or Gunpla.
Do I need a compressor with a tank for my airbrush kit?
Yes, a compressor with a tank is essential for consistent airbrushing. The tank stores pressurized air and maintains steady PSI (typically 20-40 PSI for models), preventing pressure fluctuations that cause uneven spray patterns. A moisture trap removes water vapor that can damage your airbrush needle and affect paint atomization. Tankless compressors lack this stability and are not recommended for detailed model work.
What is the difference between single-action and dual-action airbrushes?
Single-action airbrushes (like the Paasche H-Set) trigger only air flow; you control paint manually. Dual-action models (Iwata HP-CS, GSI Creos) let you pull back to simultaneously control air and paint flow, enabling fine detail work and precise spray patterns. Dual-action offers superior control for scale models and Gunpla but requires more practice. Single-action is simpler and better for base coats and stencil work.
How do I clean an airbrush after model painting?
After each session, immediately flush the airbrush with thinner (matching your paint type, acrylic or enamel). Remove the needle and soak components in cleaning solution. Use a soft brush on the needle seal and nozzle. For deep cleaning, disassemble internal mix components and soak overnight. Never let paint dry inside; clogging ruins the needle and nozzle. A dedicated cleaning station with waste container simplifies this routine.
What airbrush paint thinning ratios should I use for acrylic and enamel paints?
For acrylic paints, use a 1:1 or 1:2 paint-to-thinner ratio (paint:water or acrylic thinner). For enamel paints, use 1:1 or 1:1.5 with enamel thinner. The exact ratio depends on paint viscosity and desired spray pattern. Thinner paint improves atomization and prevents clogging but reduces coverage; thicker paint offers better coverage but may cause uneven application. Test on scrap plastic before spraying your model to dial in the perfect consistency.
This article was written using GrandRanker