

Last Updated: October 26, 2026
Quick Summary
The best airbrush paints for scale modeling are Vallejo Model Color and Tamiya Acrylic, which offer excellent consistency, flow, and adhesion without clogging the airbrush. Both brands provide extensive color ranges and spray smoothly when thinned properly, preserving fine details and panel lines that define quality scale model finishes.
- Vallejo Model Color sprays nearly straight from the bottle with minimal thinning, saving time and reducing over-thinning risk.
- Tamiya Acrylic requires more thinning but delivers a harder, more durable finish and exceptional color range.
- Primer is essential, it fills plastic imperfections and gives paint something to grip, preventing flaking and extending model durability.
- Thin paint to roughly 1:2 thinner-to-paint ratio for broad coverage and 1:1 for fine detail work at lower pressure.
- Test paint consistency on scrap plastic first; sputtering means add thinner, weak coverage means add paint.
Table of Contents
- Why Paint Selection Matters for Scale Models
- Best Acrylic Paint for Airbrushing Models
- Acrylic vs Lacquer Paint for Scale Models
- How to Thin Model Paint for Airbrush
- Airbrush Primer for Scale Models
- Common Airbrush Paint Mistakes and Fixes
- Stocking Your First Airbrush Paint Collection
- Frequently Asked Questions
Why Paint Selection Matters for Scale Models
Finding the best airbrush paints for scale modeling separates a flat model from one that captures real detail. Many modelers spend weeks perfecting a build, then rush the paint job with whatever is on hand, burying careful assembly under paint that doesn't adhere, sprays unevenly, or obscures fine details.
The best airbrush paints for scale modeling aren't just about color, they're about consistency, flow, adhesion, and preserving panel lines, decals, and surface detail.
Best Acrylic Paint for Airbrushing Models
Acrylics dominate scale modeling because they're water-based, low-odor, and easy to clean up.
Vallejo Model Color and Tamiya Acrylic are the two most reliable choices for airbrush painters. Vallejo sprays straight from the bottle with minimal thinning, which saves time and reduces the risk of over-thinning your paint. Tamiya acrylics require more thinning but offer exceptional color range and a harder, more durable finish once dry.
Acrylics are flexible: thin with water, switch between brush and airbrush mid-project, and layer colors without lacquer's harsh smell. They're forgiving for beginners, mistakes wash off and cleanup takes minutes.
Citadel Contrast paints are popular for speed painting but aren't designed for airbrushing, they thin to airbrush consistency yet work best by brush. For pure airbrush performance on scale models, stick with Vallejo or Tamiya.
Acrylic vs Lacquer Paint for Scale Models
Acrylic and lacquer are the two main chemistries in scale modeling airbrushing, affecting durability, safety, cleanup, and layering. The useful framing isn't durability versus safety but compatibility: which paints, thinners, primers, and clear coats can touch each other without reacting, and in what order.
Acrylics are water-based or water-reducible. Vallejo Model Air, Tamiya Acrylic (alcohol-based but commonly grouped with acrylics), and Mission Models are the most common airbrush-ready lines. They clean up with water or brand thinner, have low odor, and are forgiving for beginners.
Lacquers use solvent carriers. Mr. Color, Tamiya LP Lacquer, and Gaia Notes are common in scale modeling. They bite into plastic, dry fast, and produce a hard, chip-resistant finish with excellent gloss.
Compatibility rules that prevent reactions
The most common failure in mixed-chemistry painting is a hot solvent coat over a softer acrylic layer, which can soften or lift the acrylic into wrinkling, crazing, or a rough etched finish. Work from least to most solvent-resistant: primer, acrylic color, then lacquer clear, with full curing between coats.
Thinner compatibility matters as much as paint compatibility. Use the brand's own thinner: generic lacquer thinner can be too hot for hobby lacquers and attack plastic or primer, water-based acrylics shouldn't be thinned with solvents, and solvent acrylics like Tamiya Acrylic flow more consistently with matching thinner than water alone.
Safety and cleanup by chemistry
Acrylics still produce airborne particles and, in some lines, alcohol or amine odors, spray ventilated and wear at least a particle mask. Lacquers require a fitted respirator with organic vapor cartridges, not a dust mask, plus a spray booth or strong cross-ventilation. Acrylics clean with water or brand thinner while wet; lacquers need solvent-based cleaner, and prompt cleaning matters more because dried lacquer is much harder to remove.
A practical hybrid workflow
A common approach for display models is acrylic primer and color for safety and easy correction, followed by a thin lacquer clear coat for durability and gloss, most of the hard-finish benefit with less solvent exposure during color stages. Such protective layering techniques prove equally essential when weathering intricate model train kits that demand both structural resilience and a realistic finish.
For most hobbyists at home, acrylics are the practical default. Lacquers make sense with proper ventilation and respiratory protection, when you need a hard gloss or very durable finish, or for display-only models. The decision is less about which is better and more about which chemistry you can apply safely and compatibly in your workspace.
How to Thin Model Paint for Airbrush
Thinning is where most airbrush problems start, and generic advice fails because no single ratio works across paint lines, nozzle sizes, or tasks. Match thinner type, ratio, and air pressure to the paint line and the job.
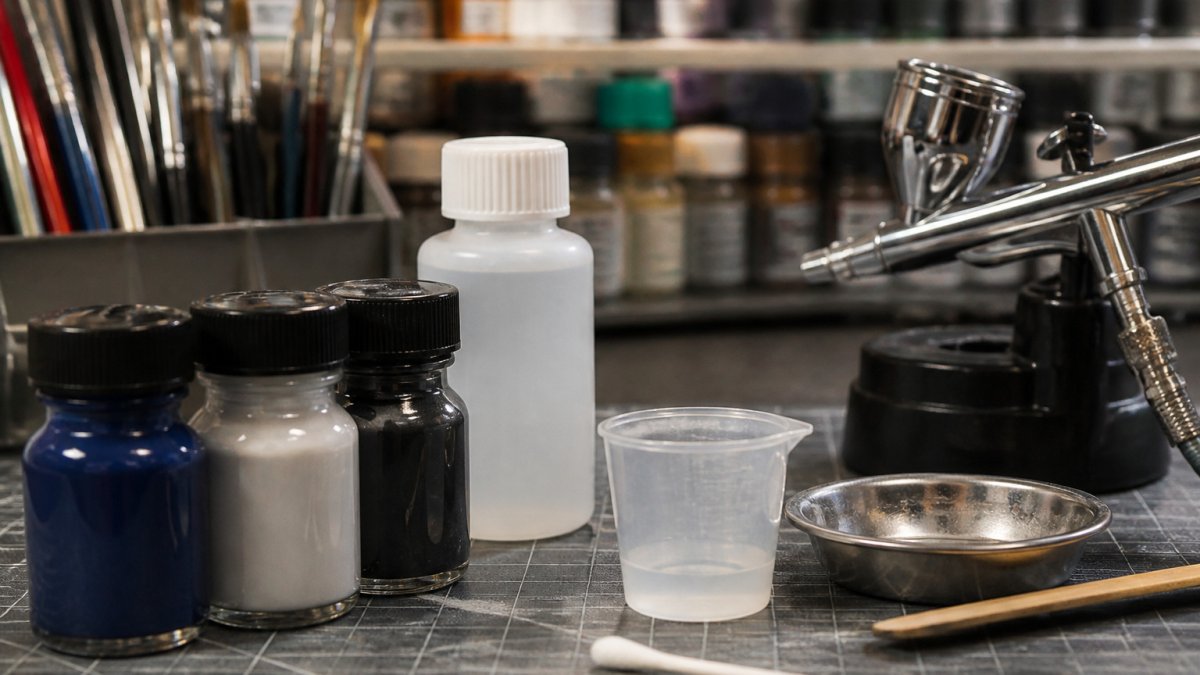
Start with the right thinner
Use the thinner made for the paint line. Vallejo Model Air sprays from the bottle for general coverage, though a few drops of Vallejo Airbrush Thinner help with fine detail. Tamiya Acrylic thins best with X-20A (water works in a pinch but changes flow and adhesion), Mission Models recommends its own thinner and polyurethane mixers, and lacquers like Mr. Color use Mr. Color Leveling Thinner. Generic hardware-store thinner is not a safe substitute, it can be too hot for plastic and primer.
Ratios by task, not by rule
A workable starting point for many acrylics is roughly 1 part thinner to 2 parts paint for general coverage, moving toward 1:1 for fine detail and panel-line work at lower pressure. Lacquers often start near 1:1, thinning further for detail. These are starting points, not rules: a 0.2 mm or 0.3 mm detail nozzle needs thinner paint and lower pressure than a 0.5 mm nozzle for broad coverage.
| Task | Typical acrylic ratio (thinner:paint) | Typical pressure | Notes |
|---|---|---|---|
| Broad coverage | 1:2 | 20-25 PSI | Build in thin passes |
| General color | 1:2 to 1:1 | 18-25 PSI | Test on scrap first |
| Fine detail and panel lines | 1:1 or thinner | 12-18 PSI | Lower pressure, closer distance |
| Clear coats | Follow brand guidance | 20-25 PSI | Thin coats, avoid wet coats |
The consistency test that actually works
Rather than relying on the milky look, spray a test pass on scrap plastic at working pressure. Sputtering means add thinner a few drops at a time; weak coverage after one pass means add paint. A rough, grainy texture means paint too thick, pressure too low, or spraying too far away. Pooling or runs mean paint too thin or spraying too close and too wet.
Compatibility and mixing rules
Never mix different paint chemistries in the same cup, acrylic and lacquer thinners aren't interchangeable and can cause separation, curdling, or a clogged nozzle. Switching from lacquer to acrylic mid-session requires a thorough clean first. When layering, let each coat cure per the brand's guidance before applying a different chemistry, and test the combination on scrap plastic.
Troubleshooting by paint behavior
- Tip dry and clogging: common with fast-drying acrylics. Add a few drops of brand thinner or a dedicated retarder, keep a cotton swab and thinner handy to wipe the needle tip, and clean the nozzle every 15-20 minutes.
- Sputtering: usually too-thick paint, low pressure, or a partially dry needle. Thin slightly, raise pressure a few PSI, and check the needle and nozzle for dried paint.
- Rough, grainy finish: paint drying before it reaches the surface. Thin more, lower the distance to 6-8 inches, and avoid spraying in high heat or direct airflow.
- Poor coverage: paint too thin, pressure too low, or passes too fast. Add paint, raise pressure slightly, and use overlapping passes.
- Spidering or runs: paint too thin or too much volume in one pass. Reduce thinner, lower pressure, and make lighter passes.
A common mistake is thinning a whole bottle at once. Mix only what you need for the session, keep the rest at factory consistency, and record the ratio and pressure that worked for that paint line and nozzle, over a few models you'll build a personal reference more reliable than any published ratio.
Airbrush Primer for Scale Models
Primer does two critical jobs: it fills microscopic imperfections in plastic and gives paint something to grip. Without it, acrylic sits on the surface and flakes off; with it, paint bonds into a solid base that holds topcoats.
For plastic scale models, use plastic-specific primers: Tamiya Fine Surface Primer (spray cans and airbrush-ready bottles) or Vallejo Primer, which comes in gray for most builds, black for dark finishes, and white for light colors.
Apply primer thin, one light coat beats one thick coat.
Many modelers skip primer on new plastic to save time, false economy. Primer prevents paint failure and improves color coverage; a properly primed model lasts decades, while one painted without primer often shows wear within a year.
Common Airbrush Paint Mistakes and Fixes
Clogged nozzle: Paint dries inside the tip, blocking flow, usually from not cleaning between coats or letting paint sit too long.
Sputtering or spitting: Paint too thick, pressure too low, or the cup running dry.
Paint not sticking: You skipped primer or your plastic is contaminated with mold release agent. Fix: Wash your model in warm soapy water before priming.
Uneven coverage: Spraying too close or too far, or paint too thin.
Dust in the finish: Dust in the air is settling on wet paint. Fix: Paint in a dust-free environment or use a spray booth with a filter.
Stocking Your First Airbrush Paint Collection
Start small. New painters often buy 20 colors and use three. Instead, pick a color scheme for your first model and buy only what you need.
For Gunpla and mecha models, Tamiya Acrylic offers Gundam-specific color sets that match official color schemes. You can practice airbrushing techniques on scale model kits designed for these color schemes.
| Paint Type | Best For | Starting Cost | Cleanup | Coverage |
|---|---|---|---|---|
| Vallejo Acrylic | Speed, ease of use | Budget-friendly | Water | Good |
| Tamiya Acrylic | Durability, color range | Moderate | Water | Excellent |
| Lacquer | Hard finish, display models | Higher | Solvent | Excellent |
| Primer | All builds | Low | Appropriate solvent | Essential |
Once you've completed a few models, you'll know which colors you use most and can expand intentionally. Many experienced modelers maintain a core set of 10-15 colors, supplemented by specialty colors for specific builds.
Frequently Asked Questions
What type of paint is best for airbrushing scale models?
Acrylic paint formulated specifically for airbrushing is the most popular choice for scale modeling because it adheres well to plastic, dries quickly, and cleans up with water. Lacquer and enamel paints offer superior durability and finish but require solvent cleanup and better ventilation. For beginners, water-based acrylics are forgiving and safer to use. Your choice depends on the finish you want, drying time needs, and your comfort with cleanup requirements.
Do airbrush paints for scale models need to be thinned?
Yes, most airbrush paints require thinning to achieve the right consistency for smooth spraying. Acrylic paints typically need a 1:1 or 2:1 paint-to-thinner ratio, while lacquers often require less thinning. Paint that is too thick clogs the airbrush and produces uneven coverage; paint that is too thin won't build color properly. Test consistency by pouring paint into a cup, it should flow like milk, not cream or water.
Can you use regular acrylic paint in an airbrush for scale models?
Regular craft acrylics are not recommended for airbrushing scale models because they contain additives that cause clogging and inconsistent spray patterns. Model-specific acrylic paints are formulated with smaller pigment particles and better flow properties for airbrush equipment. While thinning craft acrylics heavily might work in a pinch, you risk damaging your airbrush and producing poor results. Invest in paint designed for airbrushing to protect your equipment and achieve professional finishes.
What is the best airbrush paint for beginners?
Water-based acrylic paints designed for scale modeling are ideal for beginners because they're forgiving, easy to thin with water, and clean up quickly without harsh solvents. Brands that offer beginner-friendly lines provide good color range and consistent spray performance with minimal learning curve. Start with a basic primary color set and a few metallics, practice thinning ratios on scrap plastic, and invest in a quality airbrush thinner rather than water, which can affect paint adhesion and drying time.

